Thanks to iTunes, transferring photos from iPhone to Windows computer feels like a hassle-free affair. So long as you have checked off all the basics, you can get through the task without any roadblocks. However, in some cases, iPhone photos fail to sync with a Windows computer due to certain reasons. If you have run into this same frustrating syncing issue and are looking for effective methods to resolve the problem, this guide has got you fully covered.
Unable to Move Photos from Your iPhone to Your Windows Computer? Best Fixes!
What’s coming in the way of your iPhone photos? From worn-out USB cable to an outdated version of iTunes to a random software glitch, you will need to keep an eye on a number of villains. Fortunately, there is a reliable solution for each of the afore-mentioned culprits.
1. Make Sure You Are Using the Latest Version of iTunes on Your Windows Device
To begin with, ensure that you are using the latest version of iTunes on your Windows device. Yeah, you read that right! The outdated version of iTunes has a long history of causing miscellaneous issues and preventing syncing issues. Therefore, make sure to fulfill this must-have requirement beforehand. Bear in mind that transferring photos from iPhone to Windows requires iTunes 12.5.1 or later.
- Open the iTunes app on your computer -> click on the Help menu > Check for Updates and then install the latest update.
2. Ensure That Your USB Cable Is Certified
Another important retirement that you should tick off right off the bat is to ensure that the USB cable is fully compatible. If your cable is not MFi (Made for iPhone/iPad), certified, there is a decent chance it’s creating the problem.
3. Right Way to Import Photos from iPhone to Your Windows PC
Having checked off the preliminary requirements, it’s time to go through the photo transfer functionality from scratch. If you are missing out on some essential thing, it will help you sort out the quirk right away.
- Hopefully, you have updated iTunes to the latest version. Now, connect your iPhone to your computer using a supported USB cable.
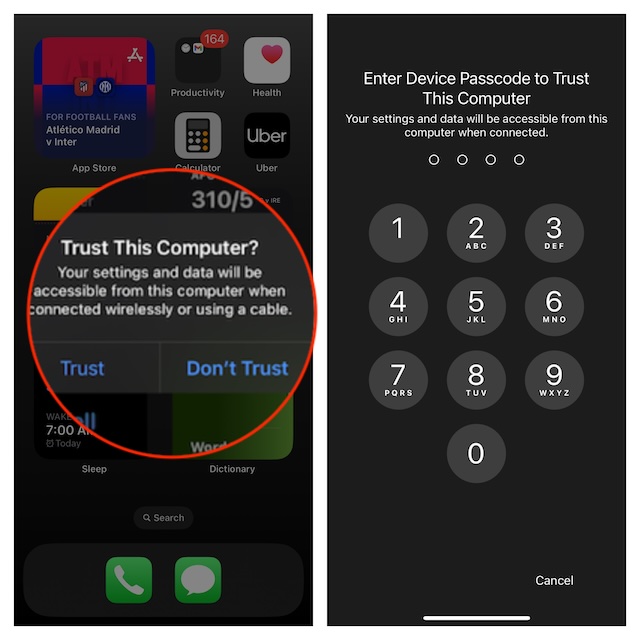
- When prompted, make sure to unlock your iPhone using the passcode. Keep in mind that your PC won’t be able to find the device if it is locked.
- Next, you may see an alert on your iPhone asking you to Trust This Computer. Be sure to tap on Trust or Allow in the popup to proceed.
- After that, on your PC, click on the Start icon.
- Now, select Photos to launch the Photos app.

- Next, click on Import at the upper-right corner of the user interface -> choose From a connected device in the drop-down menu, and then follow the usual instructions.
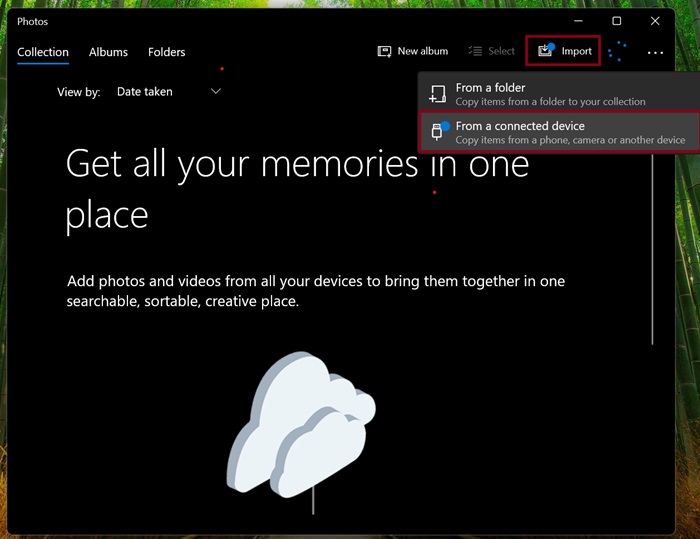
- Note that you have the option to choose the items you want to import and select the desired location where you want to save them.
- Make sure the photos you would like to transfer exist on your iPhone rather than in the cloud.
- As to how long it will take for the entire photos to sync with your Windows PC, it entirely depends on the total file size. Therefore, be fully prepared to exercise some extra patience.
Sticky Note:
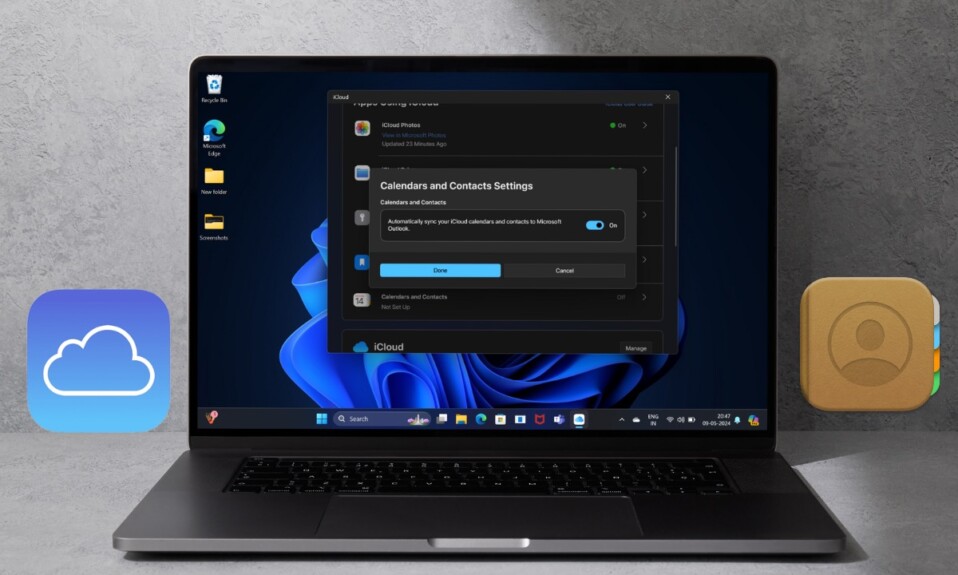
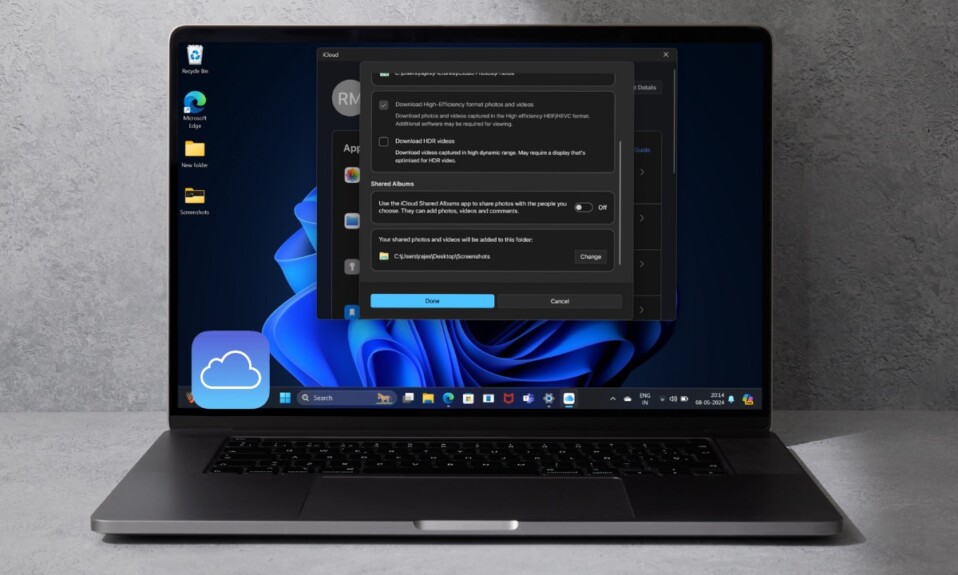
- If you are using iCloud Photos, you will be able to seamlessly import your photos and videos to your PC.
- To do so, install iCloud for Windows -> Sign in to your iCloud account -> Then, click on Options next to Photos and choose iCloud photos. Next, click on Done -> Apply.
4. Force Quit the Photos App and Relaunch It
No solution as yet? No worries! Try force-killing the Photos app and launching it again.
- Press the ‘Ctrl + Shift + Esc’ keys at once to bring up Task Manager.
- Now, choose the Photos app in the menu and hit End Task.
- Next, launch the Photos app and go through the usual way to import images from your iOS device.
5. Reboot Your Devices
If you are still unable to move photos from your iPhone to your PC, try rebooting both your iPhone and PC. Many a time, all you need to do to resolve this annoying issue is to just restart the devices.
6. Update Windows
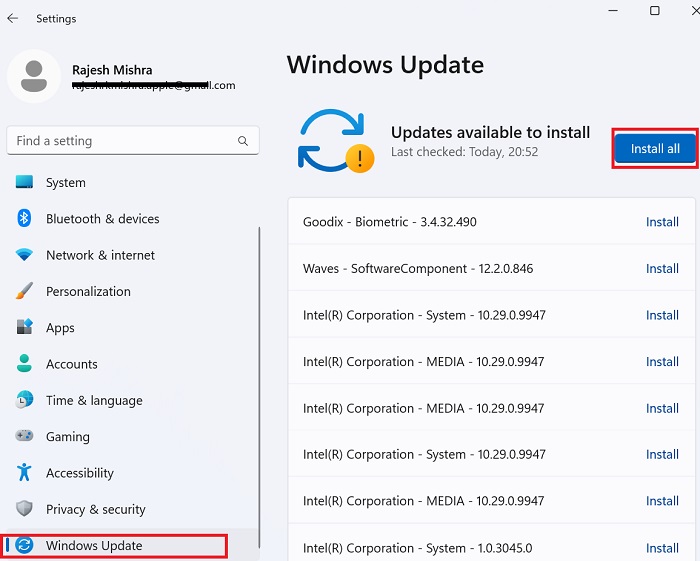
If you haven’t updated your Windows PC for a while, I suspect it’s the outdated version of the software that’s spoiling your party. Therefore, it would be wise to update the PC.
- On your PC, click on the Start menu -> Settings -> System -> Windows Update -> Download and install the latest version of the software.
7. Update Your iPhone
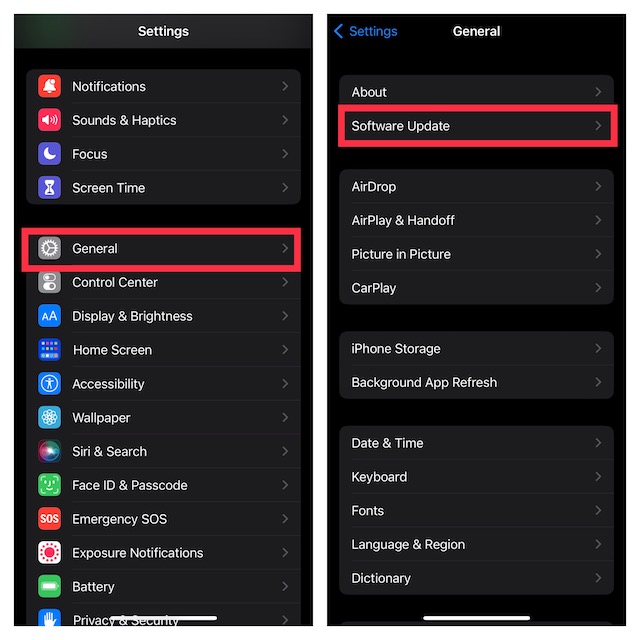
Without any doubt whatsoever, iOS 17 is a feature-packed update but it’s still far from being perfect. While most of the common problems have managed to sneak into the latest iteration of the software, a handful of new bugs have cropped up as well.
- On your iPhone, head into the Settings app -> General -> Software Update -> Check for the available iOS 17 update -> Download and install the update.
And that’s about it! I hope your photos have eventually found their way into the Windows device. Now that the problem is gone, feel free to share your feedback and the solutions that have worked for you.
Read more: 25 Ways to Fix Contact Posters Not Working in iOS 17 on iPhone