When activated, Night Light aka the blue light filter uses warmer colors to protect your eyes. The blue light filter makes sure long hours of work on a PC don’t cause eye strain or burning. Based on your preference, you can choose to fine-tune the strength of the filter and also automate it so that it can come into action whenever you need eye protection.
In terms of functionality, the night light works reliability. However, there are instances where the filter goes wrong and starts ill-functioning. If you have also found this noted Windows feature misbehaving, try out these handy solutions to fix the night light not working problem on your Windows PC.
Best Tips to Fix Night Light Not Working in Windows PC (2024)
From a corrupt graphics card driver to a tiny software glitch to an outdated update, there are many reasons why the blue light filter has begun to malfunction on your PC. Putting the spotlight on each possible culprit, I have jotted down the tips that can help you overcome the hurdle.
1. Disable/Enable the Night Light
To begin with, I would recommend you soft reset the night light. If this feature is malfunctioning due to a minor software glitch, the soft reset will let you resolve the problem.
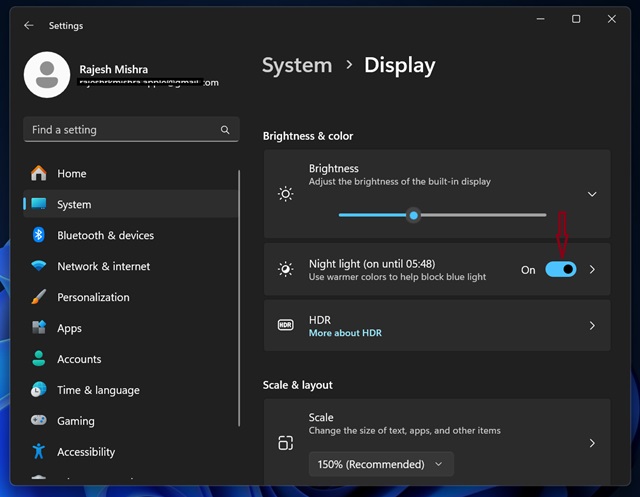
- Head over to the Start menu -> Settings -> Accessibility -> Magnifier -> Display -> Related settings -> Now, turn off the switch next to the Night light.
- After that, reboot your PC and then turn on the Night light.
2. Update Your Graphics Driver
Note that if the graphics card drivers are outdated or missing, they may prevent features related to the display from functioning properly.
- First off, press the Win + X to bring up the WinX menu.
- After that, select the Device Manager in the Access Menu.
- Now, right-click on your graphics card device and hit Update.
- Next, choose the “Search automatically for updated driver software” option.
- Once your Windows device has successfully downloaded and installed all the pending driver updates, reboot your PC.
- Now, check if the night light has come back on track.
3. Reinstall the Graphics Driver
Another reliable solution that I would like to recommend you try is to reinstall the graphics driver. For a handful of users, deleting and reinstalling the driver has worked in fixing the misbehaving blue light filter.
- To get going, press the Win + X to reveal the WinX menu -> Head over to the Device Manager in the Access menu.
- After that, you need to right-click on the display device driver and hit Uninstall device.
- When the confirmation window shows up, click on Uninstall to confirm.
- Now, make sure to keep the “Delete the driver software for this device” box unchecked.
- After you have successfully uninstalled the driver, restart your PC.
- Once your computer has rebooted, Windows will install the missing drivers for your graphics device on its own for smooth functioning.
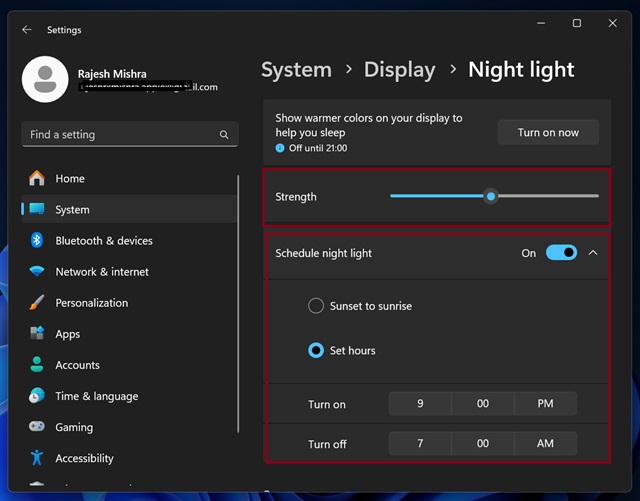
4. Adjust the Strength of Night Light
At times, just adjusting the strength of the blue light filter will let you resolve the problem.
- On your PC, navigate to the Start menu -> Settings -> Accessibility -> Magnifier -> Display -> Related Settings.
- Now, turn on Night Light and then hit the tinny arrow right next to it.
- After that, drag the slider located right next to “Strength” to adjust the intensity of the blue light filter.
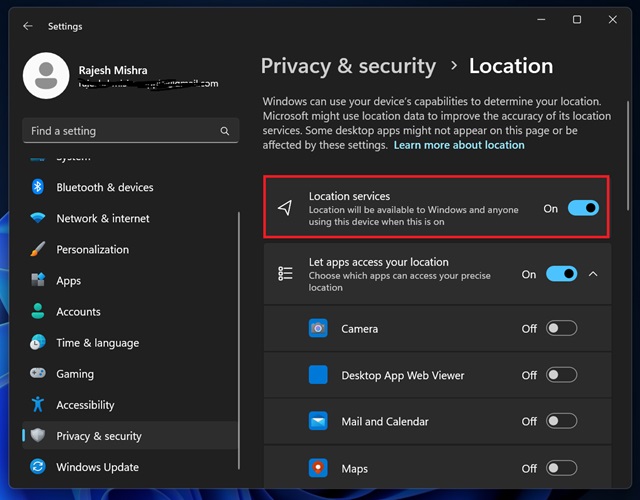
5. Ensure That You Have Enabled Location Service
Just like many other features, Night Light also takes advantage of the location data to activate and turn off at the right time. So, if you have fine-tuned it to trigger as per a schedule, make sure that location services is enabled.
- Go to the Start menu -> Settings -> Privacy & Security -> App permissions -> Location -> make sure that the toggle next to Location Services is enabled.
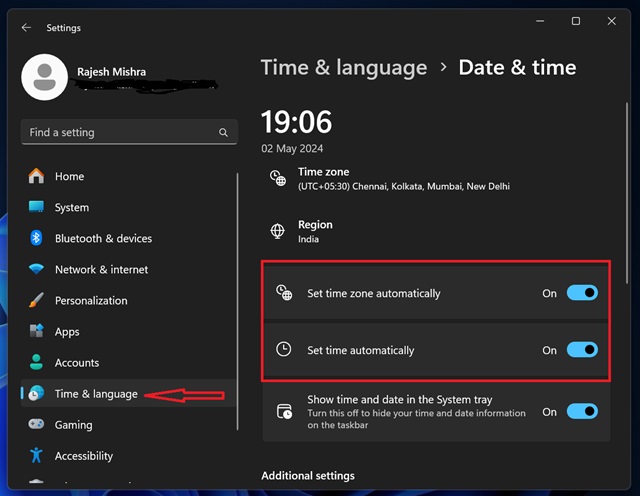
6. Check Your Date and Time Settings
Ensure that you have not set the incorrect date and time settings on your PC. If you have customized the night light to activate during set hours, the incorrect date and time could cause delayed activation.
- Head into the Start menu -> Settings -> Time & Language -> Date & Time.
- Now, turn off the toggles for Set time automatically and Set time zone automatically.
- Then, hit the Change button to Set the date and time manually.
- Make the needed change and click on the Change option to confirm the action.
- In the end, activate the Set time automatically and Set time zone automatically options.
7. Force Restart Your PC
I have long been a fan of hard reset aka force restart as it is exceptionally effective in troubleshooting miscellaneous issues. Therefore, I’m going to call upon this very solution to troubleshoot the night light.
- To force restart your PC, hold down the Ctrl key and the power button at once to trigger an emergency restart.
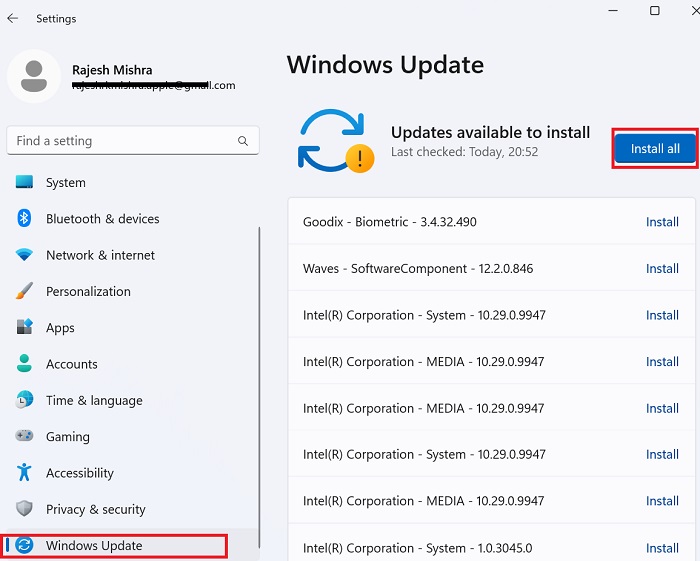
8. Update Windows
If your PC is running an outdated version of Windows, I suspect it’s the outdated update that is perhaps obstructing the night light feature.
- On your PC, dive into the Start menu -> Settings -> Windows Update.
9. Reset the Night Light Settings Using Registry Editor
Should the night light continue to ill-function, reset it via the registry editor. Bother not, it’s pretty safe and has the knack for fixing persistent Windows issues.
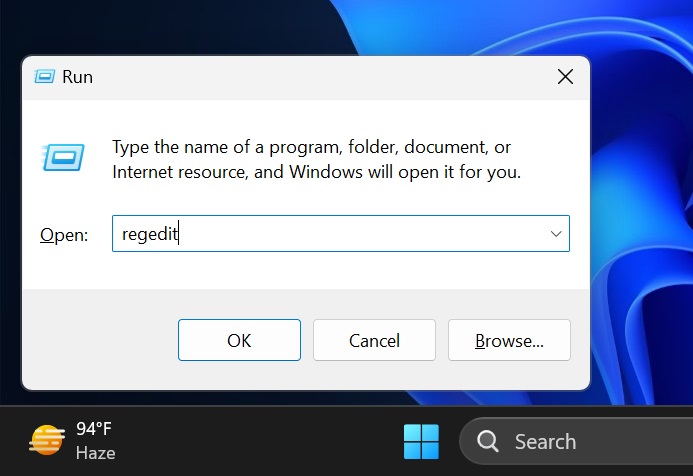
- To get started, press Win + R to access Run.
- Now, enter “regedit” and hit OK to bring up Registry Editor.
- Be sure to hit Yes if asked by User Account Control.
- Then, go to the below-given location:
HKEY_CURRENT_USER\Software\Microsoft\Windows\CurrentVersion\CloudStore\Store\DefaultAccount\Cloud
- Head over to the Cloud key section, and look for the following keys:
default$windows.data.bluelightreduction.settingsdefault$windows.data.bluelightreduction.bluelightreductionstate
- Next, right-click on the first key and hit Delete. Get rid of another key as well.
- Once you have deleted both the keys, make sure to close Registry Editor.
- Now, restart your PC -> fine-tune Night Light from scratch to check if it has begun to work as expected.
There you have it! Hopefully, the blue light filter is back in full swing on your PC. It would be an absolute pleasure to find out the suggestions that have made this Windows feature return to form. If there is something else not discussed in the guide that has rescued your PC, be sure to tip me about that as well.