Thanks to a recent update, you can get the most out of your iPhone not just as a webcam for Mac but also as a Photo Booth camera to snap stunning shots. So, if you are disappointed with the below-par camera of your Mac, there is finally a way to take full advantage of the much higher resolution camera of your iPhone than the old-fashioned built-in cameras on Macs. Hence, you can shoot high-definition photos and videos for Photo Booth on Mac. Sounds exciting? Well, let me show you how to change the Photo Booth camera on Mac to iPhone Camera.
How to Switch Camera in Photo Booth on Mac
- First and foremost, ensure that your devices are updated. If you haven’t updated your devices yet, go to the Settings app on your iPhone -> General -> Software Update. After that, download and install the latest iteration of iOS.
- On your Mac, open the System Settings app -> General -> Software Update. Then, download and install the latest iteration of macOS.
Step 1. Once you have updated your iPhone and Mac, open the Photo Booth app on your Mac. If the app is not present in the Dock, bring up the Spotlight search -> Enter Photo Booth and then launch it.
Step 2. Now, click on the “Camera” menu at the top.
Step 3. After that, choose your iPhone camera and you are good to go!
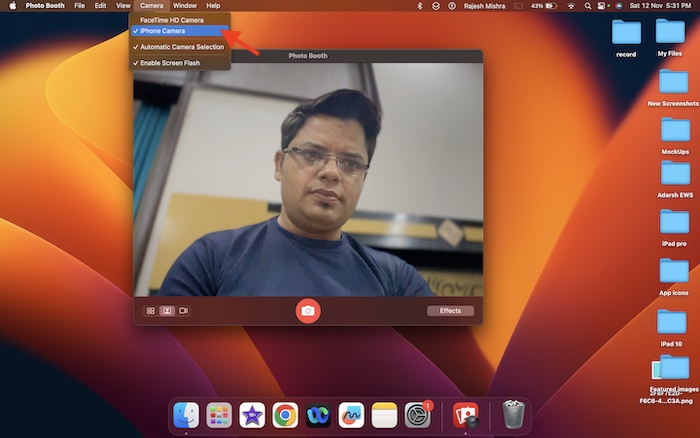
With the iPhone camera selected as the primary source, you can check the significant resolution difference. Considering the fact that modern iPhone cameras boast 12mp, you can capture top-notch images.
However, do note that the images captured by Photo Booth don’t appear to be in full 12mp resolution. Though they comparatively look a lot better and sharper than what is snapped by the built-in camera.
How to Customize iPhone Camera Video Effects in Photo Booth on Mac
On top of all, you can even customize the iPhone camera video effects in Photo Booth on your Mac. If you want to get the most out of your top-notch cameras, make sure to fine-tune the video settings.
- To get it done, click on the Control Center icon at the top-right corner of the screen and choose Video Effects.
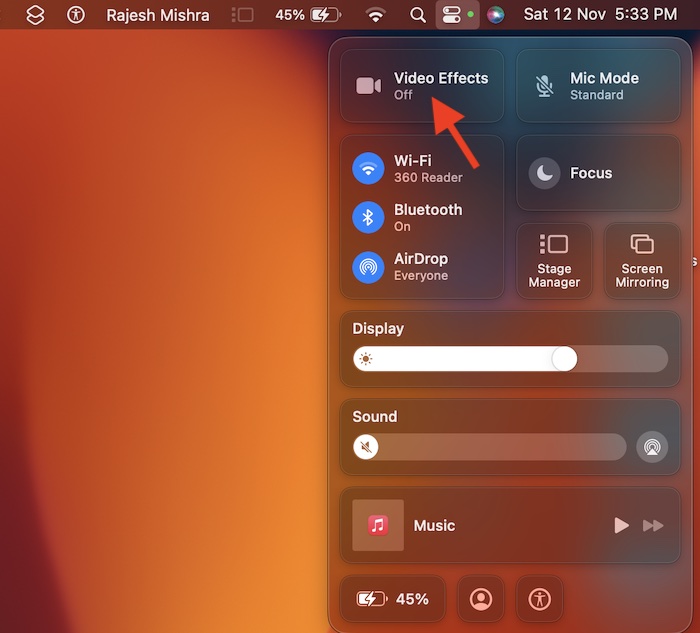
- Now, there are four options to pick from:
- Center Stage: When selected, it always keeps you in the frame so that you can communicate freely.
- Portrait: You can use the Portrait video effect to blur the background.
- Studio Light: Use this video effect to slightly dim the background and brighten up the face.
- Desk View: It’s designed to provide a stunning top-down camera view without having to use any equipment.

Signing off…
While I’m really pleased to know that there are multiple ways including the super handy Continuity Camera to make the most of the impressive iPhone camera, I wish Apple equipped modern Macs with much-improved cameras. What do you have to say about this long-awaited demand?
To watch this feature in action, check out this video:
Read more: