Gone were the times when Windows used to lag behind macOS in terms of speed and integration. Fast forward to 2024, Windows not only excels in several aspects but also leaves behind Apple’s macOS on many fronts including the much-vaunted USER EXPERIENCE.
Charmed by the vast improvements on most fronts, I had been desperately looking for a way to take Windows 11 for a long drive. So, I decided to buy a highly-rated Windows laptop (Dell Inspiron) about a month ago and gave my craving a shot to document the experience and share it with you. Having dug deep into the latest iteration of Windows, I would like to talk about the 5 Windows 11 features that would be a great addition to macOS 15.
Windows 11 Features That Would Be a Great Addition to macOS 15
There is no denying that macOS Sonoma seems to be a complete package as it ticks off most key boxes. But there are still quite a few drawbacks and room for enhancements. After all, the OS can’t claim to be perfect nor can it vouch to be immune to bugs or annoying quirks. These noteworthy incorporations will play a pivotal role in enhancing macOS 15.
1. Automate the Low Power Mode
While I’m truly fond of the macOS’ “Low Power Mode”, I wish the OS offered the flexibility to activate it automatically at a specific percentage. Instead of digging into the settings and turning it on when your notebook is running low on power every single time, wouldn’t it be better if you could automate the power-saving mode? Yeah, that would be pretty sweet.
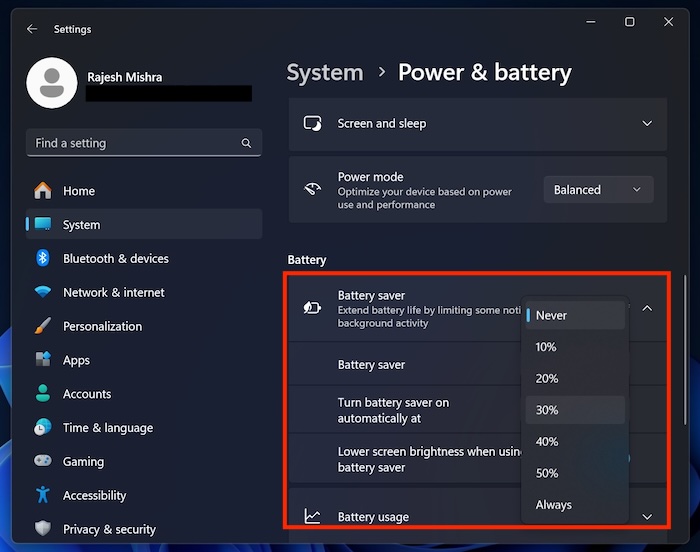
On Windows 11, you can choose to automate the “Battery saver” so that it can come into action the moment your computer’s battery goes below a particular level.
- To bring it into action, dive into the Start menu -> Settings -> Power & battery -> click on the drop-down menu next to Battery saver and turn it on.
- After that, click on the drop-down menu next to “Turn battery saver on automatically at” and then choose the desired percentage.
2. Enable Airplane Mode
Do I need to talk about how essential “Airplane Mode” is? In more ways than one, Airplane Mode is super handy as it lets you get out of the grid instantly. Times when you want to have some peace of mind, it comes into play. Moreover, many a time, it also works wonders in fixing miscellaneous network-related issues.
- Unlike Windows (Start menu -> Settings -> Network & internet), macOS doesn’t come with an airplane mode. Knowing how useful this mode is, it would be nice if macOS 15 gets the airplane mode as well.
- There is no harm in copying something from your rival if it can amp up your game – without breaking the rule, of course.

3. Check Total Data Usage
Especially when you are on a limited bandwidth, it becomes critical to keep track of the data usage so that you don’t run out of data abruptly. Unfortunately, macOS doesn’t provide a way to track data usage.
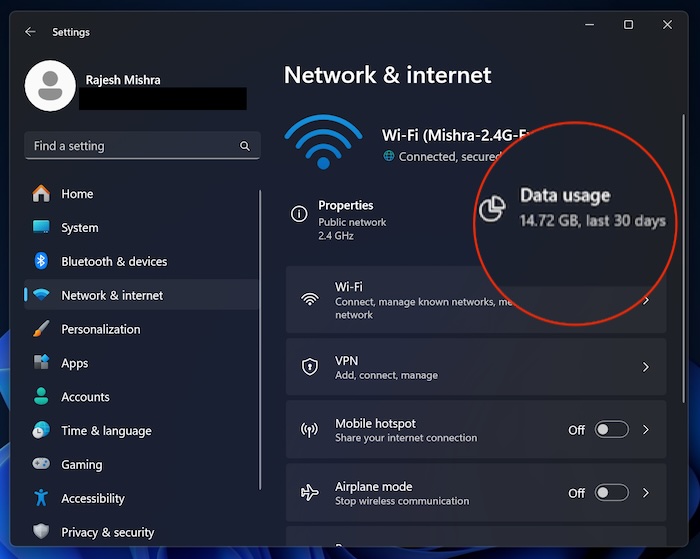
On Windows, tracking data usage is dead simple (Start menu -> Settings -> Network & internet ). Hence, you don’t have to worry about how much data is left in the tank and when you will need to turbocharge it to ensure your work doesn’t get halted in oblivion.
- Notably, Windows 11 also offers a neat way to set the data limit in order that your computer doesn’t gobble up a ton of data by keeping you in the dark.
4. Adjust How Long Notifications Stay on the Screen Before They Disappear
While some prefer to keep notifications under wraps in a way to safeguard the private alerts from prying eyes, others don’t care about whether or not they show up on the screen. Personally, I want to have the desired control over alerts and choose to put the irrelevant ones at a fair distance.
Windows’ ability to adjust how long notifications stay on the screen before they disappear has appealed to my taste. To ensure I don’t miss out on the important alerts and have to dive deep into the respective apps about what each one has to offer, I like to customize notification settings about how long alerts appear on the screen.
If you are also like me, there is a good chance, you might want to bring this Windows feature to macOS sooner rather than later.
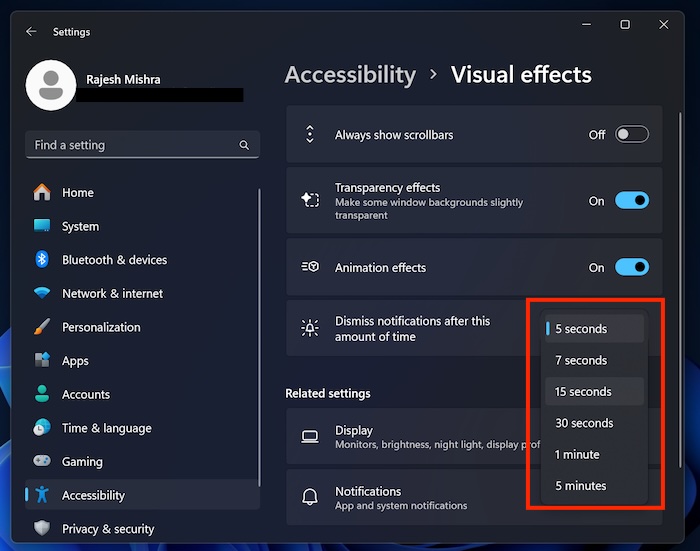
- Head into the Start menu -> Accessibility -> Visual effects -> hit the drop-down menu next to “Dismiss notifications after this amount of time” and then choose your preferred time.
5. A Dedicated Video Playback Setting
Even if you are not a movie buff, chances are you are going to want to have this feature at your beck and call.
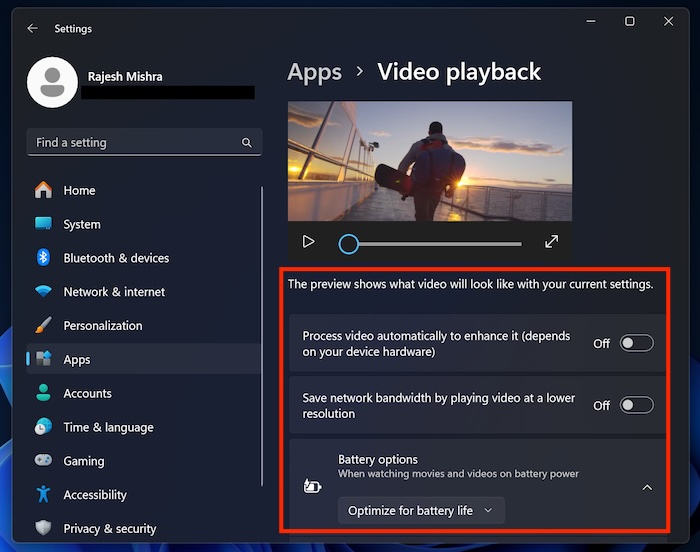
With a dedicated video playback setting, it becomes a bit more convenient to tweak the settings as and when the need comes calling to you. Whether you want to watch your favorite video in high-quality or lower resolution of a video in order to save precious data, a separate setting makes the task a pretty simple affair.
Considering how noteworthy a systemwide video playback would be to macOS, I would be super glad to see it in the next iteration of macOS 15. What about you?
- Navigate to the Start menu -> Settings -> Apps -> Video playback and then customize the settings in accordance with your preference.
So, that wraps up this article. Now that you have taken a peek at my top picks, it’s time for you to share your favorites via the comments below.
Read more: How to Permanently Disable Autoplay Videos in Microsoft Store on Windows 11