For times when you want your notebook to last longer by preserving every ounce of energy, the “Battery Saver” comes into play. For this very reason, Windows provides a built-in power-saving mode to let you extend the battery life of your laptop. But do you know that you can automatically activate the battery saver on your Windows laptop at a specific percentage? Yeah, it’s possible to automate the power-saving mode. So, if you are willing to unlock this super handy feature, keep reading.
Automatically Turn Batter Saver ON at Specific Percentage on Windows 11
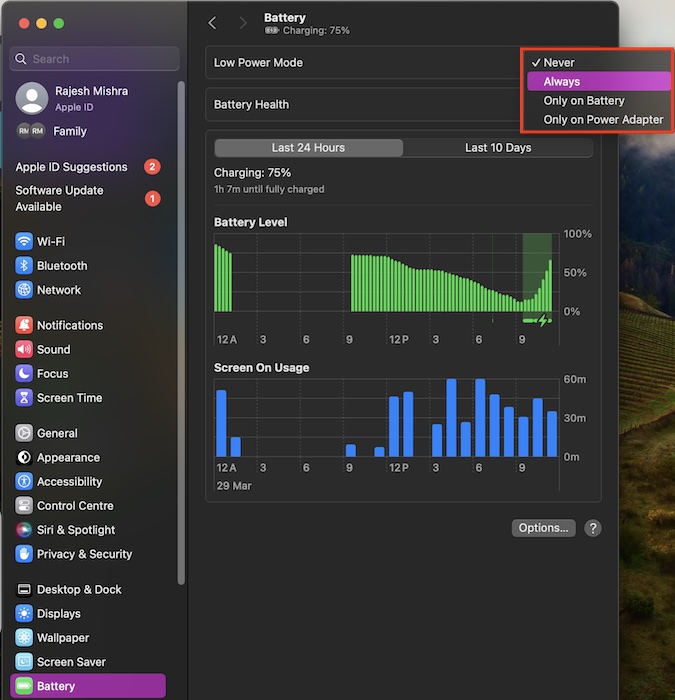
Pretty much like macOS (System Settings app -> Battery -> Low Power Mode), Windows also provides a power-saving mode. However, what makes the Windows battery saver more helpful is the ability to get activated at a specific percentage.
For instance, if you want the battery-saving feature of your Windows device to automatically turn on when the battery goes below 30%, you can customize the setting for this exact purpose.
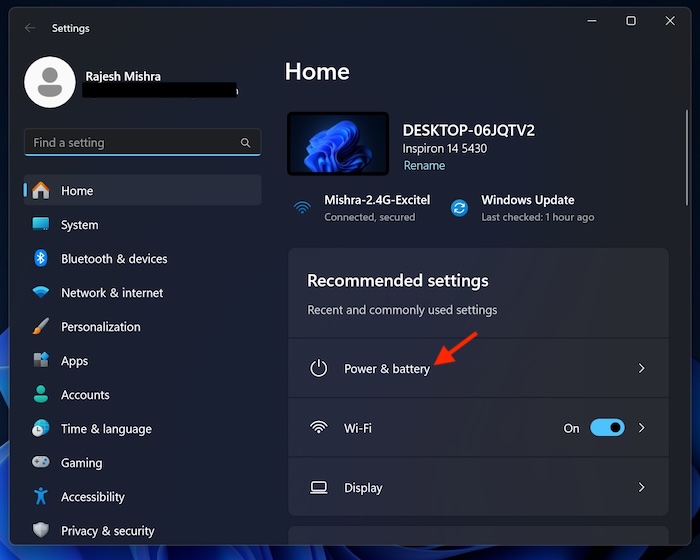
- To get started, click on the Start menu on your Windows device.
- Now, choose the Settings app to proceed.
- Make sure that the “Home” tab is selected in the left sidebar.
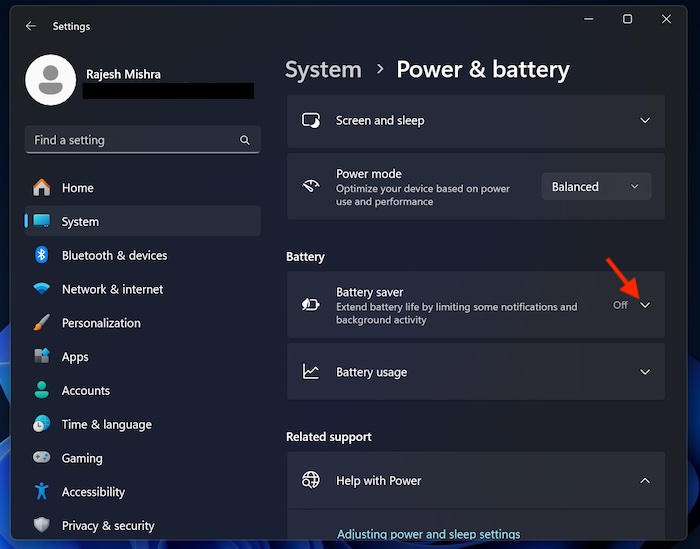
- select the “Power & battery” option.
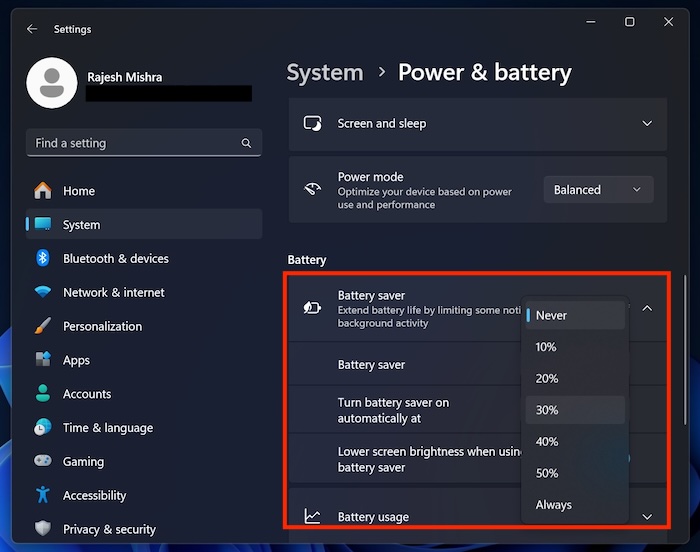
- Next up, head over to the Battery saver section and hit the drop-down menu right next to it.
- Then, click on the drop-down menu next to “Turn battery saver on automatically at” and choose the preferred percentage and you are good to go! For the purpose of this guide, I’m going to choose 40%.
Your desired configuration will kick in straight away. Going forward, the power-saving will come into play the moment the battery of your notebook hits the set level.
How to Stop Windows 11’s Battery Saver from Activating Automatically
Later, if you ever want to prevent the power-saver from kickstarting automatically, you can do that right from the same setting.
- Navigate to the Start menu -> Settings -> Power & battery -> hit the drop-down menu next to Battery saver.
- Now, click on the menu next to “Turn Battery saver on automatically at” and choose Never.
From now onwards, it won’t trigger on its own.
My second innings with Windows has been more or less a pleasing drive. Beyond a wide range of helpful features, the things that have impressed me the most are smooth performance and the availability of a ton of customization. Before switching to Windows, I was concerned about the sluggish performance which has not gripped my notebook so far.
Enough talk, it would be awesome to have your invaluable insights about this guide in particular and Windows 11 in general. So, be sure to shoot ’em out in the comments below.
Read more: Apps Freezing on Windows 11? 6 Real Fixes!