Syncing iPhone with a Windows PC is seamless and hassle-free. Moreover, once you have set up the syncing process with iTunes, you can automatically sync your music, photos, and videos with your computer. Generally, the whole syncing process works as expected. However, there are certain occasions where it goes berserk and fails to do the job. Having faced this very issue, the other day on my PC, I know how frustrating it feels. But the good thing is, there are some handy solutions that work in fixing the iPhone not syncing with Windows PC problem. Read on…
Fix iPhone Not Syncing With Windows PC Via iTunes
As to what’s preventing your iOS device from syncing with PC via iTunes, there are many reasons why this issue crops up. From a software glitch facing iTunes to a faulty USB cable to a wrong configuration to failing to tick off a must-have requirement, you will need to take care of many things.
1. Ensure That iTunes is Updated
To begin with, ensure that iTunes is updated on your computer. If you haven’t updated this app for a long time, I suspect its outdated version is coming in the way.
- To get started, launch iTunes on your PC -> click on the Help menu -> Choose “Check for Updates”.
- If there is an update available for iTunes, go for it.
2. Force Quit iTunes
If you are still unable to sync your iOS device with a Windows PC, force quit the iTunes app and try syncing your data from scratch.
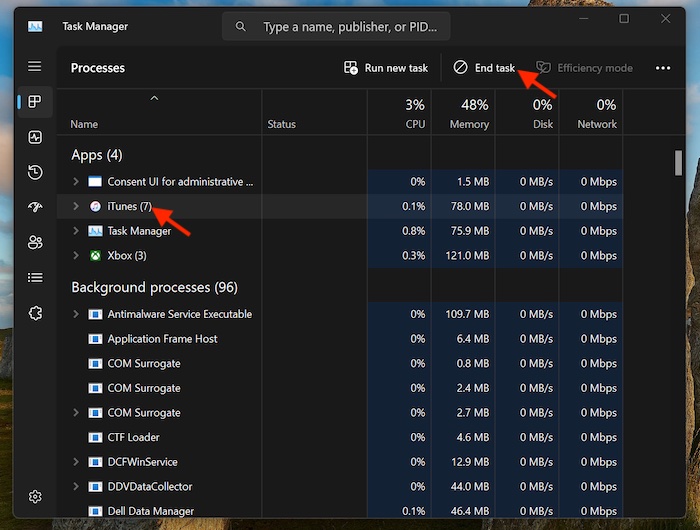
- On your computer, press the Control+Shift+ESC keyboard shortcut to open Task Manager -> Select iTunes and hit End Task.
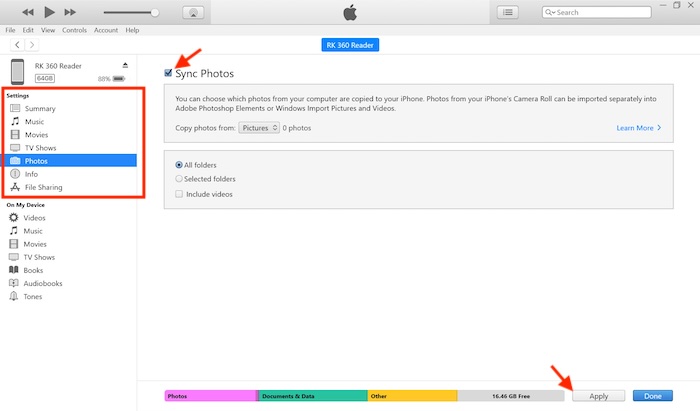
- Now, disconnect your iPhone from your computer -> wait for some time, and then reconnect the device to your computer -> launch iTunes -> click on the device icon at the top left corner of the window.
- Under the Settings section, choose the data that you wish to sync.
- Then, make sure to check the box to the left of “Sync Data type” and hit Apply. Keep in mind that you will need to tick this box for each data type that you would like to sync.
- Unless and until, syncing has been completed successfully, keep your iPhone connected to the computer.
3. Reboot Both Your iPhone and Computer
If iPhone syncing is caused by a minor software glitch, rebooting the iPhone and computer will let you resolve it.
- On iPhone without the Home button: Press and hold the side button and the volume up button -> drag the power off slider to shut down the device. Wait for a few seconds and then press the power button to restart your iPhone.
- On iPhone with the Home button: Press the side button and then drag the power off slider to turn off the device. Then, press the side button to turn on the device.
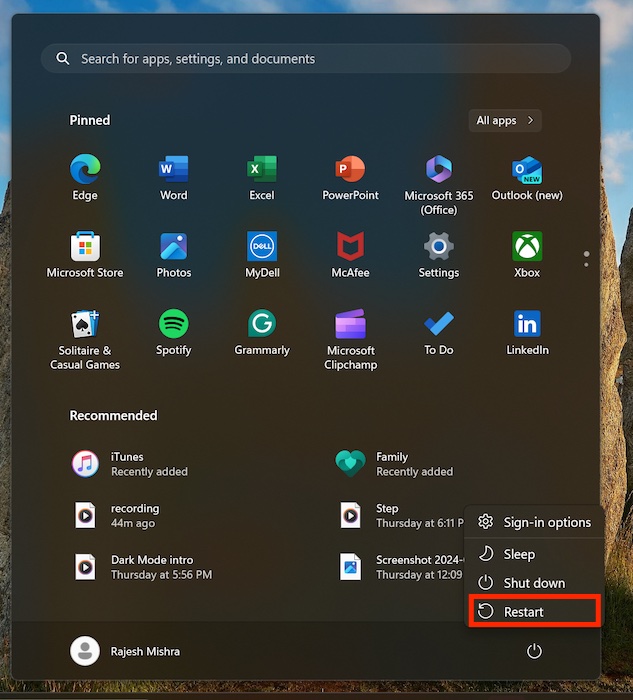
- On your PC: Hit the Start menu -> power icon -> Restart.
4. Ensure That Your USB Cable is Certified
Note that if your USB cable is fake or uncertified, you may have trouble syncing your iPhone via iTunes. Therefore, make sure that you are using a certified/MFi (Made for iPhone/iPad) cable. Also, ensure that your cable is not damaged. Try changing your USB cable to figure out if your existing cable is at fault.
5. Update Both Your iPhone and Computer
Software bugs are also equally responsible for triggering the iPhone syncing problem. If your PC hasn’t been updated for ages, there is a decent chance that the devil could be hidden in the outdated version of the software. Needless to say, the same rule applies for iPhone as well, after all, iOS 17 is super buggy.
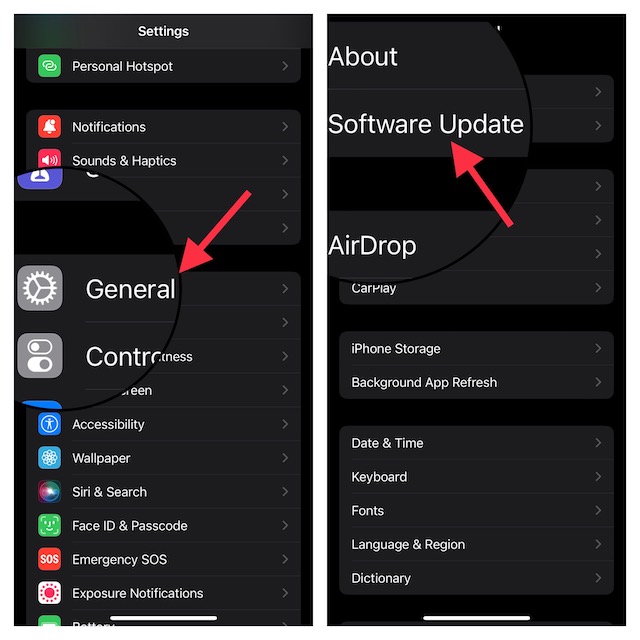
- On iPhone: Settings app -> General -> Software Update.
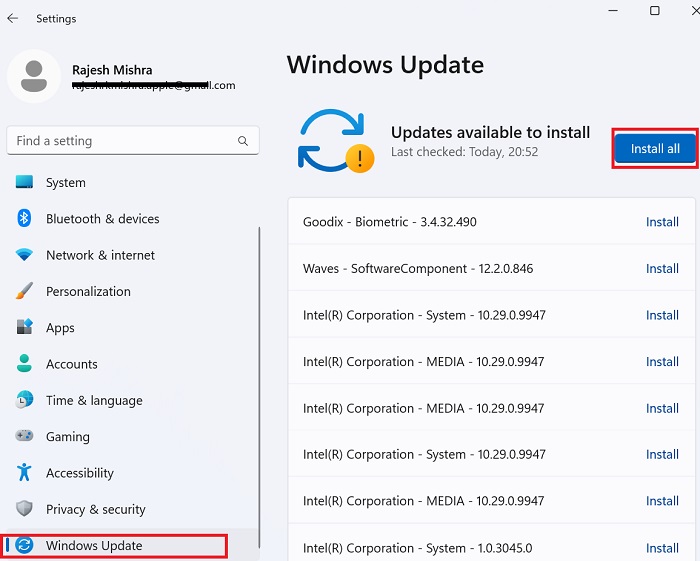
- On Windows: Start menu -> Settings app -> System -> Windows Update.
6. Trying to Auto-Sync Your iPhone with Computer
Are you trying to auto-sync your iOS device with your Windows PC? If the answer is yes, ensure that you have checked off all the essential requirements:
- Keep your iPhone and PC connected to the same Wi-Fi network.
- Be sure your iPhone is connected to a power source and charging.
- Make sure iTunes is open on your computer and the device icon is showing in the app.
- Ensure that you have enabled auto-syncing over Wi-Fi in iTunes.
7. Turn OFF/ON Syncing Over Wi-Fi
Still unable to automatically sync your iPhone with your computer? Now, I would recommend you disable/enable the syncing over Wi-Fi.
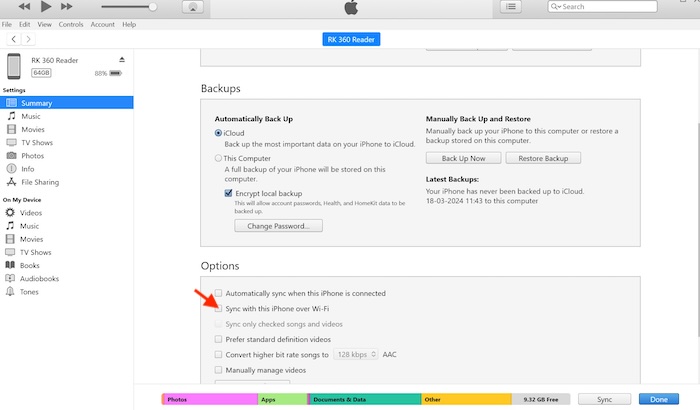
- Connect your iPhone to your computer using a USB cable -> select your device -> click on the Summary tab -> tick the box to the left of Sync with the iPhone/iPad over Wi-Fi.
8. Turn OFF/ON Wi-Fi on your Computer and iPhone
Another reliable solution that I would recommend you try out is to turn off/on Wi-Fi on your iPhone and computer. If Wi-Fi is below par, it might prevent syncing.
- On your iPhone, go to the Settings app -> Wi-Fi -> turn off the switch next to Wi-Fi. Restart your iPhone and turn on Wi-Fi.
- On your computer, click on the Wi-Fi icon -> click on the forward arrow next to the Wi-Fi network. Next, disconnect the network and turn off Wi-Fi.
- After that, click on the Start menu -> click on the power icon -> choose Restart in the menu.
- Then, restart your computer and then turn on Wi-Fi -> reconnect to the Wi-Fi network.
So, that wraps up this troubleshooting guide. I hope you have gotten the better of the syncing problem. Now, let me know the tips that have rescued your device. If there is any valuable feedback, make sure to shoot that as well.
Read more: How to Automatically Enable Batter Saver at Specific Percentage on Windows 11