As an iPhone manager, iTunes has always been reliable. Be it backing up your iPhone, restoring the device from a backup, or syncing it up automatically, the app has got you fully covered. Yeah, you read that right! You can choose to auto-sync your iPhone with your PC using iTunes. Keep reading…
Sync Your iPhone with Windows PC Using iTunes
So, how does the auto-syncing with iTunes work? Well, once you have set up the mobile device manager, your preferred content will sync seamlessly provided that your iPhone and computer are connected to the same Wi-Fi network.
What sort of content can you sync with your Windows PC?
Using iTunes, you can sync a variety of items with your PC including –
- Albums
- Songs
- Playlists
- Movies
- TV shows
- Podcasts
- Audiobooks
- Photos
- Videos
- Contacts
- Calendars
Use iTunes to Sync Your iPhone and iPad with Your Windows PC
- First off, connect your iPhone to your computer using a USB cable.
- Now, launch iTunes on your computer.
- Click on the device icon at the top left corner of the window.
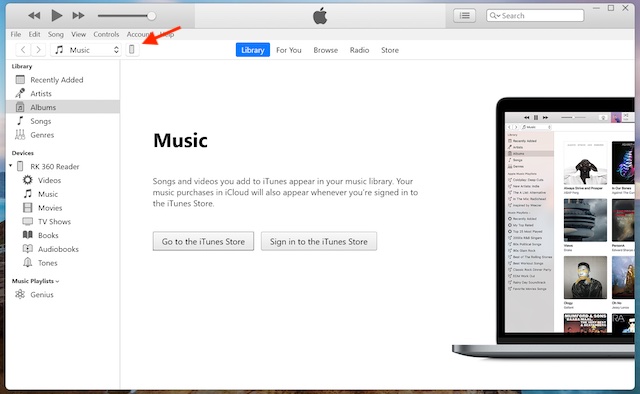
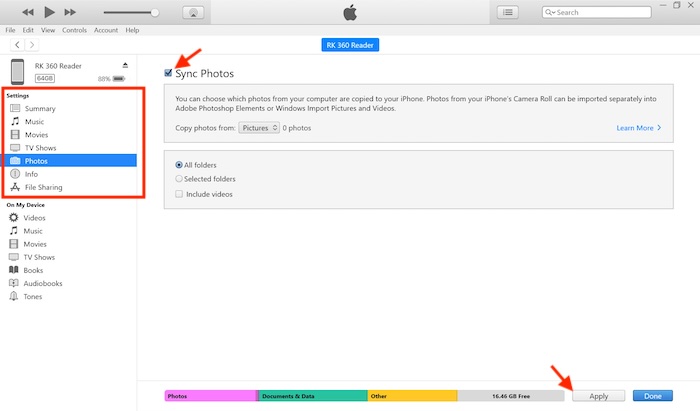
- Under the Settings section, choose the type of content that you would like to sync.
- Now, check the box to the left of Sync in order to enable syncing for a content type. Be sure to tick the box to the left of each item that you wish to sync.
- Finally, hit the Apply button in the bottom right corner of the window and you are all set!
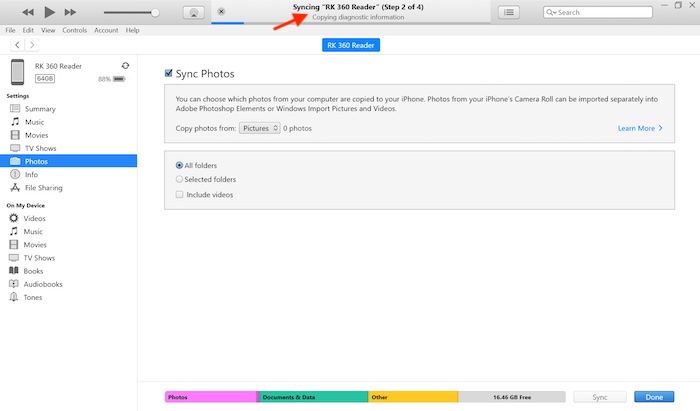
- Now, allow the syncing process to continue without any interference. Throughout the syncing process, make sure to keep your iPhone connected to your computer.
How to Automatically Sync Your iPhone/iPad with Windows PC Using iTunes
- To enable auto-syncing with your Windows PC, ensure that your iPhone/iPad is connected to your PC -> open iTunes -> select your device.
- Ensure that the Summary tab is selected in the left sidebar.
- Now, head over to the Options section.
- After that, tick the box to the left of “Automatically sync when this iPhone/iPad is connected”.
- Do not forget to hit it the Apply button and you are all set!
How to Sync Your iPhone/iPad With Computer Using Wi-Fi
Once you have set up syncing with iTunes with the help of USB, you will be able to sync your iPhone with Wi-Fi instead of USB.
1. To get it done, connect your device to your computer with a USB cable -> fire up iTunes, and then select your device at the top left corner of the window.
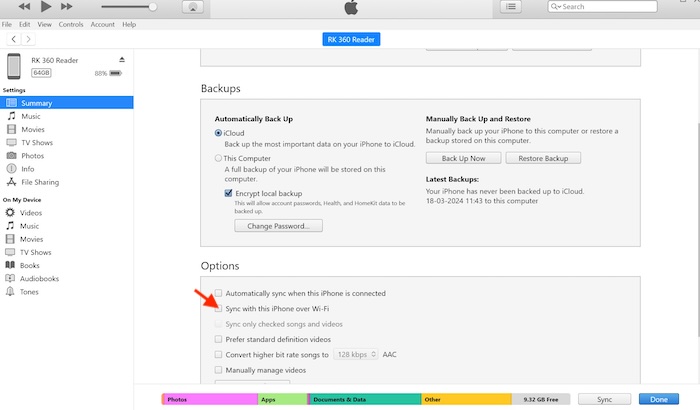
2. Now, ensure that the Summary tab is selected on the left side of the iTunes window.
3. After that, select “Sync with this ‘iPhone/iPad’ over Wi-Fi” and hit Apply.
4: From now on, your iPhone will automatically sync with the computer provided –
- Your iPhone and the Windows PC are connected to the same Wi-Fi network
- iTunes is open on the computer
- Your iPhone is connected to a power source.
Prevent Your iPhone from Syncing With Your Windows Computer
Later, if you ever don’t want to sync your iOS device with your computer, you can disable this functionality with ease – right from the iTunes settings.
- On your Windows computer, launch the iTunes app.
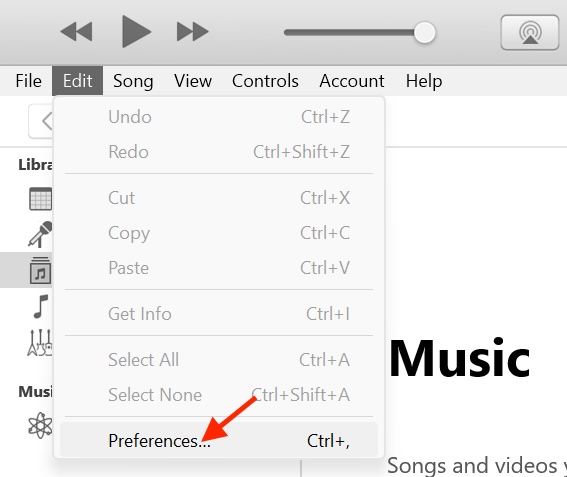
- Now, hit the Edit menu at the upper left corner of the user interface.
- Next, choose the Preferences option in the drop-down menu.
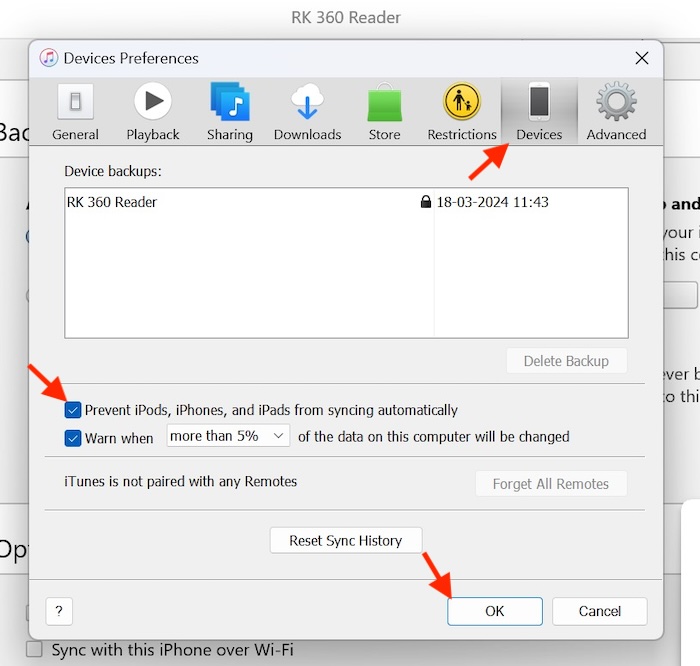
- Next up, select the “Devices” tab.
- After that, check the box to the left of “Prevent iPhone/iPad from syncing automatically.”
And that’s pretty much it! So, that’s how you can add an extra layer of protection to your data by frequently syncing the device with your PC.
Read more: Apps Freezing on Windows 11? 6 Real Fixes!

