For pro creators, it’s critical to keep colors consistent and accurate in their projects. So, it’s always good to have the needed flexibility to calibrate colors to ensure they are in line with the demand. Keeping this very essential thing in mind, Windows has introduced an auto-color management feature so that creative professionals can focus on their projects and don’t have to bother about manually tweaking the intensity of colors – every now and then. On this very note, follow along to learn how to automatically manage colors across apps on supported displays in Windows 11.
Automatically Manage Colors on Compatible Display in Windows PC
To ward off any confusion, let’s first understand how the auto-color management works on Windows!
How does the auto-color management work on Windows 11?
When activated, the auto-color management provides apps the full freedom to use billions of colors with 10-16 bits of precision. By leveraging dithering and other advanced techniques, it is able to enhance color quality even on displays that only support 8-bit color.
Better still, the auto-color management offers system-level color management in order that colors across apps appear not only consistent but also accurate on supported displays. Notably, it even enables new apps to render more colors with enhanced accuracy. This smart functioning plays a pivotal role in deriving more details and ensuring fewer color artifacts in things like shadows, gradients, and darker scenes.
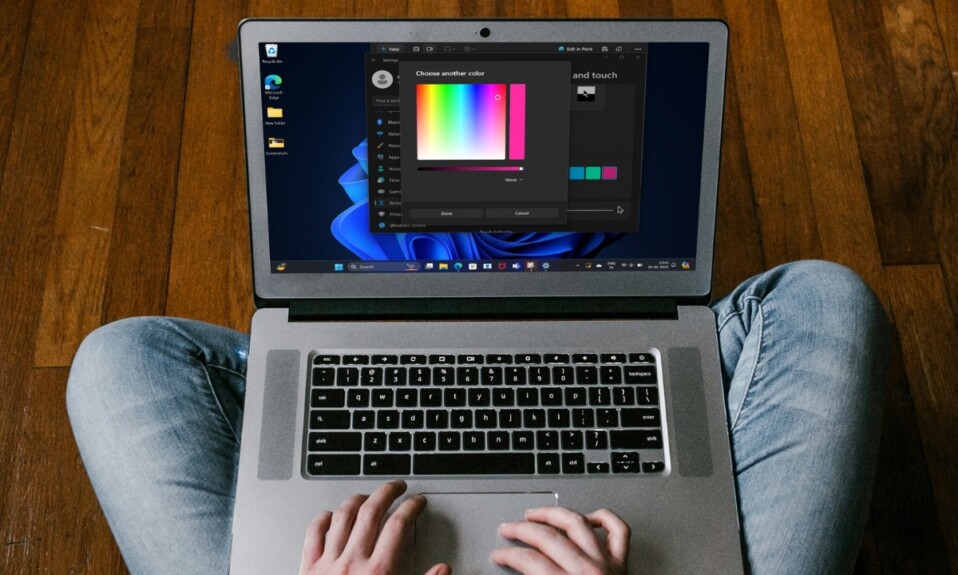
Use Auto-Color Management on Supported Displays in Windows 11
- On your Windows PC, select the Start button.
- After that, select the Settings app.
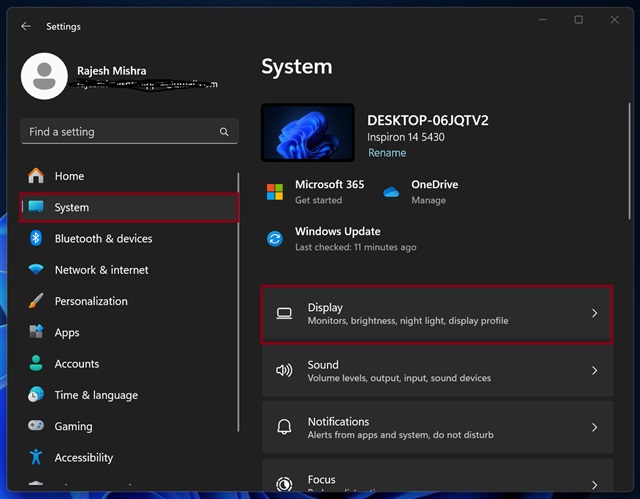
- Then, ensure that the System is selected in the left sidebar.
- Next, choose Display.
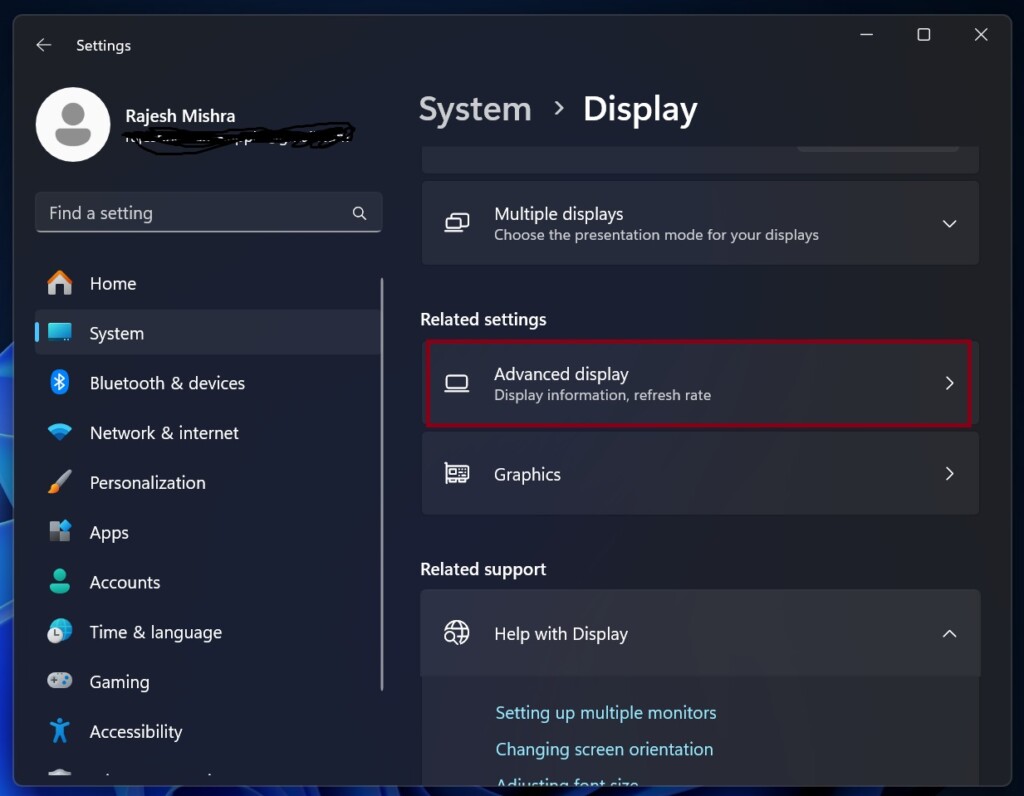
- Next up, select Advanced Display.
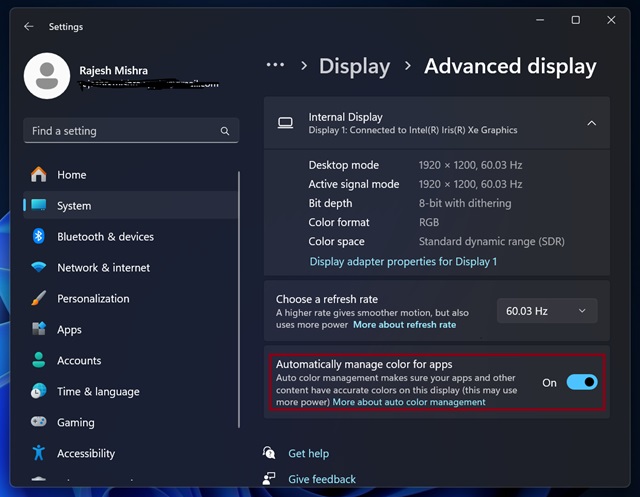
- Up next, you need to select the display in question.
- Finally, turn on the toggle next to Automatically manage color for apps and you are all set!
This smart feature will get into action right away and make colors accurate and consistent across apps.
Later, if you ever want to get rid of this feature, return to the same setting and turn off the switch next to Automatically manage color for apps.
Side Note:
- If you find the auto-color management feature ill-functioning on your PC, I would recommend you try three reliable tips.
- First off, reboot your computer to fix the minor software glitch and bring the color management back on track.
- If that doesn’t click for you, try updating all the apps and also ensure that your PC is updated to the latest version of Windows.
Read more: 6 Tips to Set Up & Use iCloud Passwords on Windows Like a Pro