Modern versions of macOS come with a fast user switching feature to let you quickly switch users. If you share your Mac with a family member or friend, you would find this feature pretty handy. Due to the complete redesign, the process of activating fast user switching has slightly changed in macOS 13. But worry not, this quick guide has got you fully covered. Here is how you can enable fast user switching in macOS 13 Ventura.
Enable Fast User Switching on Mac in macOS 13 Ventura
For a change, the Fast User Switching setting has gone inside the “Control Center” section. Ventura offers you the option to show the Fast User Switching icon in both the Control Center and the menu bar on your Mac. Hence, you can choose the preferred spot for this essential feature.
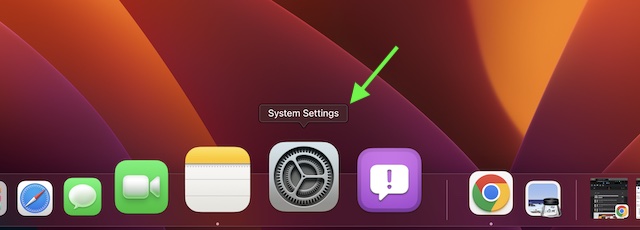
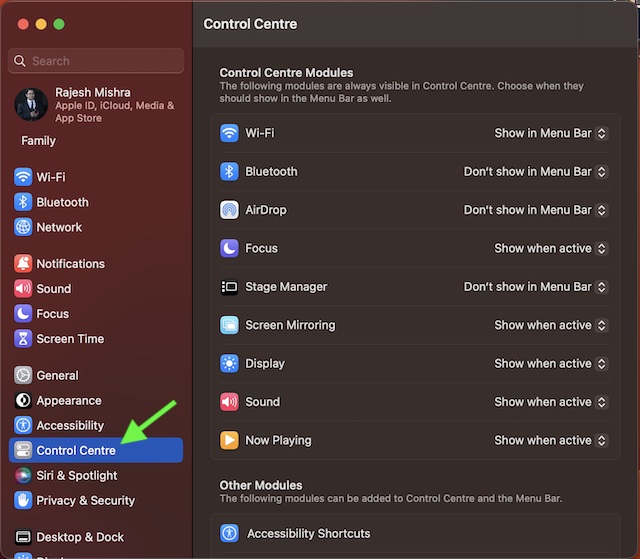
Step 1. To get going, click on the Apple menu at the top-left corner of the screen and choose System Settings in the menu. Alternatively, you can also use the Spotlight search to search for the System Settings and launch it.
Step 2. Now, scroll down and select Control Center.
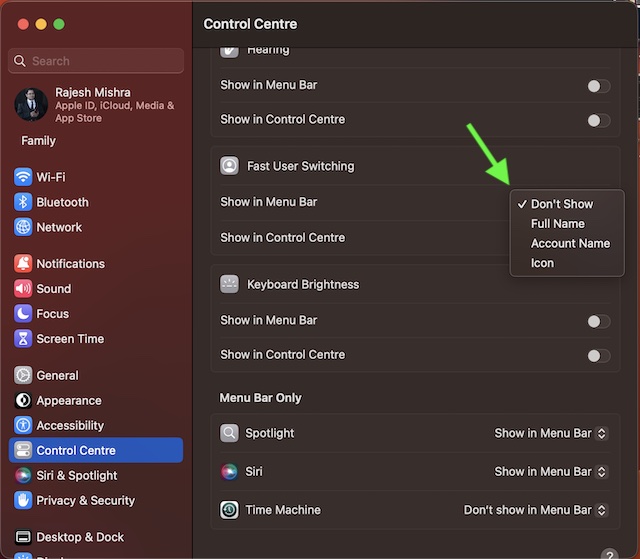
Step 3. Next, scroll down to the Fast User Switching section. Now, you have two options:
- Show Fast User Switching in Menu Bar: If you want to show the fast user switching option in the menu bar on your Mac, click on the drop-down menu next to Show in Menu Bar and choose Full Name, Account Name, or Icon as per your needs.
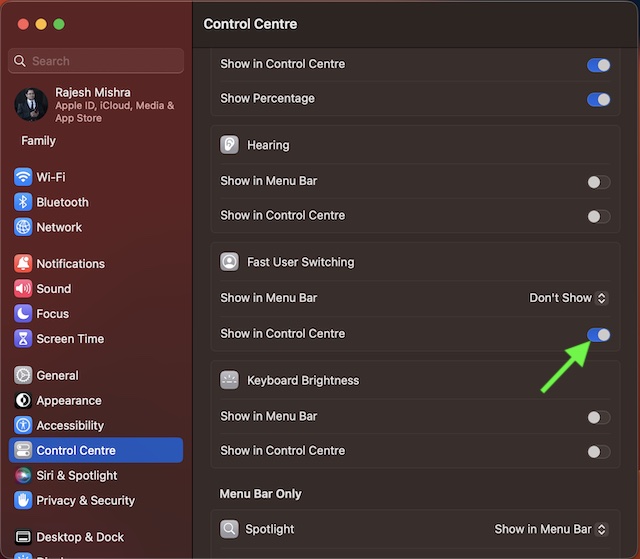
- Show Fast User Switching in Control Center: If you wish to show the fast user switching option in the control center, turn on the toggle next to Show in Control Center.
Now, select the preferred option depending on your need and you are good to go! From now onwards, you will be able to switch users right from the menu bar or the control center on your Mac. Pretty neat, isn’t it?
Signing off…
As someone who loves an intuitive user interface, I find the redesigned System Settings very impressive. It looks in line with iOS/iPadOS and also feels pretty snappier. Though it may take a while to get used to this overhauled design, I’m sure most users would appreciate this change.
Recently, we have covered some interesting macOS 13 guides including how to use iPhone as Mac’s webcam, enable and use Face ID handoff, and change the default browser. If you have missed these articles, make sure to check them out.