As soon as I bought a Windows computer, I wished to move all the photos from my iPhone to the computer to free up plenty of precious storage. So, I went with the plan and transferred every single image to the computer. However, when I checked the quality of the transferred photos, I felt extremely disappointed as they were all in the JPEG (aka most compatible) format.
After a bit of digging, I came to know that by default iOS transfers iPhone photos to Windows or Mac in JPEG format. It’s smartly done to make the photo transfer a faster and a more smooth sailing process. Though it’s well-thought-out and designed to simplify the whole process, some of you might want to move original quality photos from your iPhone to a Windows computer. Keep reading to…
Transfer Original Quality Photos from iPhone to Windows PC or Mac
Slightly buried in the Photos setting exists an option to manage the photo quality; especially when migrating images from iOS to a Mac or Windows device. That means you won’t have to opt for a third-party tool or spend any bucks to ensure that your photos won’t lose quality.
Configure Your iPhone or iPad to Automatically Transfer Original Quality Photos to Your PC or Mac
- On your iPhone or iPad, head over to the Settings app.
- Now, scroll down and choose Photos.
- After that, scroll down to the bottom of the screen and choose Keep Originals.
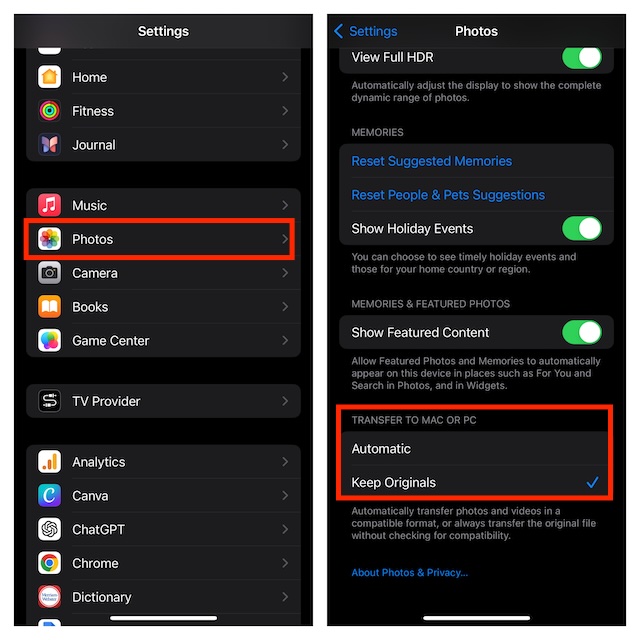
And that’s pretty much it! Going forward, you will be able to transfer photos from your iOS device to your computer in their original format.
Step-By-Step Guide to Move Original Quality Photos from iPhone to PC or Mac
- To begin with, ensure that your computer has the latest version of iTunes installed.
- After that, connect your iPhone to your computer.
- Then, launch the Photos app on your PC.
- Next, click on the Import option at the upper-right corner of the user interface and select your connected device.
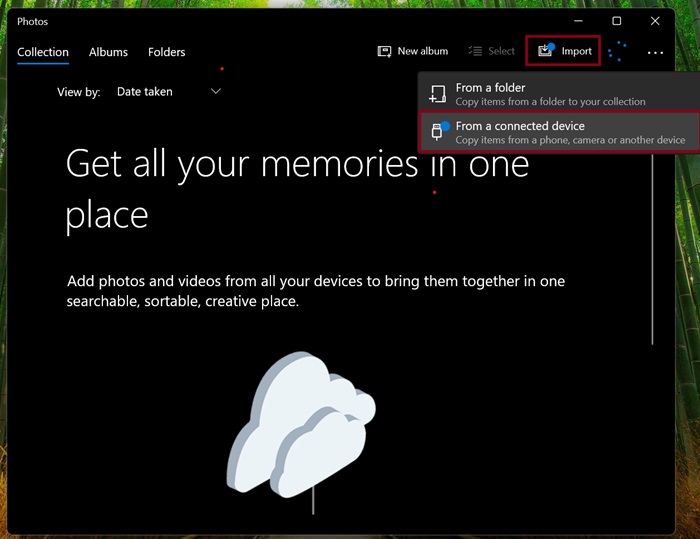
- Next up, choose the images that you would like to transfer and then follow the instructions to complete the photo transfer.
Note: On Mac, connect your iPhone to your computer -> Launch the Photos app -> select your device in the left sidebar -> Hit the Import option at the top right.
And that’s all there is to it! Hopefully, you will no longer be worried about losing the quality of your photos while moving them to your computer. If you have found this guide handy, feel free to shoot your thoughts in the comments below.
Read more: How to Automatically Sync Your iPhone With Windows PC Over Wi-Fi