Probably, the best part about the StandBy mode is the full-on customization. That means you can perfectly customize the all-new Lock Screen mode so that it can always be ready to feast your eyes with not only the desired glanceable information but also favorite images handpicked from your photo library. To ensure your smart display never loses its tryst with charm, let me show you how to add or remove photo album from StandBy photo view in iOS 17 on iPhone.
Add or Remove Photo Album from StandBy Photo View on iPhone
From what I can tell based on the experience, the StandBy mode has offered a smart way to let everyone relish the Always-On-Display including those who are still holding onto the relatively older iPhone models (i.e. iPhone XR and the budget-friendly iPhone SE 2).
Considering the fact that the AOD is locked to the top-tier iPhone 14 Pro/14 Pro Max and other flagship Android smartphones, getting it on an old iPhone is a big deal – whichever way you look at the deal. It’s akin to driving a Range Rover on a Tata Nano budget (no pun intended)!
- To get started, ensure that your iPhone is locked, positioned in the horizontal orientation, and charging. Yeah, it’s a must-have requirement for activating the StandBy mode on iPhone.
- Next, tap on the screen to invoke the StandBy mode. (Thanks to the Always-On-Display functionality, you don’t need to hit the screen to bring the StandBy mode into action on iPhone 14 Pro/14 Pro Max).
- Next, you need to swipe left to go to the second screen.
- Next up, long-press on the image that shows up on the screen.

- Up next, swipe up/down to view all the available themes.
- Hit the “Eye” icon at the top-left corner of each photo collection in order to show or hide it from the photo view.
- Note that once a photo collection is hidden, a line appears through the “Eye” icon as a confirmation. Besides, the excluded photo collection is also dimmed a bit.
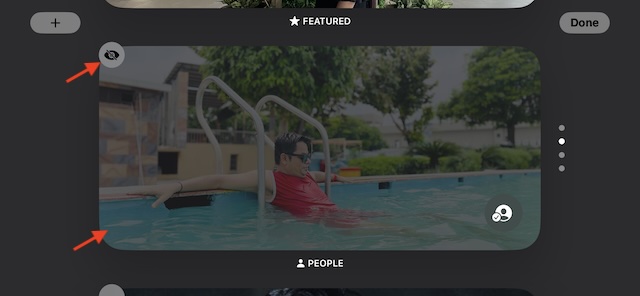
- To add an album to the photo view, tap on the “+” button in the upper-left corner of the screen.

- Then, pick the preferred album from your Photos app.

- In order to remove any photo album, tap on the “-” button at the top left corner of the photo album.
- In the end, be sure to tap on“Done” to confirm and you are all set!

Wrapping up…
There you go! So, that’s how you can ideally customize your photo view in the iPhone StandBy mode. If you wish to unlock all the cool features of this brand-new Lock Screen mode, be sure to check out the related guides including the ability to customize widgets, and change the iPhone clock style in the Standby mode. Additionally, also read the massive roundup of the best tips and tricks to use iPhone StandBy.
Read more: 110+ Best iOS 17 Hidden Features: Time to Dig Deeper!