Whether you are a pro or a novice snapper, taking control of exposure, which controls the brightness of an image, is key to capturing a stunning shot. In what could be music to your ears, adjusting exposure in iPhone photos is a breeze. What’s more, you can fine-tune the exposure not only in the iPhone camera app before snapping a shot but also in the Photos app after you have captured an image. That means if you find any image too bright or too dark, you can easily fix it during editing. That said, let’s get started!
Perfectly Adjust Exposure in iPhone Photos (Video)
To let you take photos with enhanced control, the stock camera app lets you fine-tune the intensity of brightness using a neat slider and also lock the focus/exposure. Thus, there is very little chance of any photo being over or under-exposed. Of course, if your eyes ever fail to spot the glitch, the built-in exposure tool in the Photos app is always there to get the job done for you.
Adjust Exposure in iPhone Camera
- First off, open the Camera app on your iPhone.
- After that, point the camera at something that you want to capture.
- Then, you need to tap anywhere on the screen to reveal the automatic focus area and exposure setting.
- After that, you can tap where you wish to move the focus area.
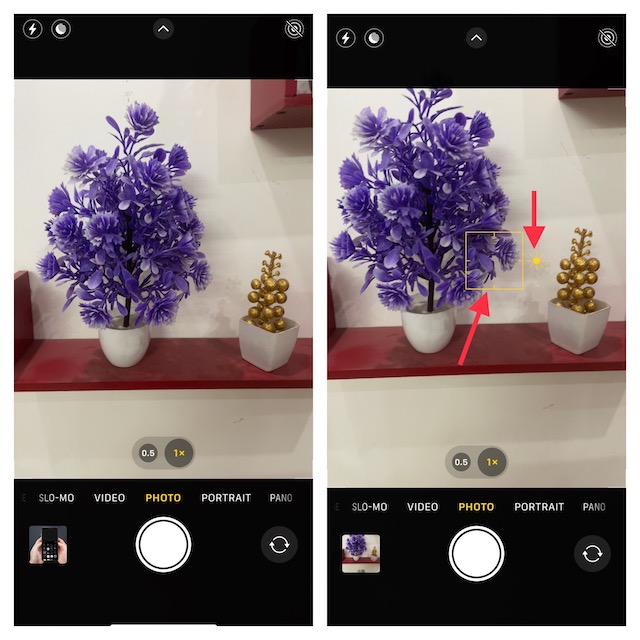
- Next, you can drag the slider up or down to perfectly adjust the exposure.
- If you would like to lock your manual focus and exposure settings for upcoming shots, just touch and hold the focus area until the AE/AF Lock appears at the top.
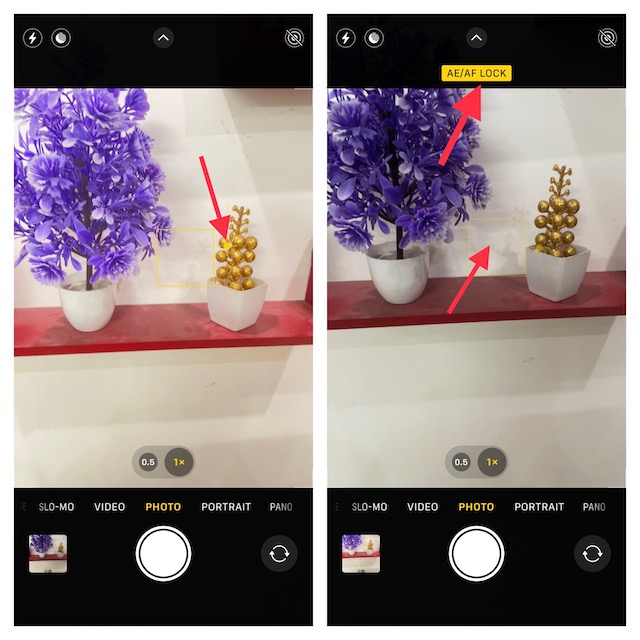
- If you ever want to unlock the settings, simply tap anywhere on the screen.
Adjust Exposure of Any Image Using Photos App on iPhone
Fine-tuning the exposure of any image in the Photos app is just as straightforward.
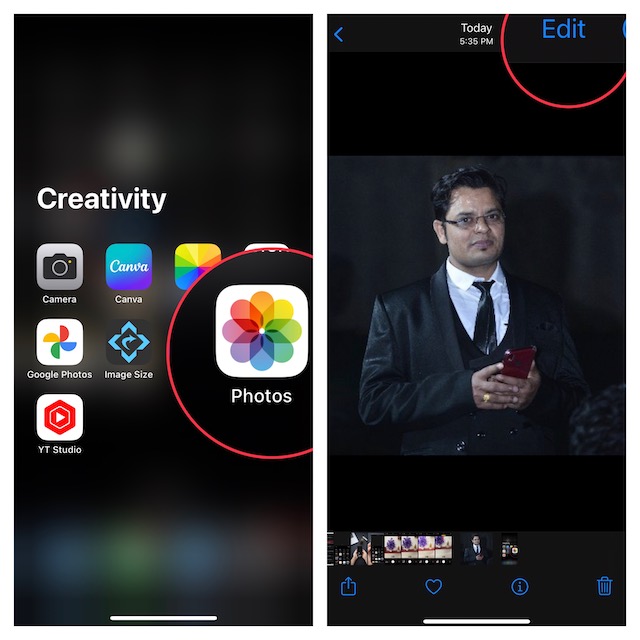
- To get going, launch the Photos app on your iPhone.
- After that, open the image with which exposure you would like to adjust.
- Then, tap on the Edit button at the top right corner of the screen.
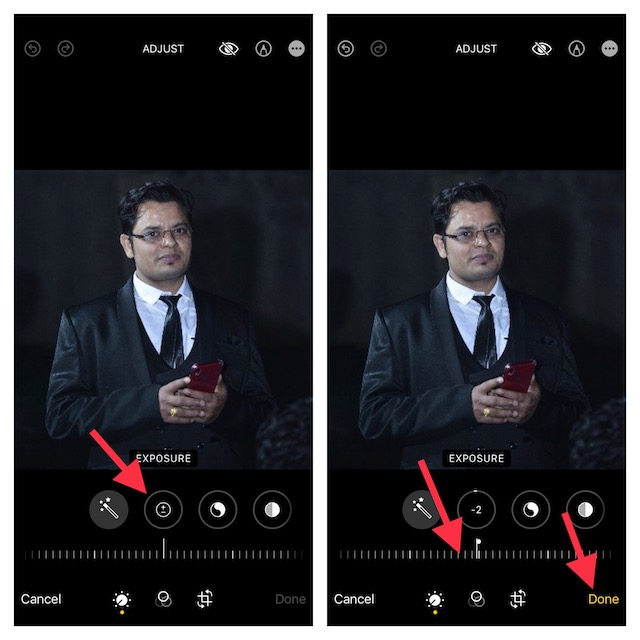
- Next, tap on the Exposure button at the bottom of the screen.
- Next up, you can drag the slider left or right to perfectly adjust the exposure of the image.
- When you are happy with the result, make sure to tap on Done at the bottom right corner of the screen to confirm the action.
- Later, if you want to revert the change, tap on the Edit button -> then hit Revert at the bottom right corner of the screen -> Revert to Original to finish.
There you go! So, that’s how you can ideally adjust the exposure of a photo on iPhone. Now that you have mastered this handy photography tip, get the most out of it to shoot pro-looking shots or fix the under-exposed images.
Read more: How to Allow/Disallow Multiplayer Games in Game Center on iPhone and iPad