Considering that outdated apps are problematic and tend to create too many issues, it’s always recommended to keep apps updated. But, it’s easier said than done, isn’t it? Most of us forget to manually update apps from time to time. As a result, they not only eat into more battery life but also cause our Mac to slow down. Not to mention, they also make our computers more vulnerable to malicious attacks. That’s why it’s better to go for the automatic update. Here is how you can automatically update apps in macOS 13 Ventura on Mac.
How to Automatically Update Apps on Mac in macOS 13 Ventura or Later
With a complete redesign, the System Settings (formerly System Preferences) looks in line with the Settings app for iOS and iPadOS. While we love the intuitive user interface of the redesigned Settings app for macOS, a lot of things have changed including the process to update apps automatically. But bother not, this quick guide has got you fully covered.
Step 1. To get started, open the System Settings app on your Mac. Or, select the Apple menu at the top left corner of the screen and hit System Settings in the drop-down menu.

Step 2. In the System Settings menu, click on General.
Step 3. Now, click on Software Update.

Step 4. Click on the tiny “info” button next to Automatic Updates.

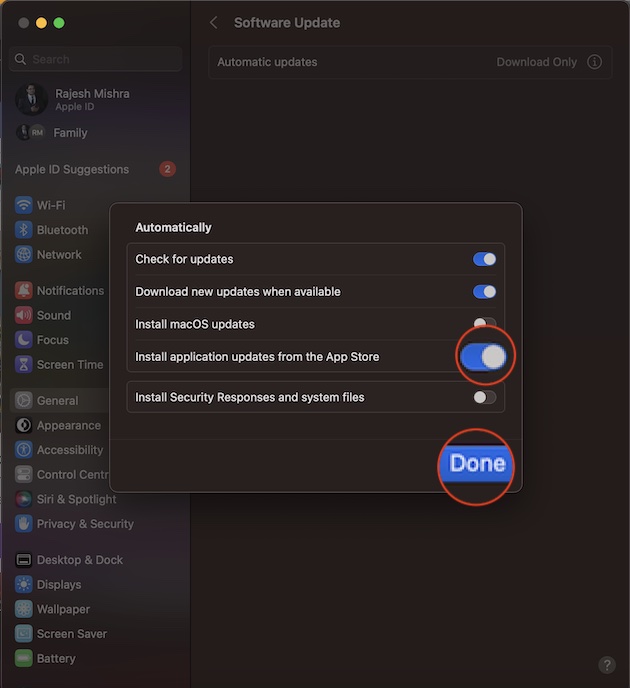
Step 5. Turn on the toggle next to Install application updates from the App Store.
Step 6. Make sure to click on Done in the menu.
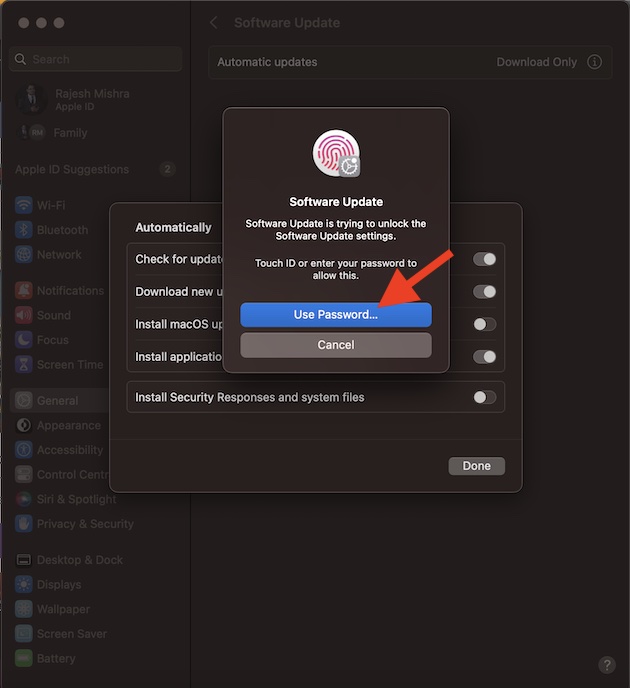
Step 7. Finally, authenticate using your administrator password or Touch ID to confirm.
That’s pretty much it! From now onwards, apps will be automatically updated on your macOS device. Later, if you ever want to change this behavior, return to this very setting and turn off the toggle.
Frequently Asked Questions
Q 1. How do I update non-App Store apps on Mac?
Updating non-App Store apps on Mac is pretty simple. Open the app that you want to update and then head into the Help or the settings menu. After that, look for the software update option and then do the needful.
Q 2. Why can’t I update my Mac apps?
Sluggish internet connection is one of the main reasons why apps fail to update on Mac ( or for that matter on any device). If the issue persists, sign out of Apple ID and sign back in.
Wrapping up…
Personally, I prefer to keep the auto-update for apps always enabled. It helps not only get the most out of apps but also prevents them from causing issues. What about you?
You may also like: