Though macOS offers a pretty quick way to convert images on Mac, I prefer to use an image-converting folder to convert several photos even faster on Mac. So, if you have to convert a ton of images repeatedly on your Mac, I would recommend you take advantage of this super handy feature. If it sounds fascinating to you, let me show you how it works.
How to Create an Image-Converting Folder on Mac
Before moving ahead, it would be better to talk about how this productivity-centric feature works for a clear understanding!
So, How Does This Hack Work?
Well, it requires you to use an app called “Automator” to create an image-converting folder on your Mac. Once you have created the smart folder, you will be able to automatically convert images by just dropping them inside.
Note that Automator has existed on macOS for a long time and is designed to let users automate tasks. Hence, you don’t need to be running the latest version of macOS to get the most out of this app.
Use Automator to Create an Image Converting Folder on Mac
- To get started, launch Automator app on your Mac. Just press the Command+Spacebar -> type in Automator and launch it.
- Now, click on New Document.
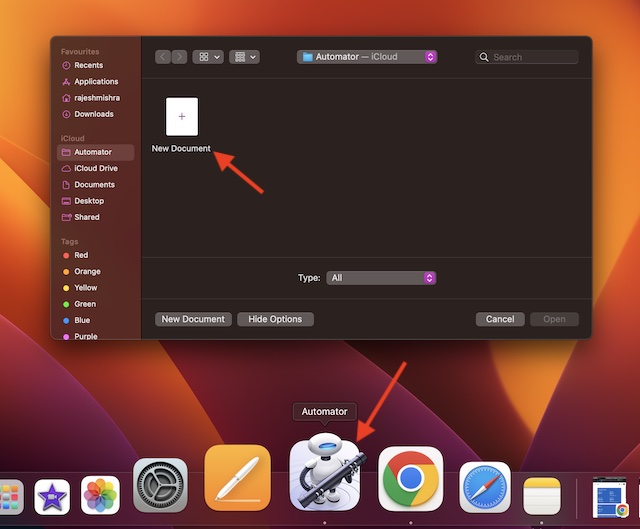
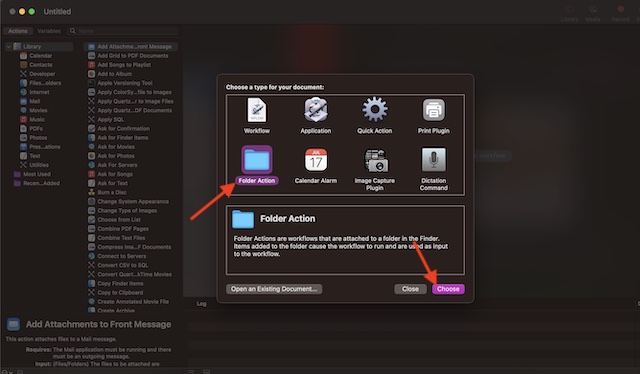
- Next, you need to select Folder Action as the type of document. After that, click on Choose to proceed. For those unaware, folder actions are workflows that are attached to a folder in the Finder. Notably, the items added to the folder trigger the workflow to run and are used as input to the workflow.
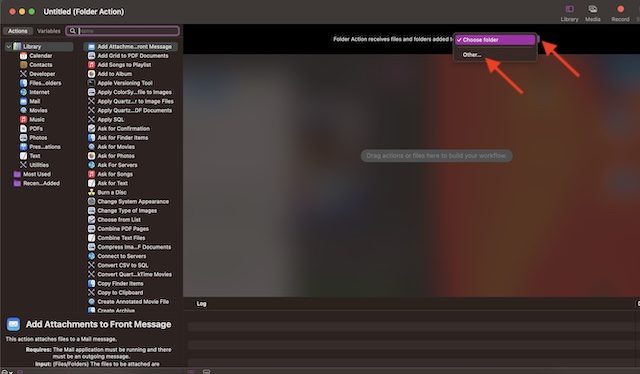
- Click on the dropdown next to Folder Action receives files and folders added to at the top of the workflow area, and then choose Other… in the drop-down menu. =
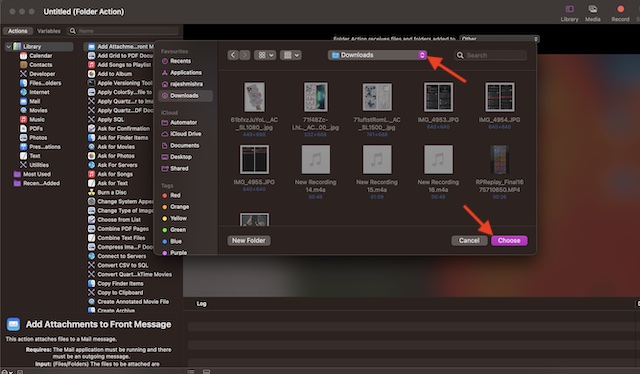
- After that, select the folder which you want to use for the image conversion action. For the purpose of this guide, I’m going to choose the Downloads folder.
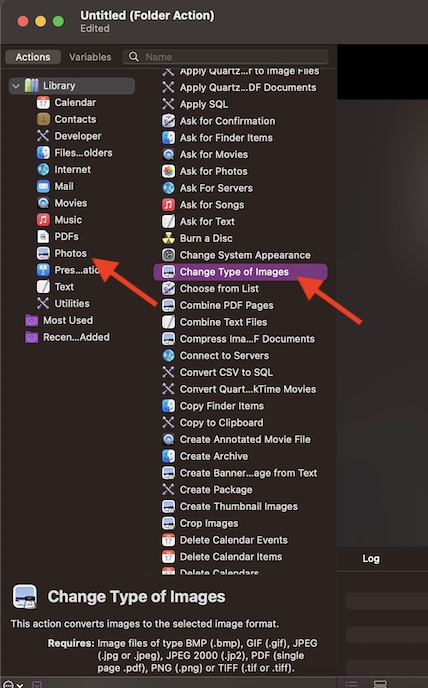
- Select Photos located from the library sidebar on the far left.
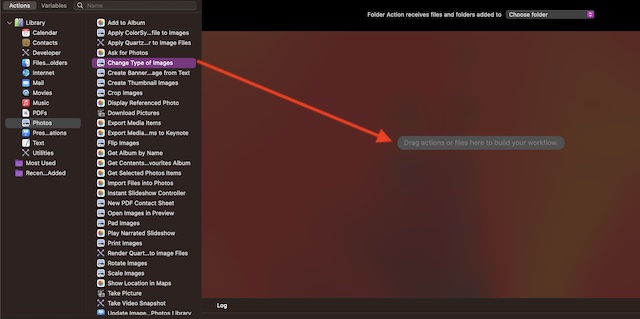
- From the Actions column, you need to drag the Change Type of Images to the workflow area on the right.
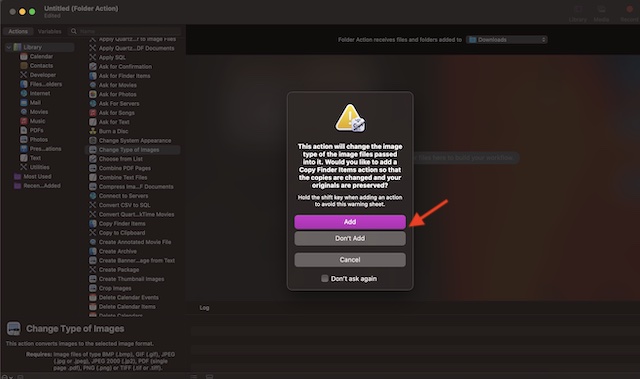
- Next, a dialog prompt will show on the screen. If you want this custom action to convert copies of images placed in the folder, while also preserving the originals, choose the Add option. However, if you want it to just convert the original images, choose the Don’t Add option.
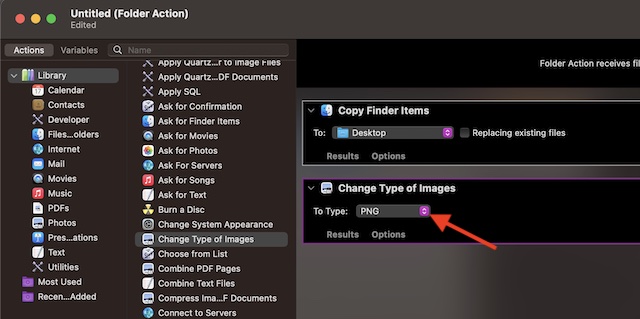
- In the Change Type of Images action panel, you need to select the file format that you want images to be converted to. I’m going to choose PNG.
- Next, click on the File menu and choose Save. Alternatively, press Command-S to bring up the new file action.
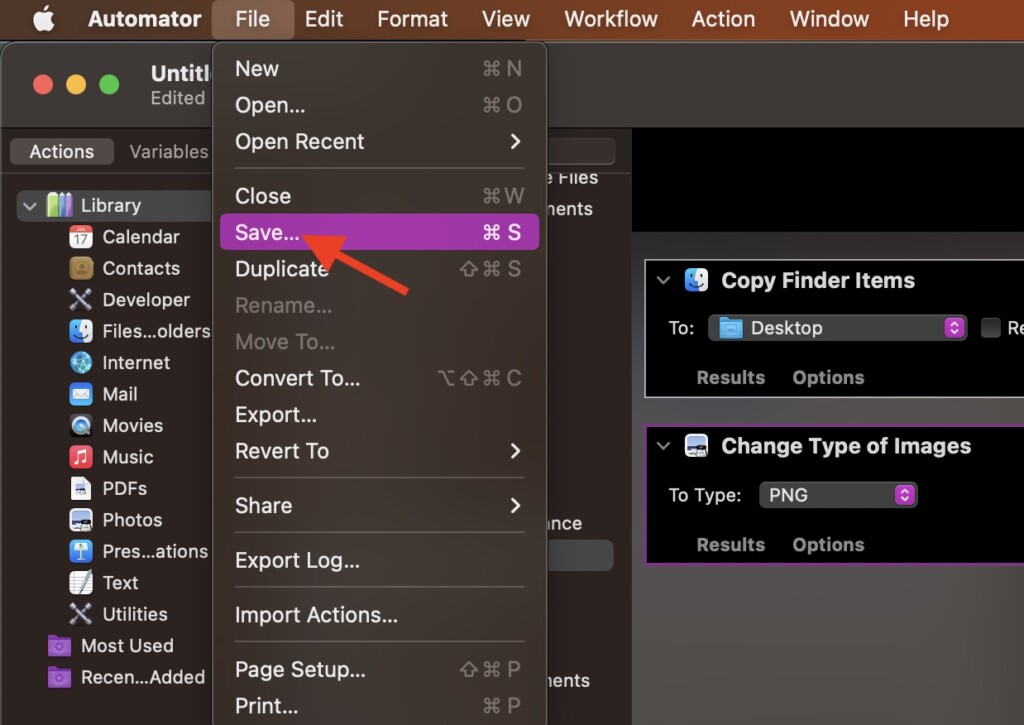
- After that, give a suitable name to the folder action and hit Save.

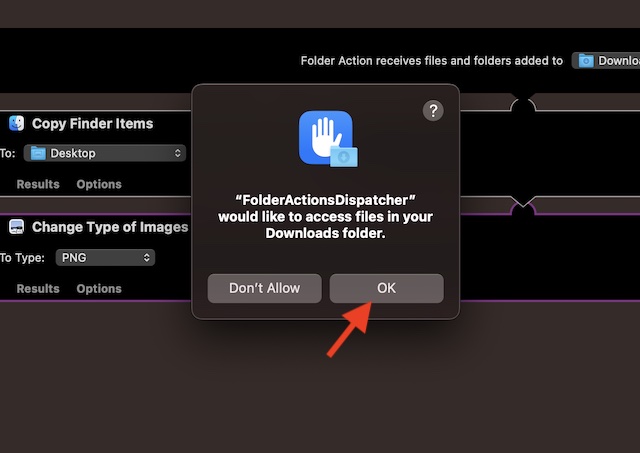
- Finally, a popup will appear on the screen asking you to allow the “FolderActionsDispatcher” to access files in the Downloads folder. Then, click on OK to confirm.
That’s pretty much it! You have successfully created an Image-Converting Folder on your Mac.
From now onwards, you will be able to convert an image into your desired format using this smart folder. Simply, drag an image into the folder and you are good to go!
Read more: How to Show More or Fewer Recent Apps in Your Mac’s Dock