Firewall has long been a notable security feature. What makes it so important is the ability to safeguard your Mac from malicious attacks by blocking all unwanted connections from the internet or other networks. To ensure you have the desired control, macOS offers you the flexibility to choose how much to block incoming connections and allow unrestricted connections from selected apps. Considering how pivotal this feature is, you would like to learn how to enable and customize Firewall in macOS 13 Ventura on Mac. Read on…
Enable and Customize Firewall on Mac in macOS 13 Ventura or Later
While the basic Firewall has existed in macOS for a long time, it was the OS X 10.5 Leopard that brought this security feature to the forefront of attention. The subsequent versions of macOS have further enhanced this security shield and also given you the freedom to let fine-tune it in line with your preference.
- First off, launch the System Settings app on your Mac. Alternately, click on the Apple menu at the top left corner of the screen and choose System Settings in the drop-down menu.

- After that, click on Network in the sidebar.
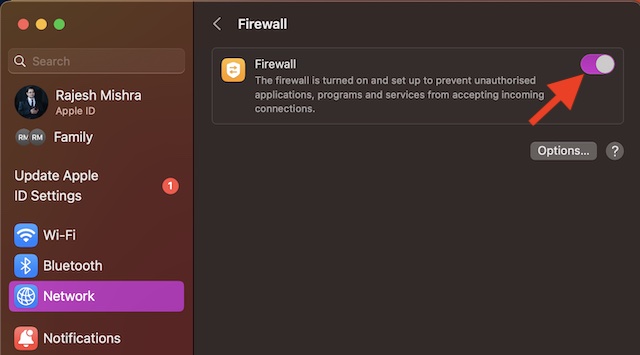
- Next, click on Firewall.

- Finally, click on the toggle next to the Firewall to turn it on.
Customize the Firewall on Your Mac for Enhanced Protection
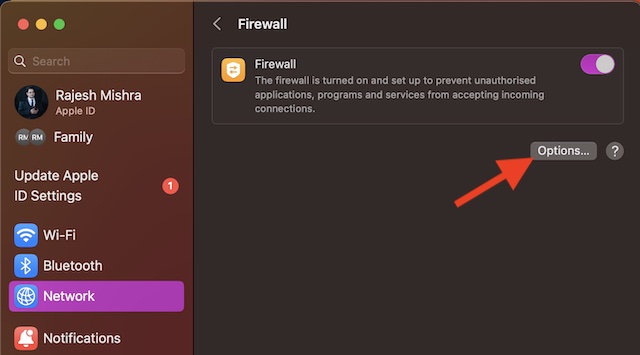
Customizing the Firewall settings is just as straightforward.
To do so, click on the Options button. After that, do the following as per your needs:
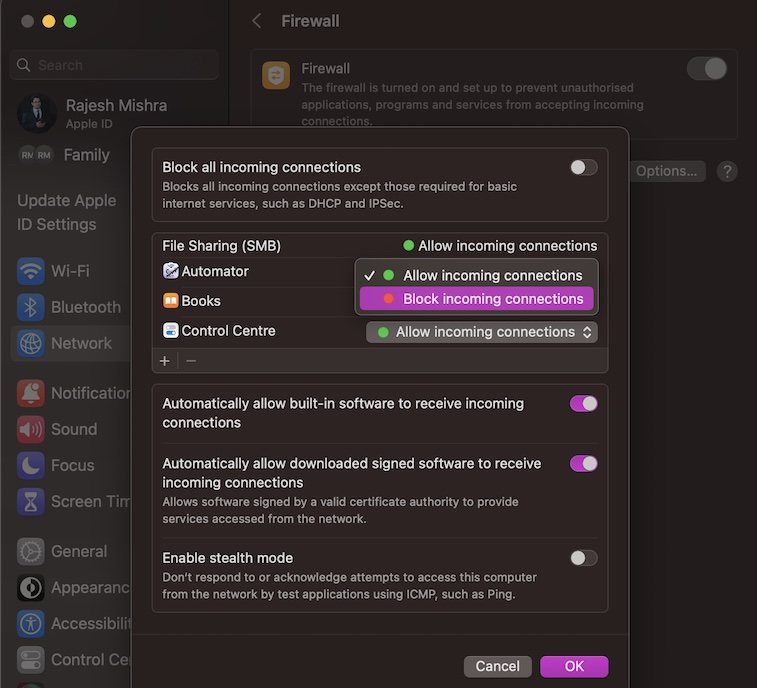
- Block All Incoming Connections: You can choose to block all incoming connections except those required for basic internet services, such as DHCP and IPSec. To do so, turn on the toggle next to Block all incoming connections.
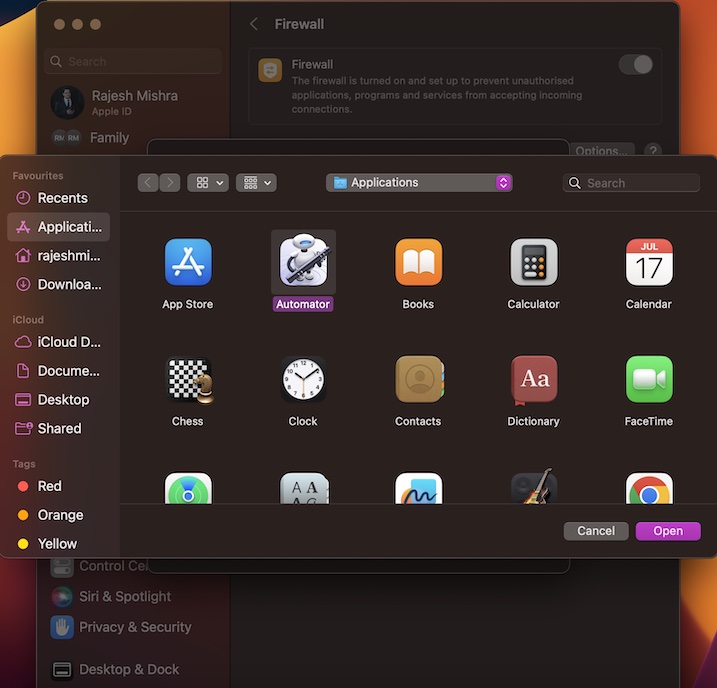
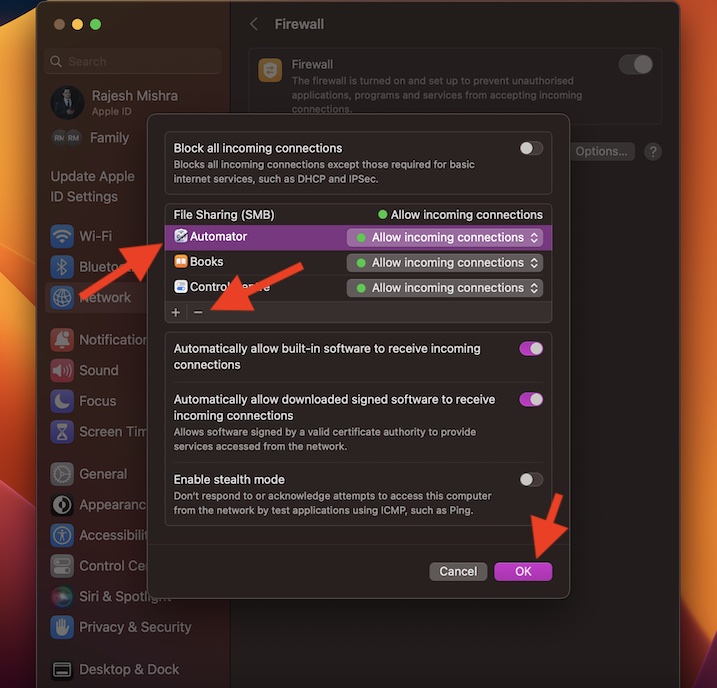
- Allow Incoming Connections from Specific Apps: Click on the “+” button and then choose an app from which you want to allow incoming connections without any hindrance.
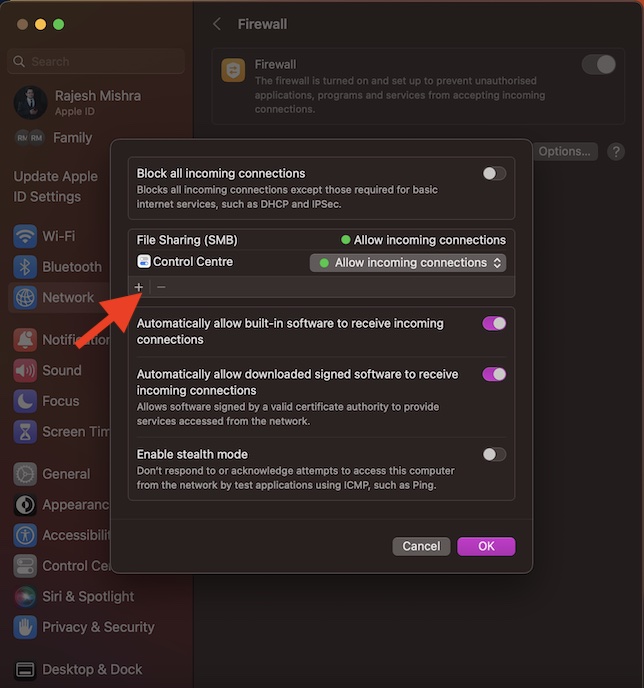
- Disallow Incoming Connections from a Particular App without Removing It from the List: Do note that you can prevent incoming connections from a particular app without having to remove them from the list. To do so, click on the drop-down menu right next to the app and choose Block incoming connections.
- Remove an App/Service from Allowing Incoming Connections: If you no longer want to allow incoming connections from a specific app, select the app in question and then hit the “-” minus button.
- Automatically Allow the Built-in Software to Receive Incoming Connection: For a seamless experience, you can allow the built-in apps and services, which are signed by a valid certificate authority, to be automatically included in your list of allowed apps even without authorization.
- Automatically Allow Downloaded Signed Software to Receive Incoming Connections: Use this option to allow the downloaded apps and the services, which have been signed by a trusted authority, to be automatically listed in your collection of allowed apps without your authorization.
- Enable Stealth Mode. With this mode enabled, you will be able to stop your Mac from responding to probing requests which can be used to find its existence. Note that your Mac can still answer requests from authorized apps. However, unauthorized requests such as ICMP won’t get any response.
Once you have perfectly customized the Firewall, make sure to click on OK at the bottom right corner of the window to confirm the changes. And that’s about it!
Disable Firewall on Your Mac
Later, if you ever want to turn off Firewall in order to allow incoming connections without any obstructions whatsoever, you can do so with ease.
- On your Mac, open the System Settings app -> Network -> Firewall and then turn it off.
Wrap up…
There you go! Now, you know how to activate and fine-tune the Firewall to your liking on Mac. Do you still have any doubts lingering in your mind? If yes, be sure to shoot it via the comments below.
Read more: 32 Ways to Fix iPad/iPhone Not Showing in Finder/iTunes on Mac or Windows PC