Changing the App Store country region on iPhone or iPad is as simple as it can ever get. Hence, as and when the need arises, you can switch the country of the App Store without any hassle. However, there are certain terms and restrictions that you need to keep in mind, failing to do that will block your path. So, whether you have moved to another country or found an exciting app that is yet to be rolled out in your region and wish to install it, this detailed guide has got your back.
Best Tips to Fix ‘Can’t Change App Store Country/Region” on iPhone, iPad & Mac
To begin with, I would first recommend you check out some of the usual suspects that often come in the way.
So, what could be preventing you from switching the App Store’s country on your iDevice?
When faced with this frustrating issue, you should first take care of the basics. And with the basics, I mean making sure that your payment method and billing address are in line with the requirements. Additionally, you should also pay special attention to things like your active subscriptions, store credits, and pre-orders as they often tend to block the path. Above all, you should never take your eyes away from the villains like software bugs and server outages.
1. Find Out How to Change the App Store Country or Region
To ward off any confusion lingering around, let’s first find out all the ways to change the App Store country on iDevices. Even though the process is quite straightforward, not everyone might be aware of the App Store rules and the prerequisites.
Use your iPhone/iPad to Change App Store Country or Region
- Open the Settings app on your iPhone or iPad -> your name -> Media & Purchases -> View Account.
- If prompted, sign in to your account.
- After that, tap on Country/Region -> Change Country or Region.
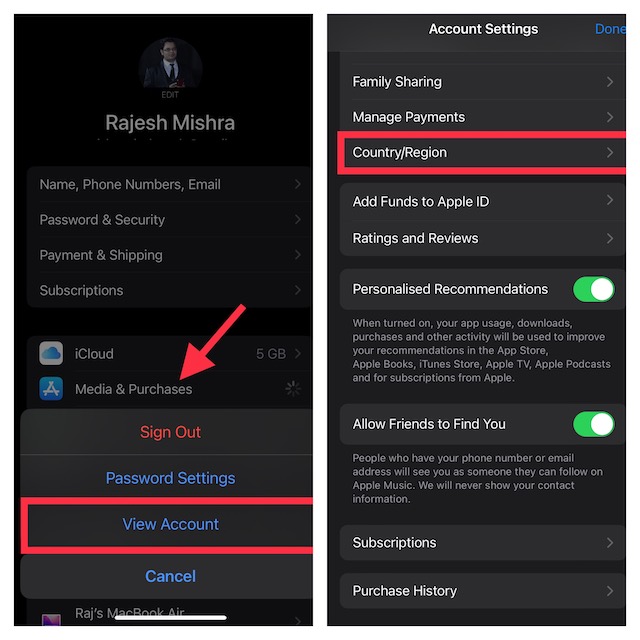
- Select your new country -> agree to the Terms and Conditions -> choose a preferred payment method and then enter the required details including the billing address.
Use Your Mac or Windows PC to Change Your App Store Country or Region
- Launch Apple Music or iTunes on your computer -> Click on the Account menu at the top -> View My Account/Account Settings.
- Next, sign in with your Apple ID.
- On the Account Information page, click on the Change Country or Region.
- Select your new country/region -> agree to the terms and conditions and enter your new payment information and billing address.
Change App Store Country or Region on Web
- Open a browser and go to appleid.apple.com.
- Now, click on Personal Information -> Country/Region.
- Next, follow the onscreen instructions to change it. Make sure to enter a valid payment method for your new country.
2. Leave a Family Sharing Group
Keep in mind that if you are a part of a Family Sharing group, Apple may not allow you to change your country or region. Hence, leave the Family Sharing group you are part of.
On iPhone and iPad
- Head over to the Settings app -> Family under your profile (or tap on your name -> Family) -> your name -> Stop Using Family Sharing.

On Mac
- Go to the System Settings app -> Family -> your name -> Stop Using Family Sharing.
Note: In macOS Monterey or earlier, navigate to the System Preferences app -> Family Sharing -> Details next to your name -> Stop Using Family Sharing.
3. Make Sure You Have Spent Any Balance Remaining on Your Apple ID
Another essential requirement that you must tick off before going any further is to ensure that you have spent all your balance remaining on your Apple ID. There are multiple ways to check your balance.
Check Your Balance on iPhone or iPad
- Open the App Store -> tap on your profile at the top-right corner of the screen -> your balance should appear under your Apple ID.
Check Your Balance on Mac
- Launch App Store on your Mac -> check out the balance at the top bottom of the sidebar right below your profile.

4. Cancel All Your Subscriptions
Make sure to cancel all your subscriptions and also wait until the end of the subscription. Else, you won’t be allowed to change your country.
Cancel a Subscription on iPhone and iPad
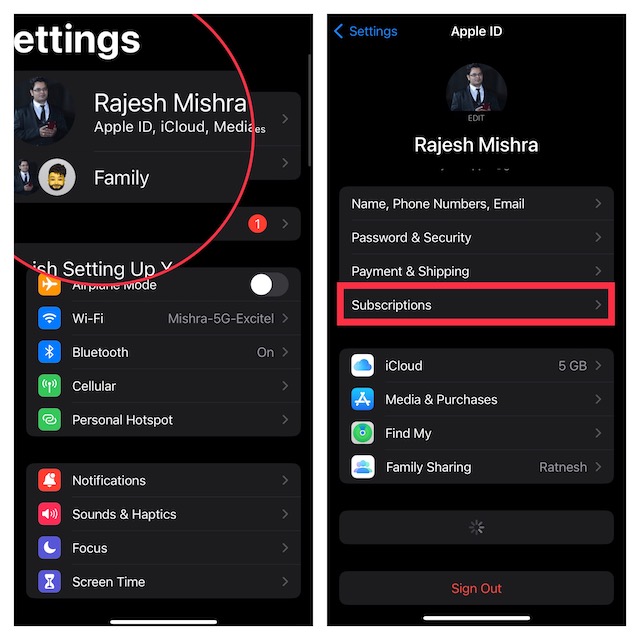
- Open the Settings app -> your name -> Subscriptions.
- Tap on the specific subscription -> hit Cancel Subscription and confirm. You can repeat the same steps to cancel all the subscriptions.
Cancel a Subscription on Your Mac
- Launch the App Store -> your name -> Account Settings -> head over to the Subscriptions section and hit Manage.
- Go to a specific subscription -> Edit -> Cancel Subscription.
Cancel a Subscription on Your Windows PC
- On your Windows PC, launch iTunes -> choose Account at the top -> View My Account.
- Scroll to the Settings section and hit Manage located next to Subscriptions.
- Find the subscription -> Edit -> Cancel Subscriptions.
5. Wait for Any Memberships, Movie Rentals, and Season Passes to Complete
Be sure to wait for all memberships, movie rentals, and season passes to complete. Otherwise, you won’t be allowed to change the country of the App Store.
6. Be Sure to Let Pending Store Credit Refunds Process
You must allow your pending store credit refunds to process.
7. Make Sure to Cancel All Your Pre-Orders
If you don’t want to let your pre-orders complete, be sure to cancel them.
Cancel Pre-Orders on iPhone and iPad
- Head into the App Store -> your profile at the top right corner of the screen -> your name -> tap on Pre-Orders for pre-orders or tap on Arcade Gaming Coming Soon for Arcade Games.
- Next, tap on the item you wish to cancel and then follow the instructions to finish.
Cancel Pre-Orders on Your Mac
- Go to the App Store -> click on your name at the bottom right corner of the screen -> Account Settings/View Information at the top of the window.
- Scroll down to find Pre-Orders -> Manage Pre-Orders/Arcade Games Coming Soon.
- Click on an item and then follow the instructions to cancel it.
Cancel a Pre-Order on Windows PC
- Open iTunes on your computer -> click on the Account menu at the top -> View My Account -> Manage Pre-Orders and then do the needful.
8. Make Sure You Have Set Up a Valid Payment Method
It’s also important to state that you have to set up a valid payment method for your new country or region.
- Note that in the US, you can use Apple Card, Apple Pay, Apple Cash, most credit and debit cards, PayPal, and Apple Account balances.
- To find out which payment methods are used in a particular country, head over to the Apple Support website.
9. Make Sure App Store is Not Down or Faced with a Technical Issue
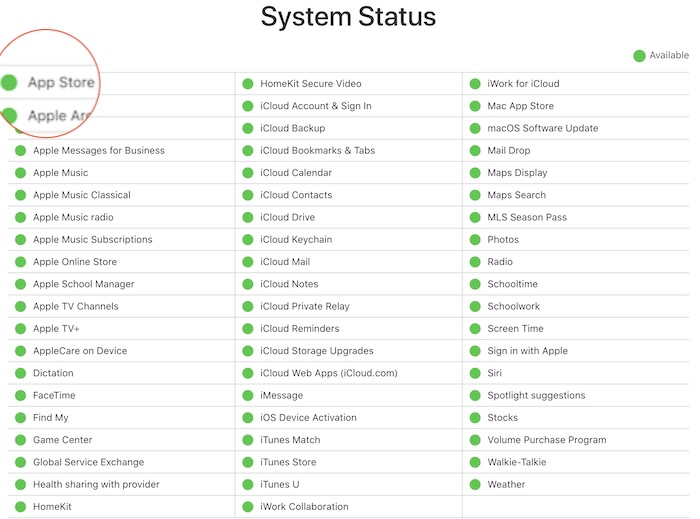
If Lady Luck has continued to elude you, it would be wise to ensure that the App Store is running as usual and that it’s not embroiled in any technical issues.
- To check the App Store status, go to the Apple System Status page and make sure that the App Store is live and functioning as usual.
10. Sign Out of Apple ID and Sign Back In
If you are still unable to change your App Store country on your iDevice, sign out of your Apple ID and sign back in.
On your iPhone or iPad
- Open the Settings app -> your name -> Sign Out. Keep a copy of all the important items and hit Sign Out.
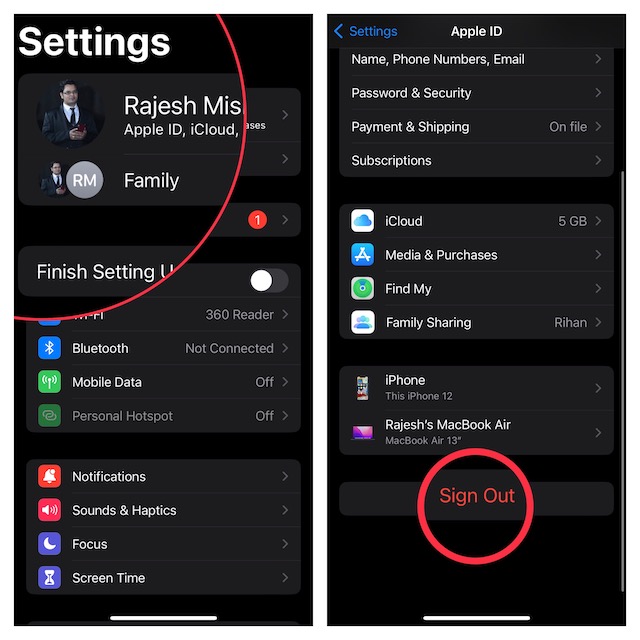
- After that, sign in to your account.
On Mac
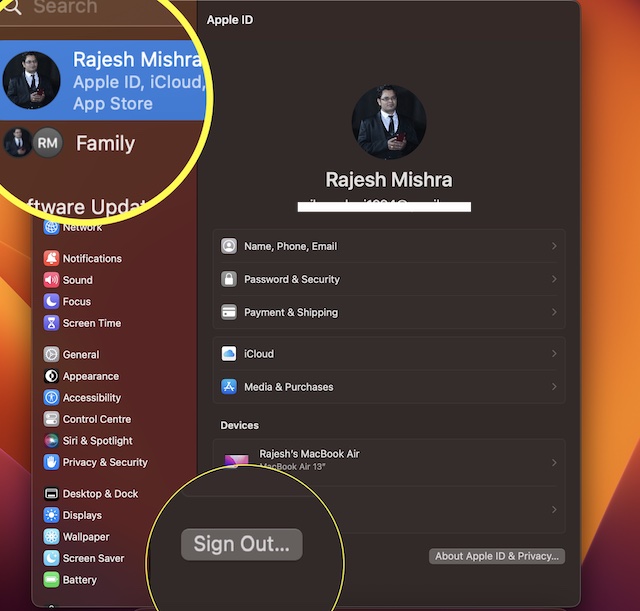
- Click on the Apple menu icon at the top left -> System Settings -> your name -> Sign Out. Wait for a few minutes and then sign in to your account.
11. Update Software
If none of the tips have worked in fixing the App Store problem, try updating the software as there is a high chance that the problem might be due to a software bug. Don’t be disheartened as Apple often releases software updates with plenty of performance enhancements and bug fixes. So, it’s likely to resolve the problem.
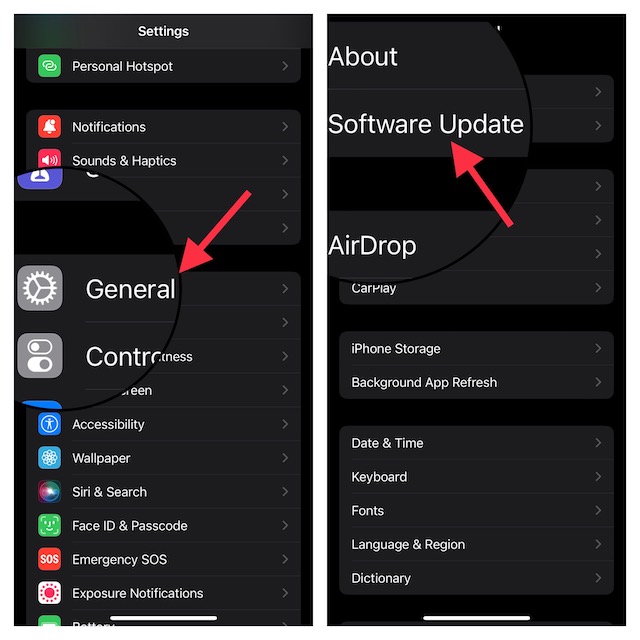
On iPhone and iPad
- Go to the Settings app -> General -> Software Update -> download and install the latest version of iOS or iPadOS on your device.
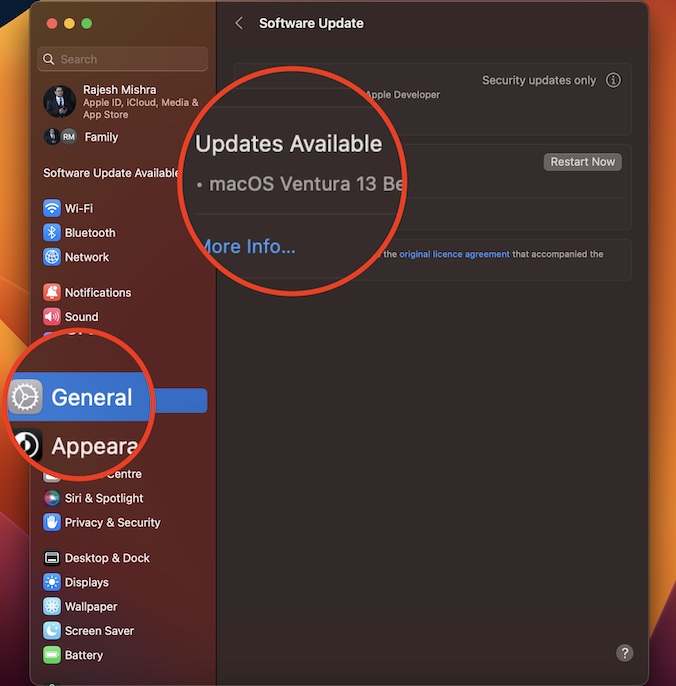
On your Mac
- Open the System Settings app -> General -> Software Update. Then, download and install the latest version of macOS.
Fixed Unable to Change App Store Country or Region on iDevice With Ease
There you go! I hope you have successfully resolved the App Store issue. Let me know the trick that has enabled you to switch to the desired country or region in the App Store. As always, if you find any workable hack missing from this guide, make sure to tip me about that without fail.
Read more: 25 Tips to Fix iOS 16 Battery Drain Issue on iPhone and iPad