Thanks to the seamless and secure autofill feature, logging into apps and websites feels ever so smooth sailing. As someone who hates to remember passwords, let alone fill them up repeatedly and spare time to manage them, I love this feature more than anything else. Unfortunately, it doesn’t always work as expected. That’s why I thought it would be helpful to talk about various ways to fix AutoFill passwords not working on in iOS 17 iPhone and iPad. So, if you have found yourself on the wrong end of this frustrating issue, these 18 tips will come to your rescue.
Fix AutoFill Passwords Not Working on iPhone and iPad
Integrated with the iCloud Keychain, the built-in password manager, the AutoFill password leaves very little room for complaint. However, it has had its fair share of issues. Before going on to resolve it, let’s figure out some of the possible reasons that tend to prevent the autofill feature from working:
- Technical outage
- Wrong configuration
- Accidental deletion of iCloud Keychain data
- Incognito mode
- Lack of support
- Outdated apps
- Software bug
We have looked at each one of the above villains to troubleshoot the problem. So, chances are pretty high that you will be able to bring the autofill password back on track after trying out the suggested tips.
Note:
- While this guide has been updated in accordance with iOS 17, you can make the most of these tips to troubleshoot the AutoFill password issues in older iOS versions as well.
1. Make Sure That iCloud Keychain is Enabled on Your iPhone or iPad
To get going, ensure that you have enabled the iCloud Keychain on your device. While it may sound funny to many, it’s always better to start with the basics.
- On your iPhone or iPad, open the Settings app -> your profile -> iCloud.
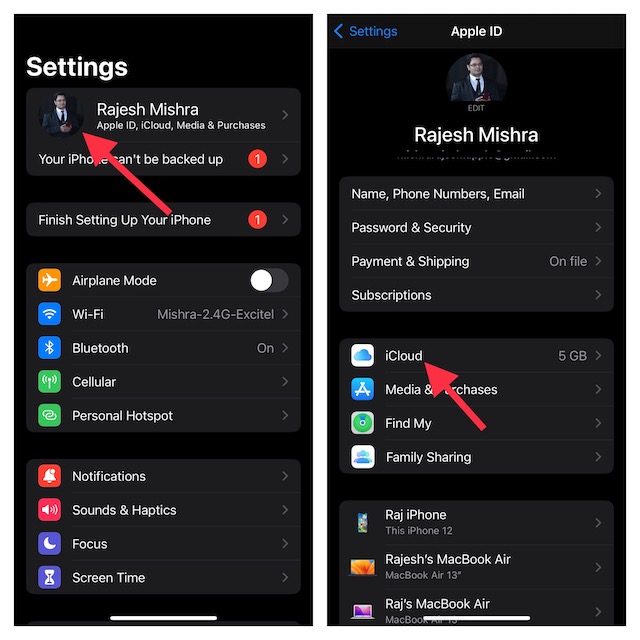
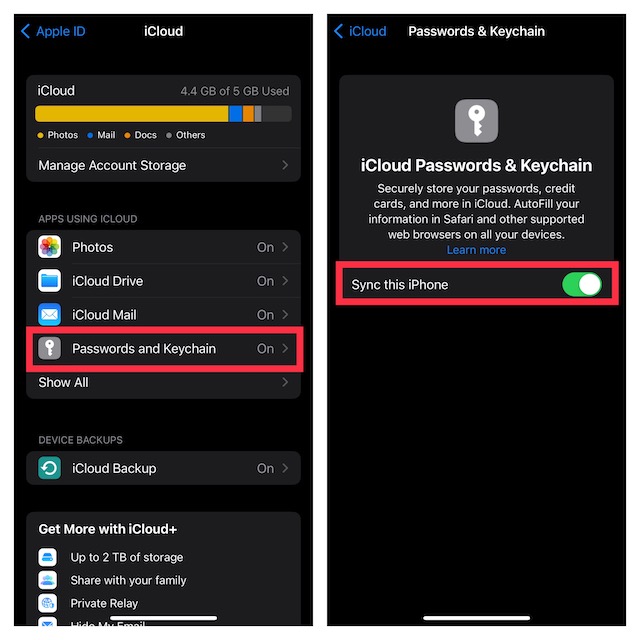
- Now, tap on Passwords and Keychain, and then make sure that the toggle for Sync this iPhone or iPad is turned on.
- Next, head over to any website or app and try to autofill the password to check if you have overcome the problem.
2. Ensure That AutoFill Toggles for Contact Info and Credit Cards are Enabled in Safari
iOS allows you to enable autofill for contact info and credit cards in Safari. Thus, you can automatically fill out web forms using your contact info and credit cards as and when the need arrives.
- Go to the Settings app on your device –> Safari -> AutoFill.
- Then, turn on the toggles for Use Contact Info and Credit Cards.

3. Allow Filling from iCloud Passwords and Keychain
Another important thing that you should do without fail is to allow filling from iCloud Passwords and Keychain.
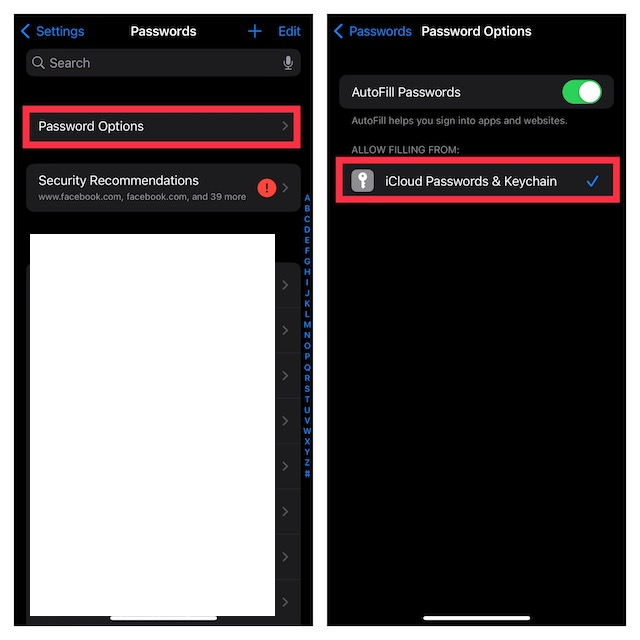
- Head into the Settings app on your iPhone or iPad -> Passwords -> Password Options.
- Under the Allow Filling From section, ensure that iCloud Passwords & Keychain is selected.
4. Disable Private Browsing Mode
Note that the autofill password does not work in the private browsing mode. Therefore, if you are trying to use the autofill password in Safari, ensure that the private browsing mode is disabled.
- To do so, open Safari on your iPhone or iPad -> touch and hold onto the tabs icon at the bottom right corner of the screen and then choose a general tab or a tab group.

- Alternately, launch Safari on your device -> tap on the X tabs in the bottom center of the screen and choose other tabs to get out of Safari’s private browsing mode.
5. Be Sure You Didn’t Delete Your iCloud Keychain Data Locally
Make sure you didn’t delete your iCloud Keychain data locally. Bear in mind that when you disable iCloud Keychain on all your devices and choose to delete your iCloud Keychain locally, it also wipes your entire Keychain data from iCloud servers.
6. Make Sure You Didn’t Use Keychain Access to Reset your iCloud Keychain on Your Mac
Ensure that you didn’t use Keychain Access to reset your iCloud Keychain on your Mac. If you did it, macOS wiped out your iCloud Keychain items. In this situation, you will need to set up iCloud Keychain again. Do note that if you ever happen to reset your Mac Keychain, make sure to temporarily turn off iCloud Keychain in iCloud Preferences before resetting the macOS Keychain.
7. Make Sure the Apps/Websites Support AutoFill Passwords
Even though it’s been several years since Apple introduced the autofill passwords, there are still many apps and websites that still do not support this feature. Thus, ensure that the apps or websites, where you want to use the autofill password feature, support this feature.
8. Make Sure You Have Added the Login Credentials for a Specific Website
It’s important to point out that you must add the login credentials for a specific website to autofill. If you haven’t done it yet, be sure to do it without fail.
9. Force Quit the App
At times, all you need to do to fix an ill-functioning app is to just force-kill it. So, whether the autofill popup does not seem to show or the app seems to feel unresponsive, give this nifty hack a try.
- On iPhone and iPad without the Home button: Swipe up from the Home bar and hold along the middle of the screen. Then, swipe up on the app card to close the problematic app.

- On iPhone and iPad with the Home button: Double-press the Home button to bring up the App Switcher and then swipe up on the app cards to kill the corresponding apps.
10. Turn OFF/ON AutoFill Passwords
Many a time, you can get rid of a common iOS issue just by turning on/off the feature. Considering how nifty yet effective it is, we will not miss out on this one.
- Open the Settings app on your iPhone or iPad -> Passwords -> Password Options -> turn off the toggle for AutoFill Passwords.
- After that, restart your device.
- Once your device has rebooted, enable AutoFill Passwords.
11. Reset the Password
Whenever I face the autofill passwords not working issue on my iPhone, one of the very first things that I try to do is reset the password. On most occasions, this simple trick works in fixing the problem. Guess what? I’m going to count on it to work wonder again.
- Head over to the Settings app on your iPhone or iPad -> Scroll down and select Passwords -> find the app/s which passwords are not working and then reset them.
12. Hard Reset Your iPhone or iPad
When you are up against an annoying issue like this one, you can’t overlook hard reset considering how effective it is.
- On iPhone 8/X or later and iPad without the Home Button: Press and quickly release the volume button. Then, press and quickly release the volume down button. After that, hold down the power button until the Apple logo appears on the screen.
- iPhone 7/7 Plus: Hold down the volume down button and the Home button at once until you see the Apple logo.
- On iPhone 6s or earlier and iPad with the Home button: Hold down the Home button and the power button simultaneously until the Apple logo shows up on the screen.
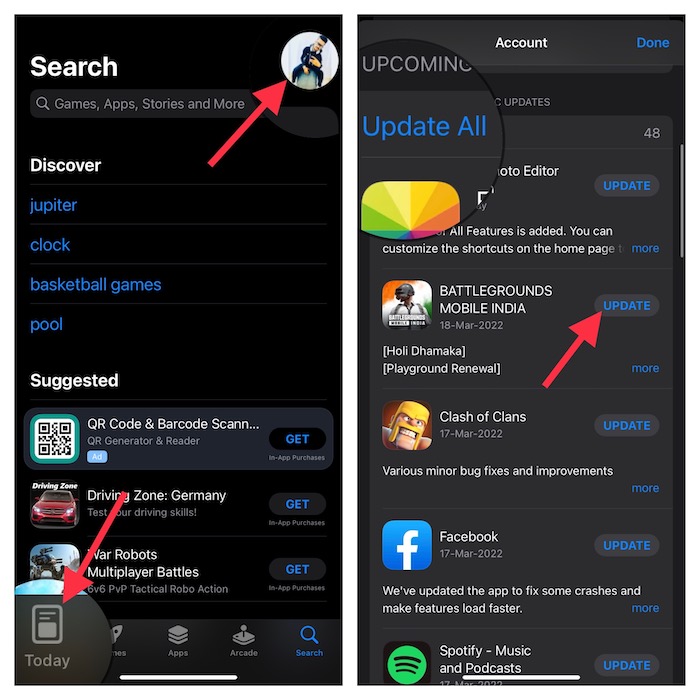
13. Update All Apps
If the auto-fill passwords are not working inside specific apps on your iOS device, update all those problematic apps. If you haven’t updated them for a while, the devil could be hidden in their outdated structure.
- Navigate to the App Store on your device -> tap on your profile at the upper right corner of the screen -> scroll down to find the list of apps that need to be updated.
- Then, update all apps at once or do it one by one.
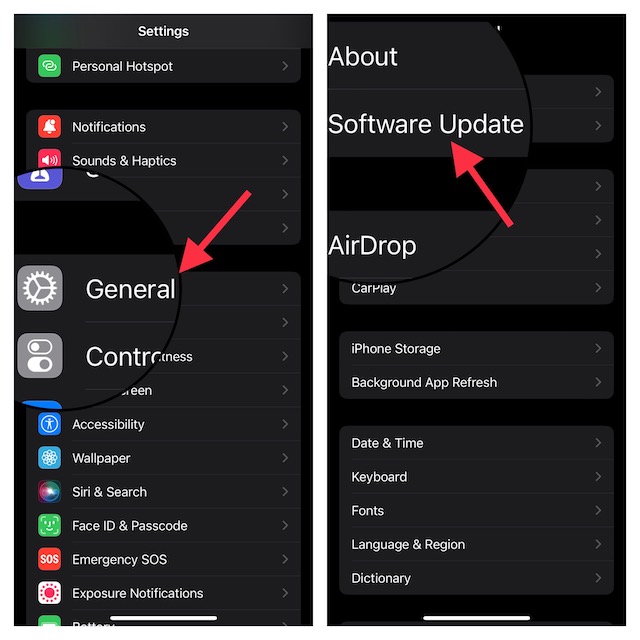
14. Update Software
These days, software bugs have become probably the biggest villain, especially on iOS. Therefore, I suspect a rare bug could be hindering the autofill passwords from functioning properly.
- Open the Settings app on your iPhone or iPad –> General -> Software Update and then download and install the latest version of the software.
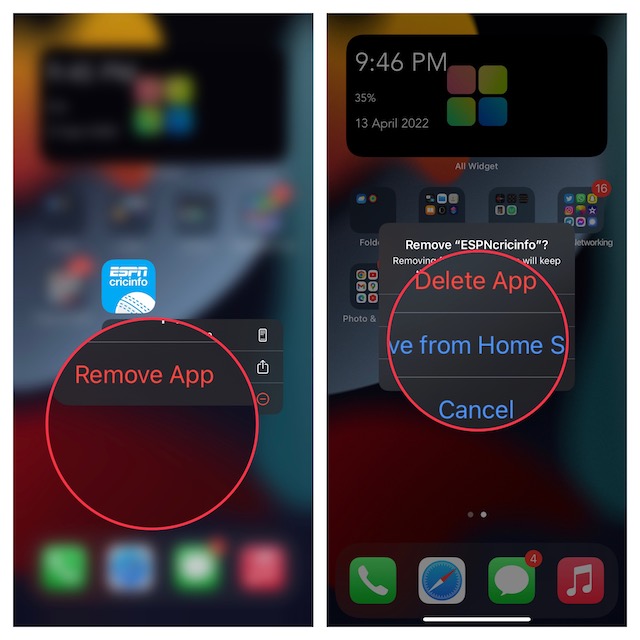
15. Delete and Reinstall All the Problematic Apps
If you still can’t autofill passwords for certain apps on your iPhone, delete and reinstall them. Make sure to back up the data before going for the kill.
- Simply, touch and hold onto the app icon -> Remove App -> Delete the App and confirm. Then, open the App Store -> find the apps and reinstall them.
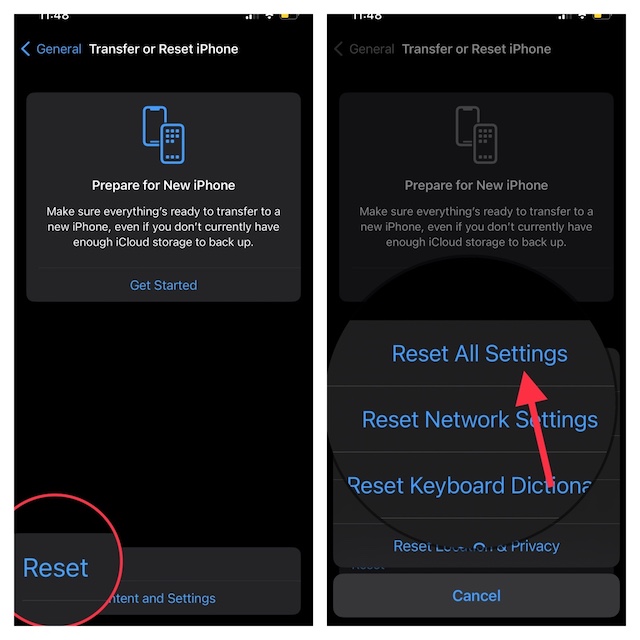
16. Reset All Settings
Factory reset is another reliable solution that comes in super handy when dealing with a persistent issue. Hence, we will give it a chance as well. For folks who are concerned about losing important data, let me assure you that a factory reset does not harm any media or data.
- Go to the Settings app on your iPhone or iPad -> General -> Transfer or Reset iPhone/iPad -> Reset -> Reset All Settings.
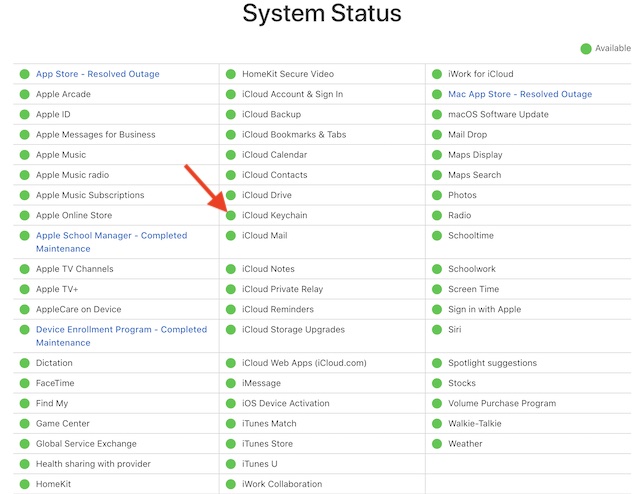
17. Make Sure iCloud Keychain is Not Facing Any Outage
If iCloud Keychain is going through an outage, you can’t do anything but wait until Apple fixes the problem. Hence, if the built-in password manager continues to struggle even after you have checked off all the basics, go to Apple’s System Status page and make sure that the circle next to the iCloud Keychain is green. Just in case the iCloud Keychain’s circle is showing orange, take a cup of coffee and allow the Cupertino giant to resolve the problem.
18. Sign Out of Apple ID and Sign Back In
Should the autofill functionality continue to misbehave, I would suggest you sign out of Apple ID and sign back in. A fresh sign-in may help in fixing the problem.
- Launch the Settings app on your device -> your profile -> tap on Sign Out. Be sure to keep a copy of all the important data so that you won’t lose it before confirmation.
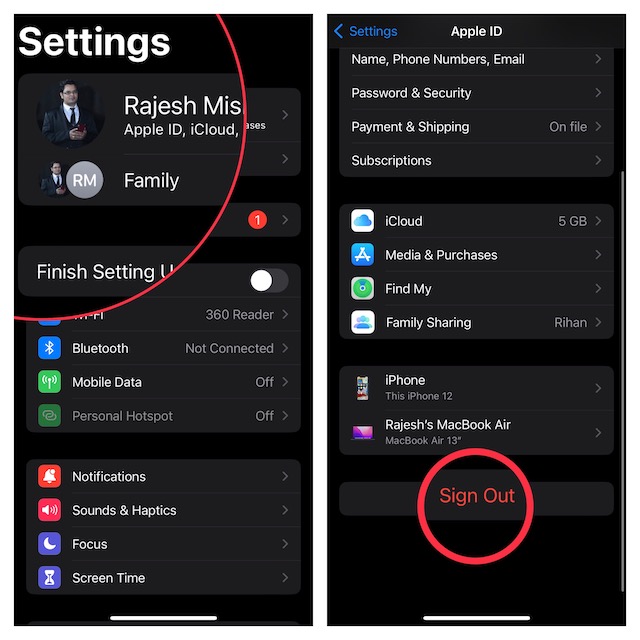
- After waiting for a few seconds, sign in using your Apple ID and password.
Fixed AutoFill Password Not Working on iPhone and iPad..!
There you go! Hopefully, the autofill passwords feature is back on track and has begun to work as expected. Great! But, before you get engrossed in your work or kickstart a long gaming spree, be sure to let us know the tip that has rescued you. Besides, if you find any viable solution missing from this troubleshooting guide, let us know that as well.
Read more: 17 Ways to Fix YouTube “Something Went Wrong, Tap to Retry” Error on iPhone or iPad