Even if you are a pro at shooting images on iPhone, you would be the first one to agree to the fact that adjusting the shooting angles doesn’t always feel convenient. More so when you have only a few seconds to capture a moment. As a result, more often than not, you end up with a skewed angle and have to spend a precious amount of time on fixing the issue. To let you amp up your photography game by getting rid of this hurdle, Apple has added a more improved camera level tool. Follow along to learn how to straighten your shooting angle with the new iPhone camera level feature in iOS 17.
Pro Tips to Straighten Shooting Angle With New iPhone Camera Level Feature
To get started, let’s briefly discuss this new add-on and what makes it such a neat camera tool!
What is the new iPhone camera level tool and how do you use it?
Though the stock camera app already had some settings to let you line up your shots, they were not just concealed but also less obvious. So, unless you were good at snapping shots with iPhone, you wouldn’t be able to make the best use of those tools.
For example, in iOS 16 or earlier, you could use a Grid to overlay the viewfinder in order to perfectly execute the rule of thirds. Wondering what the rule of thirds is and why it matters? Well, let me break it down for you.
To be more precise, the rule of thirds is nothing but the composition guideline designed to help you position your subject either in the left or the right third image while ensuring that the other two-thirds remain more open. What makes this photography technique so handy is the ability to let you snap well-composed shots.
Moreover, the camera app also had a leveling feature for capturing top-down shots. When invoked, it would show a floating crosshair to enable you to accurately place your subject.
Having used both the grid and the leveling features in the iPhone camera for years, I must say that they never felt intuitive to me. The reason why I would fumble while dealing with it is because both the tools were intertwined. I guess I’m not alone to have felt this way, am I?
Thankfully, that has changed for the better. Perhaps, having experienced this very inconvenience, Apple has separated the camera leveling functionality from the Grid mode. Better still, the company has also included a horizontal level that makes it incredibly simple to capture straight-on images.
Activating the new camera Level feature brings up a broken horizontal line on the screen as soon as your iPhone detects that you are trying to line up a straight-on photo and you have tilted the device out of the required horizontal level. When your iPhone is out of the level, the line turns white. And the moment you are able to properly line up the image, the line becomes yellow, confirming that it’s time to hit the shutter!
To put it in layman’s terms, the broken camera line indicates that the photo is tilted and the angle or the level is uneven. Hence, you will have to tilt your iPhone slightly so that the broken horizontal line gets fixed and appears to be one straight line.
How to Enable New iPhone Camera Level Feature
By default, the new camera level feature is disabled. However, you can bring it into play with ease from the Settings app.
- To get going, open the Settings app on your iPhone running iOS 17 or later.
- Scroll down in the Settings menu and choose Camera.
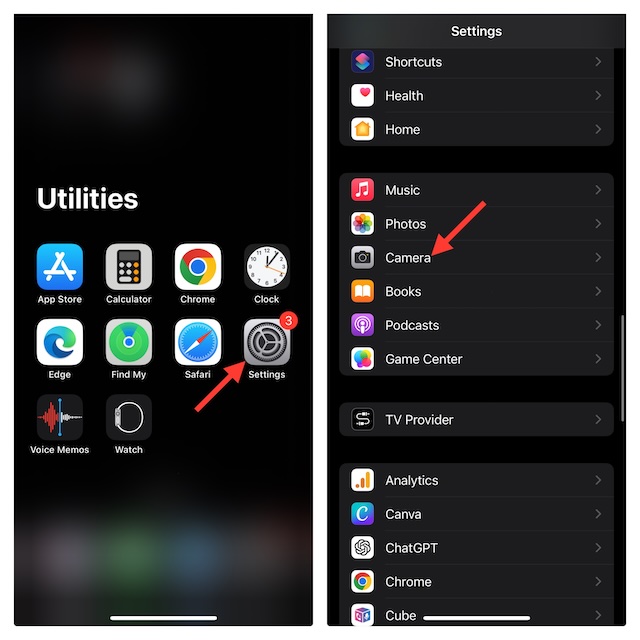
- Then, head over to the Composition section and turn on the toggle next to Level.

Capture Straight-On Shots Using New iPhone Camera Level Feature
- Launch the Camera app on your iOS device to use the camera-level tool and try capturing some straight-on shots.
- When the broken horizontal lines show up in the center of the viewfinder, swiftly straighten up your angle so that the lines get connected and become a single horizontal line.
- Bear in mind that the camera leveling tool shows up on the screen only for a few seconds; and that too, within a narrow range of angles – adjacent to the horizontal in both the landscape and portrait orientations.
Read more: 10 Best New Photo Features Coming to iPhone in iOS 17