Even though iPhone 15 Series has just seen the light of day, a plethora of issues has plagued smartphones. Days after several users complained about the annoying camera shaking, random rebooting while charging, and ill-fated Always-On-Display, a larger number of users have reported the SIM card not supported on iPhone 15 and 15 Pro error. If you also find yourself on the wrong end of the problem, check out these 14 best tips and tricks to resolve the SIM not supported on iPhone 15 and 14 models.
Tips to Fix SIM Card Not Supported on iPhone 15 and 14 Models
It would be wise to get into the heart of the problem beforehand and look for the reasons why it occurs.
So, Why Does the SIM Card Not Supported Error Appear?
In the wake of incessant complaints from a large of users, Apple has come up with an acknowledgment and promised to resolve the problem permanently. As for the reasons why the issue has cropped up, there could be more than one culprit behind it:
- Unsupported SIM card
- A technical issue from the carrier
- Software bug
- A miscellaneous software glitch
Right after the popup message appears, the iPhone freezes and stops responding to touch. If you are concerned about hardware failure or any of that kind, let me tell you that Apple has confirmed that it’s not related to hardware at all. Thus, you should not worry too much about it.
1. Remove and Reinstall the SIM Card
First off, remove and reinstall the SIM card. Yeah, you read that right! This simple trick has helped a good number of iPhone 14 users who had also run into the same problem. Therefore, it would be apt to begin this guide with this workable solution.
- Use the SIM ejector tool to pop out the SIM tray. Then, remove the SIM card and reinstall it perfectly.
2. Make Sure the SIM Card Has Been Activated Properly
Another important thing that you should do without fail is to ensure that the SIM card has been activated properly.
- Head over to the Settings app on your iPhone -> Cellular -> Set Up Cellular or Add eSIM.
- After that, tap on Transfer From Nearby iPhone or select a phone number. On your previous iPhone, you will need to follow the onscreen instructions to confirm the transfer.
- Do note that once the phone number has been transferred to your new iPhone, it will stop working on your previous iPhone.
3. Scan a QR Code Provided by Your Carrier
Should the problem persist, I would recommend you scan the QR code provided by your carrier.
- To do so, open the Settings app on your iPhone -> Cellular -> Set Up Cellular or Add eSIM.
- After that, tap on Use QR Code.
- Next, perfectly position iPhone to ensure the QR code appears in the frame. Note that you can also enter the details manually.
- If asked, make sure to enter a confirmation code provided by your carrier.
4. Transfer SIM from a Non-Apple Smartphone
It’s worth pointing out that if your previous phone isn’t an Apple iPhone, you must contact your carrier to let you transfer the phone number.
5. Activate the SIM Card Through a Participating Carrier’s App
You can also activate a SIM card through a participating carrier’s app. So, if the SIM card not supported continues to haunt you on your iPhone 14 Series, give this solution a chance as well.
- Navigate to the App Store -> search for the carrier’s app and then download it.
- After that, use the app to activate cellular service on your iPhone 14 Series.
6. Connect your iPhone to an Available Wi-Fi or Cellular Network
Keep in mind that an eSIM setup requires an internet connection. Therefore, be sure to connect your iPhone to an available Wi-Fi or cellular network whenever you are prompted.
7. Change the SIM Card
Looking at the SIM not supported error, it seems to be due to the unsupported SIM card. Therefore, remove the installed SIM card and insert another one to check if it resolves the problem.
8. Force Restart Your iPhone
Since the iPhone freezes right after the popup message appears, you should force restart the device to fix the touch unresponsiveness.
- First off, press and quickly release the volume up button. After that, press and quickly release the volume down button.
- Then, make sure to hold down the power button until the Apple logo shows on the screen.
9. Contact Your Carrier Provider
It would also be better to contact the carrier provider and enquire about the issue that you are facing. If the problem is related to the carrier network, you may not have to wait long to get a permanent fix.
10. Update Carrier Settings
Carrier providers often release updates to resolve any issues and also boost performance. So, check if there is any update available.
- Open the Settings app on your iPhone -> General -> About.
- If a carrier setting update is available, iOS will prompt you to install it.
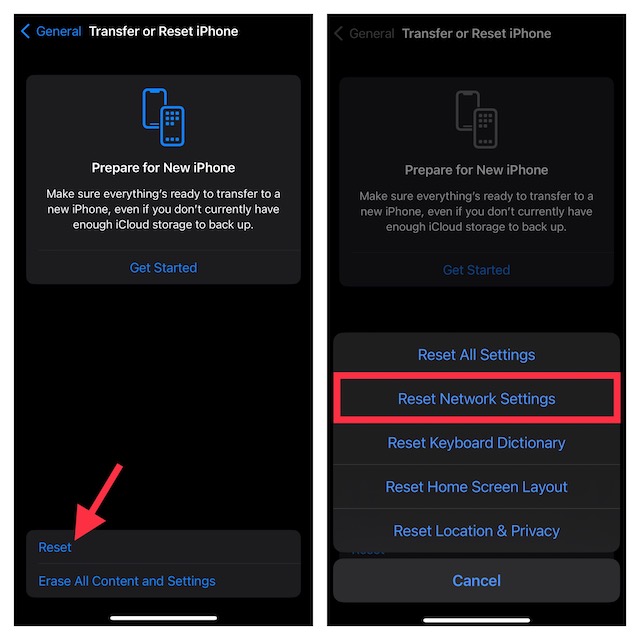
11. Reset Network Settings
If your iPhone is faced with a random network-related issue, it could prevent the SIM card from activating properly. But fret not, resetting the network settings may help you get rid of this problem.
- Go to the Settings app on your iPhone -> General -> Transfer or Reset iPhone -> Reset -> Reset Network Settings.
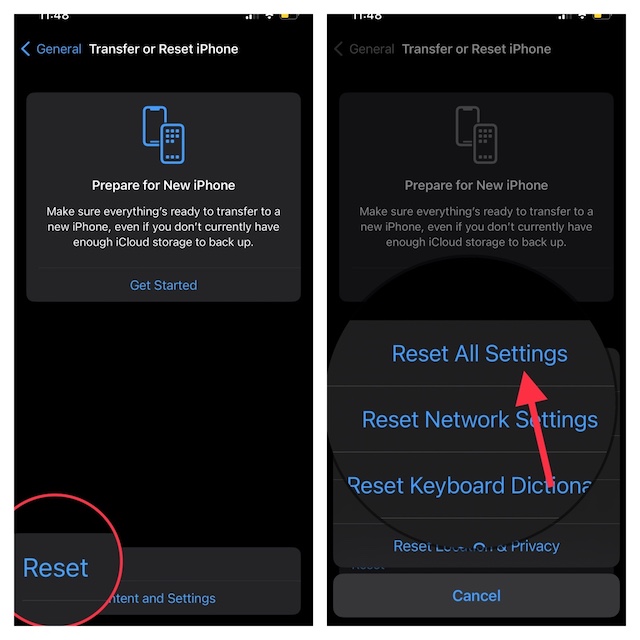
12. Reset All Settings
Factory reset comes in super handy while dealing with frustrating issues like this one. So, make sure to give it a chance as well.
- Launch the Settings app on your iPhone -> General -> Transfer or Reset iPhone -> Reset -> Reset All Settings.
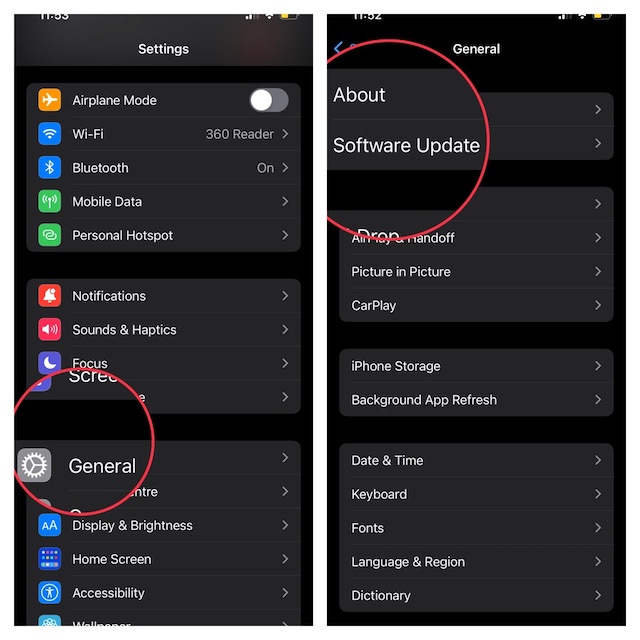
13. Update Software
Most software updates come packed with a ton of bug fixes and performance boosters. Thus, try updating the software.
- Open the Settings app -> General -> Software Update and then do the needful.
14. Contact Apple Support
Bear in mind that Apple recommends users not restore the device. Therefore, if the “SIM card not supported” error continues, contact Apple Support or any authorized service provider and request technical assistance.
Signing off…
Hopefully, one of these tips has worked in troubleshooting the SIM not supported error on your iPhone. Even if they haven’t completely fixed the issue, there is no need to panic at all as Apple is going to fix it sooner than later.
Read more: 33 Best Tips to Fix iPhone Continuity Camera Not Working in macOS 13 Ventura and iOS 16