Let’s face it! We all want to provide a strong shield to our private photos and videos so that they won’t fall prey to intruders. Unfortunately, the Apple Photos app lacked a reliable tool to shield private photo albums up until now. Yeah, you got that right! With iOS 16, you can lock hidden photo album with Face ID/Touch ID in iOS 16 on iPhone and iPad. Let me show you how it works!
Lock Hidden Photo Album with Face ID/Touch ID in iOS 16 on iPhone and iPad
Apart from locking your hidden photo album with Face ID/Touch depending on your device model, iOS 16 also safeguards your Recently Deleted folder where deleted images remain available for up to 30 days. If you ever happen to delete some of your private photos and forget to delete them permanently, this lock will work as a shield to prevent anyone from getting inside the recently deleted folder.
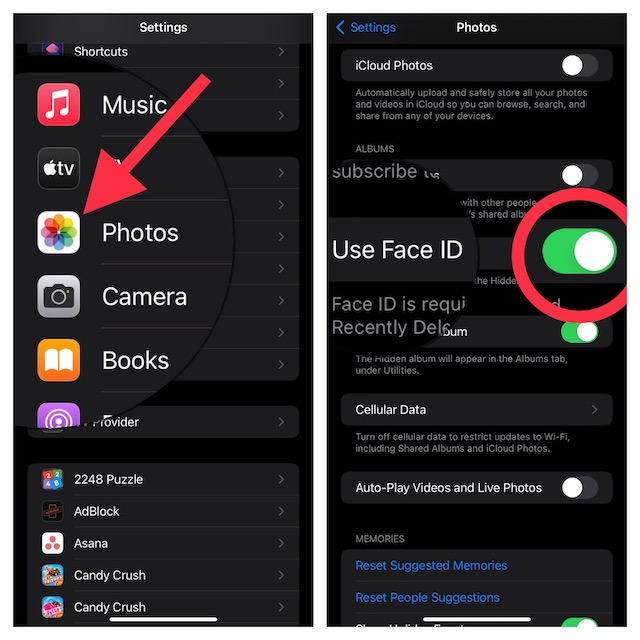
Step 1. On your iPhone or iPad, open the Settings app.
Step 2. Scroll down to find the Photos app and choose it.
Step 3. Now, make sure the toggle next to Use Face ID/Touch ID is turned on.
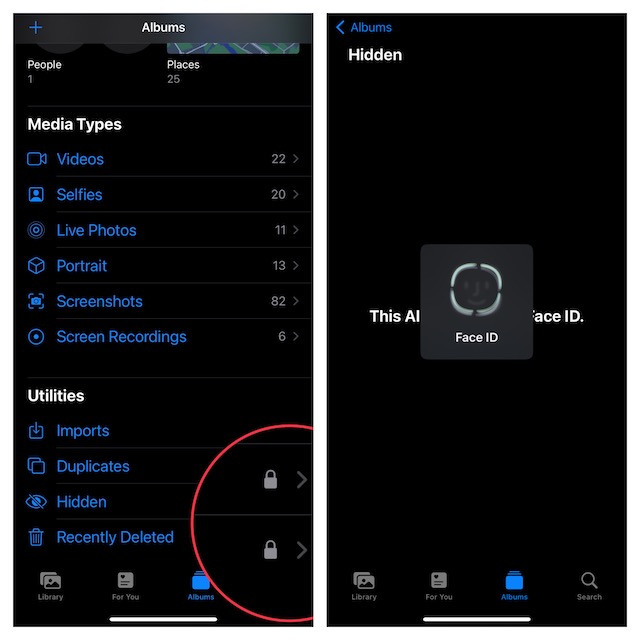
That’s pretty much done! Now a lock icon will appear right next to the Hidden and Recently Deleted Folder. And if you or anyone else try to open these albums, authentication through Face ID or Touch will be required. That’s not all, iOS will also ask for biometric authentication if anyone tries to disable this feature, which will work as an additional layer of shield.
Allow Unrestricted Access to Locked Hidden Photo Album on iPhone and iPad
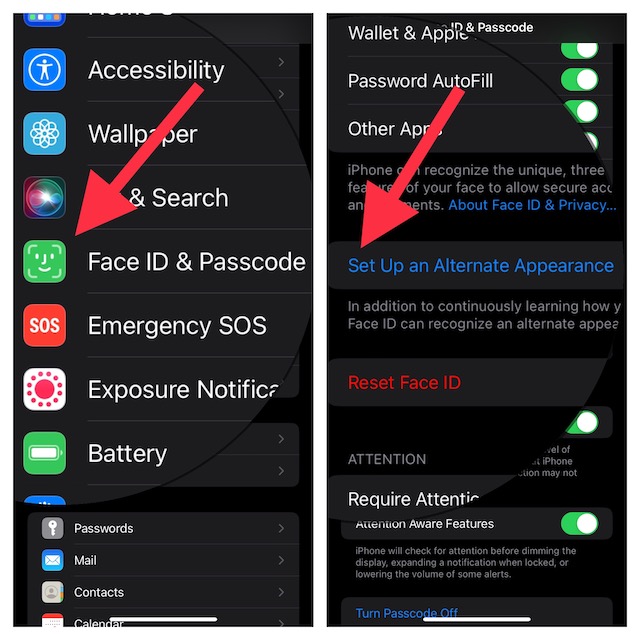
If you would like to allow a family member or a close friend unrestricted access to the locked hidden album, there is a way to get it done as well. For it, you will need to set up an alternate appearance with Face ID or add an alternate fingerprint.
Step 1. Head into the Settings app on your iPhone and choose Face ID/Touch ID & Passcode.
Step 2. Now, tap Set an alternate appearance or Add a fingerprint and then follow the instructions to set up Face ID/Touch ID.
Wrapping up…
There you go! From now onwards, your personal photos will remain safeguarded from intruders. If you have liked this guide, chances are you may also like to catch up with these iOS 16 guides:
- How to Show/Hide Spotlight Search on Home Screen on iPhone in iOS 16
- How to Link Focus Mode to iPhone Lock Screen Wallpaper in iOS 16 or Later