Equipped with top-of-the-line specs, Apple Studio Display stands out as probably the best Apple-centric display in the market. While there is no dearth of premium displays, none works as seamlessly with macOS as Apple’s Display. For all being top-notch, it’s not flawless, or for that matter immune to issues. Speaking of issues, some users have recently complained that Apple Studio Display brightness is not working. If this problem has ruined your experience as well, try out these 9 reliable tips to fix the brightness issues on your Apple Studio Display.
Best Tips to Fix Apple Studio Display Brightness Not Working
So, what ails the brightness of your Studio Display? Let’s first discuss the reasons that could be behind the issue!
What is causing the brightness to misbehave on your Apple Studio Display?
Though it would be wrong to rule out the possibility of a hardware failure, software glitches appear to be at the forefront of the problem. So, in most cases, you can get rid of the brightness issue on your Apple Studio Display by tweaking the software or by fixing the miscellaneous glitches. However, if the software-related tricks do not yield the desired results, you will have to contact Apple Support to get your display repaired.
1. Learn How to Adjust Brightness on Mac
There are multiple ways to fine-tune the brightness on Mac. As always, you can use the F1 and F2 keys to quickly adjust the brightness of your Mac. Besides, you can also use the display slider in the Control Center to adjust the brightness on your device.
After you have fine-tuned the brightness on your Mac, wait for some time to check if the brightness level remains as per your need or drastically goes below the normal level.
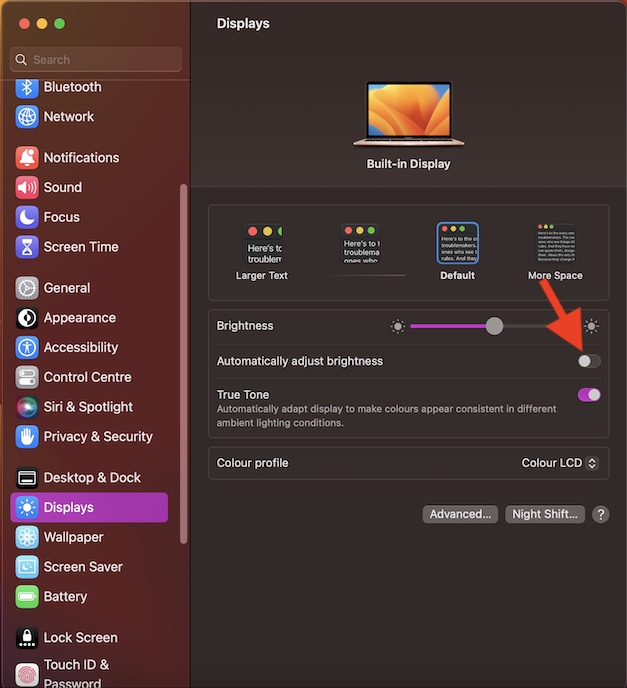
2. Disable Auto-Brightness
Auto brightness has a long history of ill-functioning out of the blue. Hence, if the brightness of your Studio Display tends to often get too bright or too dark without any obvious reason, disable auto brightness.
For folks who are unaware, auto brightness is designed to automatically adjust the brightness of your device based on ambient lighting. When you are outside, the brightness gets brighter to enhance your viewing. And when you get indoors, the brightness is lowered to safeguard your eyes.
- Head over to the System Settings app on your Mac -> scroll down in the sidebar and choose Displays.
- After that, disable the toggle for “Automatically adjust brightness”.
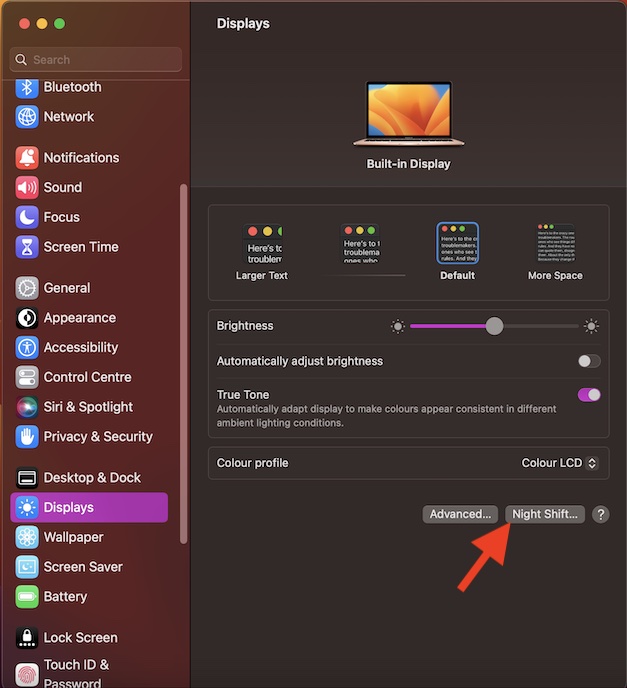
3. Turn OFF the Night Shift
Night Shift is another feature aimed at improving your viewing experience so that you can have a better night’s sleep. When enabled, it automatically shifts the colors of your display to the warmer end of the color spectrum after dark. However, when it goes out of track, your viewing gets severely impacted.
- Navigate to the System Settings app on your Mac -> choose Displays -> Night Shift.
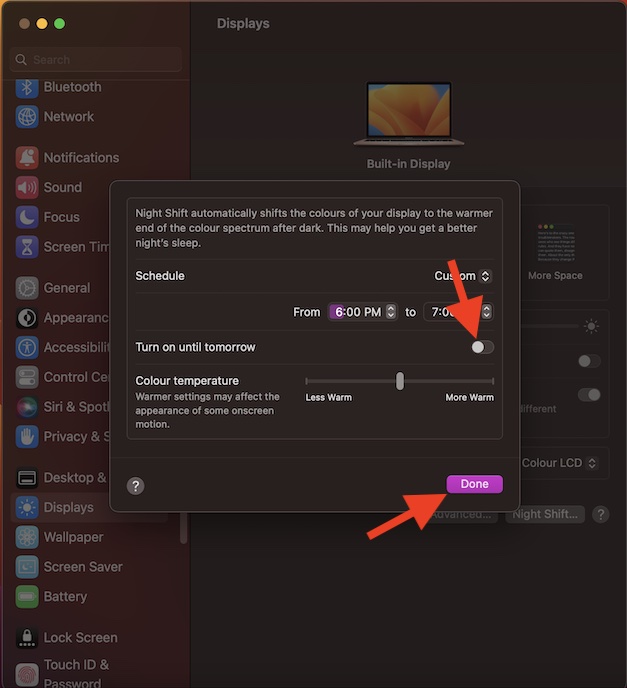
- Then, turn off the toggle for “Turn on until tomorrow”. Next, make sure to click on Done in the window to confirm.
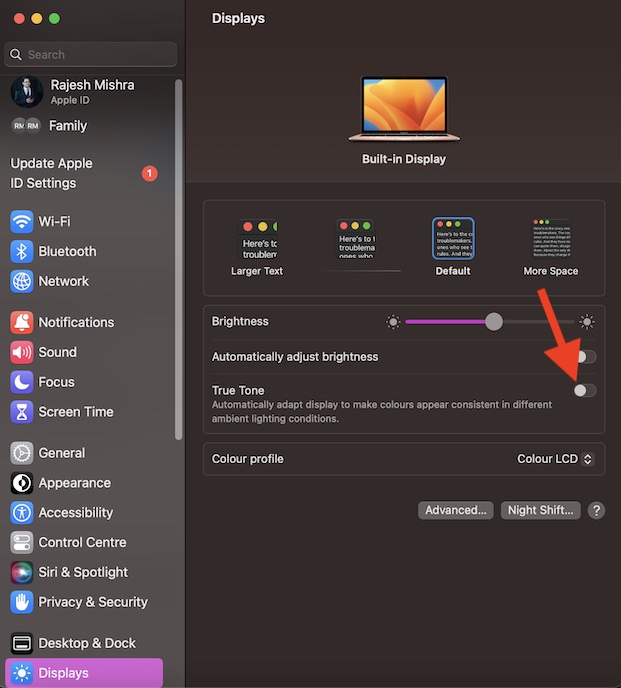
4. Disable True Tone Display
With True Tone enabled, your Mac automatically adapts the display in order to make colors appear consistent in different ambient lighting conditions. However, when it starts malfunctioning, it could cause brightness issues.
- Head over to the System Settings app on your Mac -> scroll down and choose Displays. Then, turn off the toggle next to True Tone.
5. Restart Your Mac
More often than not, you can resolve a macOS problem by just rebooting your device. Thus, we will give this nifty trick a chance to overcome the hurdle.
- Click on the Apple menu at the top left corner of the screen and choose Restart in the menu.
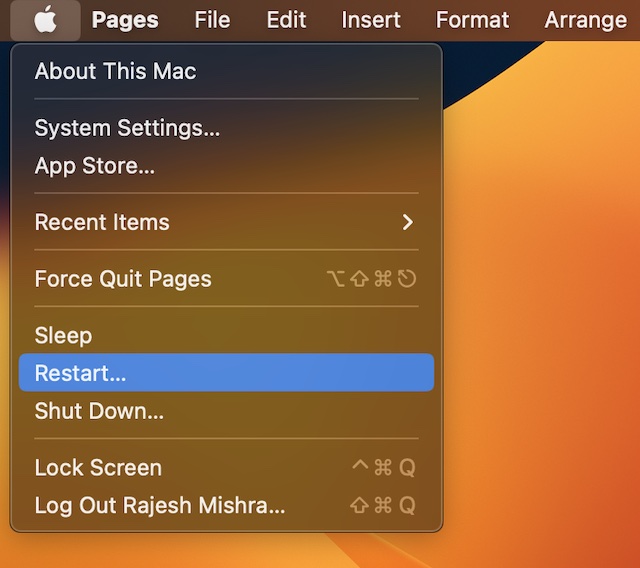
- Once your Mac has rebooted, click on the Control Center at the top left corner of the screen and then drag the display slider left or right to adjust the brightness. Or, use the F1 and F2 keys to adjust the brightness.
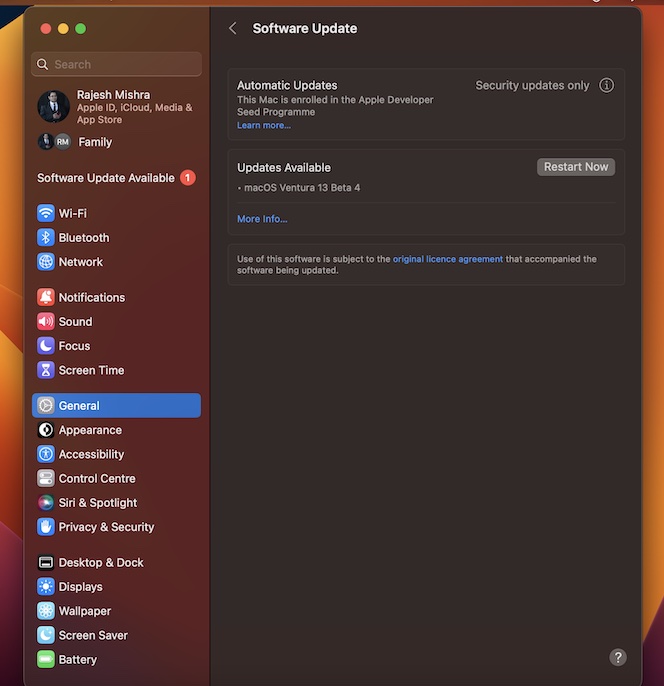
6. Update Software
As stated above, a software bug could very well be in action and be causing the display to misbehave. Hence updating the software could help you overcome the problem.
- To do so, click on the Apple menu at the top left corner of the screen and choose System Settings in the drop-down menu.
- In the sidebar, select General > Software Update > Download and install the latest version of macOS.
7. Declutter Your Mac
Knowing that a clogged-up Mac tends to throw all sorts of problems, you should get rid of the clutter. Yeah, if it’s been ages since you cleaned up your Mac, there is a good chance that the devil could be in the cluttered storage itself.
- On your Mac, click on the Apple menu at the top left corner of the screen and choose System Settings in the menu.
- Click on General and choose Storage.
- On the next screen, you should see how storage has been used on your device. Furthermore, you can also view the list of apps along with the amount of storage each one has consumed.

- Having found the culprits, go ahead with the cleanup process to remove all the storage-hogging files. And if the situation demands, wipe out all the useless apps.
8. Completely Erase Your Mac and Set It Up from Scratch
When everything else fails to fix a persistent issue, resetting Mac comes into the picture. As it will erase your Mac, be sure to back up your device beforehand.
- Go to the System Settings app on your Mac > General > Time Machine. Then back up your Mac as usual.
- Next, click on Transfer or Reset.
- After that, click on Erase All Content and Settings and confirm the action.

9. If Nothing Works, Contact Apple Support Without Any More Ado…
Should the brightness of your Studio Display continue to ill function, it would be wrong to rule out the possibility of hardware failure. If you are looking at this scenario, contact Apple Support without any more ado.
Frequently Asked Questions
1. Is Apple Studio Display worth it?
Boasting top-notch hardware and the ability to work with Apple devices seamlessly, Apple Studio Display is what you should pick if you are already locked into the Apple ecosystem. From this perspective, it’s worth the price ($1600).
2. Why has my Apple Studio Display become so slow?
Aside from the software glitches, storage-hogging files could be the prime reason why your Studio Display has become sluggish.
3. Is Apple Studio Display OLED?
Flaunting an elegant OLED screen, Apple Studio Display is an impressive monitor. With the 5K IPS Retina panel topped by 5120-by-2880 pixels resolution and 600 nits brightness, it deserves a serious look.
Read more: Permanently Turn OFF & Remove Rapid Security Response Software Updates on Mac