Recently, the stock contacts app has received several notable improvements such as the ability to export all contacts, transfer all Gmail contacts, find and merge duplicate contacts, and quickly delete contacts. Another equally important feature is to organize contacts into lists on iPhone and iPad. Let me show you how it works:
How to Organize Contacts into Lists on iPhone and iPad: Ultimate Guide
First off, let’s briefly discuss why this feature is so important!
So, Why Should You Create a Contact List?
Earlier, we had to rely on third-party apps, iCloud website, and Mac for making neatly organized contact lists. Thanks to the recent update, it has become possible to get it done right on iPhone and iPad. Hence, you can create several different lists such as family, friends, office, party, and more to manage your personal and professional lives with enhanced control.
Probably, the best part about this new add-on is that it allows you to quickly message and email all the people on a list. Yeah, you got that right! You don’t have to manually choose each of the contacts with whom you want to communicate or collaborate. Long story short, it can not only help you keep the hassle at bay but also save plenty of precious time which could have a direct impact on your productivity. That’s why I call it productivity-defining.
1. Create Contact Lists on iOS and iPadOS
Step 1. Open the Contacts app on your iPhone. You can also access contacts using the Contacts tab in the Phone app.
Step 2. Next, tap on Lists in the top-left corner of the Contacts interface. (If you are using iPad, the Lists button is in the sidebar.)
Step 3. Next up, tap on Add List in the top-right corner.
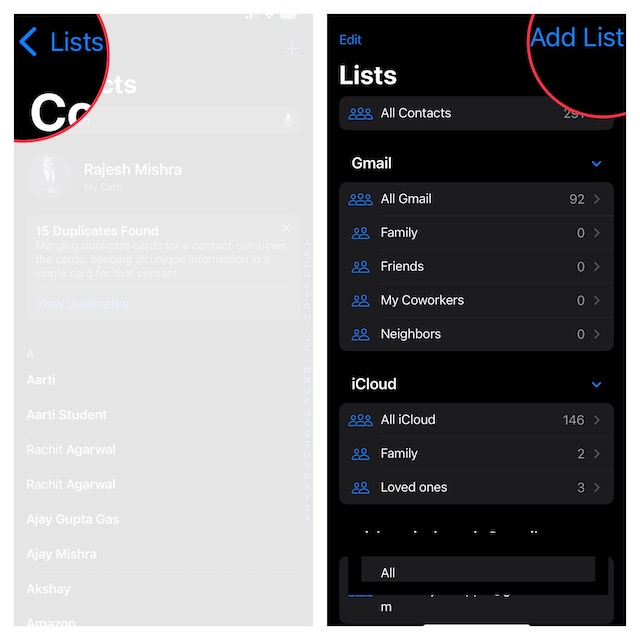
Step 4. Next up, select an account if required (iCloud is the default).
Step 5. Give your list a name, then tap it.
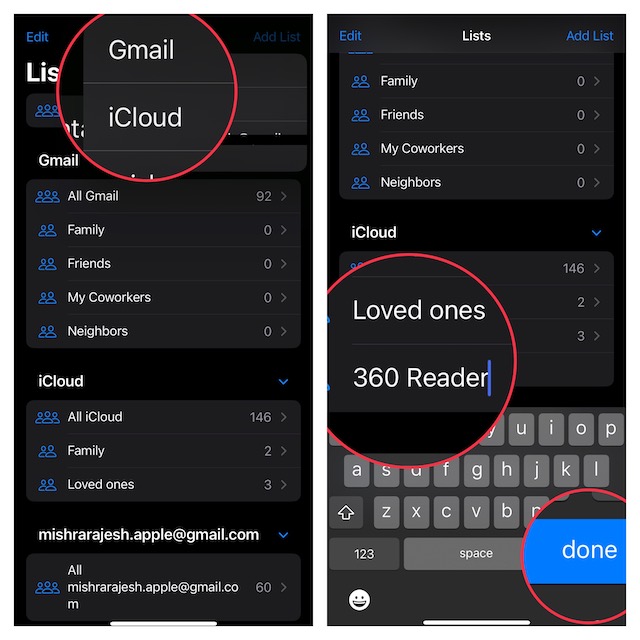
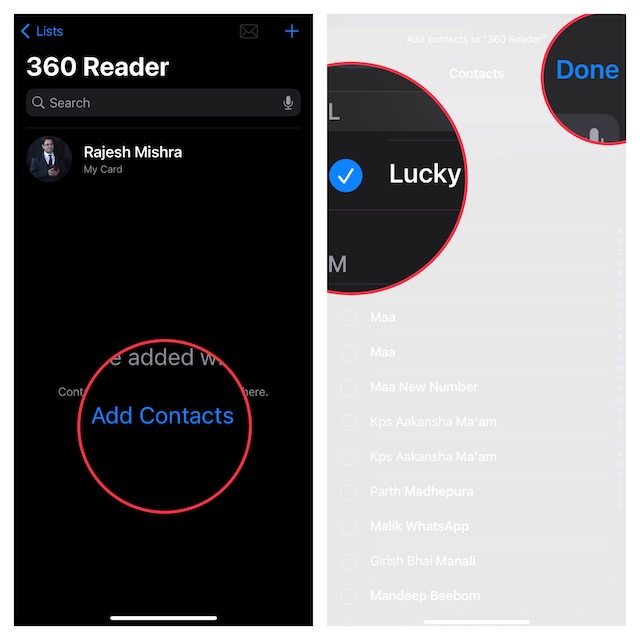
Step 6. After that, tap on Add Contacts. Select the contacts you wish to add.
Step 7. Make sure to tap on Done.
That’s it! So, that’s how you can create different contact lists on iPhone. You can follow the same steps to make more lists to better organize your personal and professional lives.
Sticky Note:
- Once you have created a contact list, you can use the search bar at the top to search for a specific contact.
- If you want to add more contacts, tap on the “+” button at the top right corner of the screen -> select contacts from your address book -> tap on Done at the upper right corner of the screen to finish.
2. Email All People in a Contact List on iPhone and iPad
Once you have made a contact list, you can email everyone at once with ease.
- To do so, open the Contacts app on your iPhone or iPad -> tap on Lists at the top left corner of the screen -> tap on the name of the contact list -> tap on the email icon at the top right corner of the screen. Alternately, touch and hold the contact list name and choose the Email All option in the popup menu.
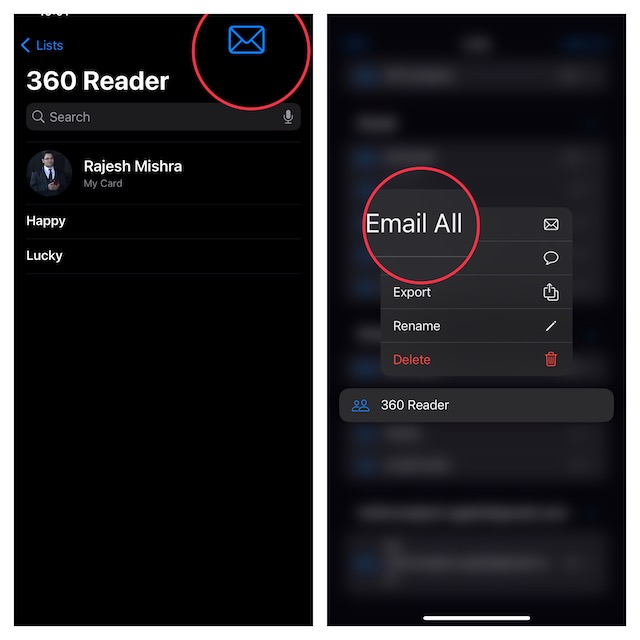
- After that, enter the subject and body of the email and send it as usual. So simple, isn’t it?
3. Group Message All People in the Contact List on iPhone and iPad
After you have created a contact list, messaging everyone in a group becomes pretty straightforward.
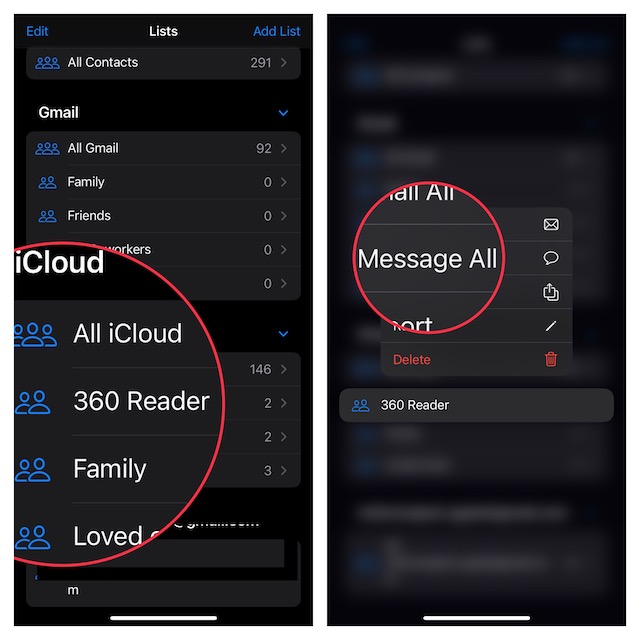
- To get it done, launch the Contacts app on your iPhone or iPad -> tap on Lists at the top left corner of the screen.
- Now, touch and hold (long-press) the contact list and choose Message All in the popover menu.
4. Remove Specific Contacts from a Contact List on iPhone and iPad
At any time, you want to remove a person from a contact list, you can do so with ease.
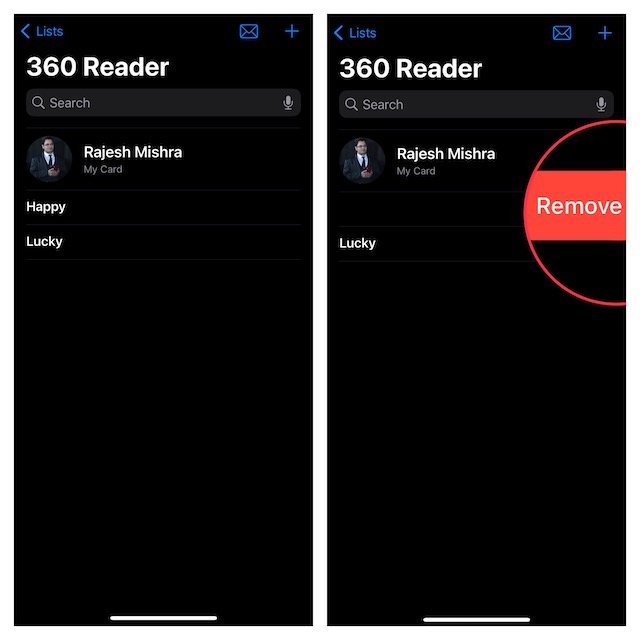
- First off, open the Contacts app on your iPhone or iPad -> tap on Lists at the top left corner of the screen -> tap on the name of the contact list.
- After that, find the contact you want to get rid of. Then, swipe left on the contact in question and hit the red Remove button.
5. Export Specific Contact Lists on iPhone and iPad
It’s important to note that you can also export an entire contact list.
- To get started, launch the Contacts app on your iPhone or iPad -> tap on Lists at the top left corner of the screen.
- Now, touch and hold (long-press) the contact list and select Export.
- After that, select the preferred app like Messages, Mail, and more through which you want to export the contact list. As always, you can also AirDrop the entire contact list to another iDevice.
6. Rename a Contact List on iPhone and iPad
- To begin with, launch the Contacts app on your iPhone or iPad -> tap on Lists at the top left corner of the screen.
- Now, touch and hold (long-press) the contact list and select Rename. Alternatively, swipe left on the name of the contact list and choose the Rename icon (looks like a pencil).
- Then, remove the existing name and enter a new one.
- Be sure to tap on Done to confirm the change.
7. Delete Specific Contact List on iPhone and iPad
If you no longer need a particular contact list, you can delete it without any hassle.
- First off, launch the Contacts app on your iPhone or iPad -> tap on Lists at the top left corner of the screen.
- Now, touch and hold (long-press) the contact list and then select the Delete icon in the popup menu, and confirm. Alternatively, swipe left on the contact list name and hit the Delete icon.
Tips to Get the Most Out of Contact List on iPhone and iPad
There you go! So, that’s how you can create a variety of contact lists to perfectly manage your professional and personal lives. While this new add-on may not have hogged a ton of spotlight, it’s definitely worth taking note of. What do you have to say about it?