With iOS 15.4/iPadOS 15.4 or later, you can set up custom email domains with iCloud Mail on your iPhone or iPad. So, if you are an ICloud+ (starts at $0.99/month) user and are looking for a way to create custom email domains directly on your iPhone, this hands-on guide is for you.
Set Up Custom Email Domains With iCloud Mail on iPhone and iPad
Before getting started, let’s first understand how custom email domains with iCloud Mail work!
How Does Custom Email Domains with iCloud Mail Work?
Using the custom domains, you can send and receive emails with iCloud Mail. That means if you have a personal domain name, you will be able to set up iCloud Mail to use it when sending or receiving mail. This way your recipients will see mail coming from your personalized email address.
It’s worth pointing out that you are allowed to use iCloud Mail to send and receive an email with up to five personal domains, with up to three email addresses per domain. If you currently share iCloud+ with your Family Sharing Group, you will be allowed to share your email domain with your family members.
Do note that anyone in your Family Sharing group will be able to add a custom domain and select whether or not to share it. Moreover, your family members can also manage the email addresses that they use with that domain.
Step-by-Step Guide About Adding a Custom Email Domain on iPhone and iPad
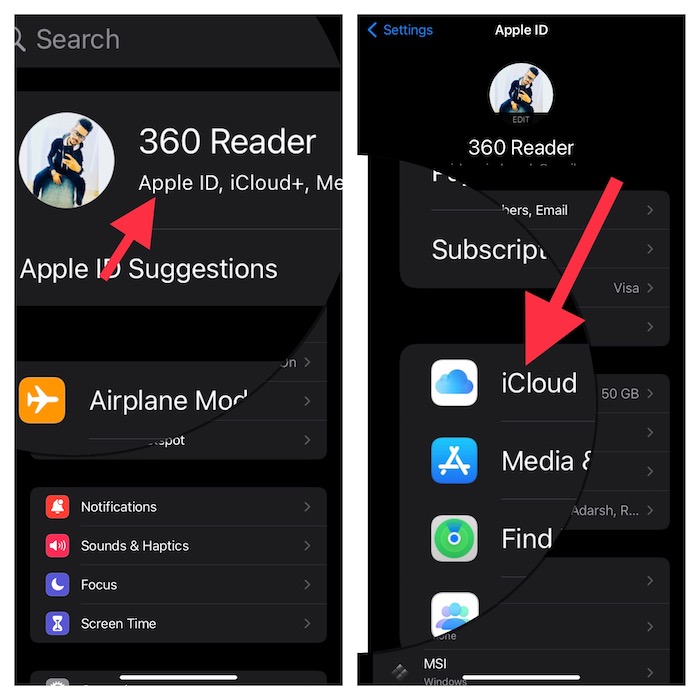
Step 1. First off, open the Settings app on your iPhone or iPad -> tap on your Apple ID banner at the top -> select iCloud.
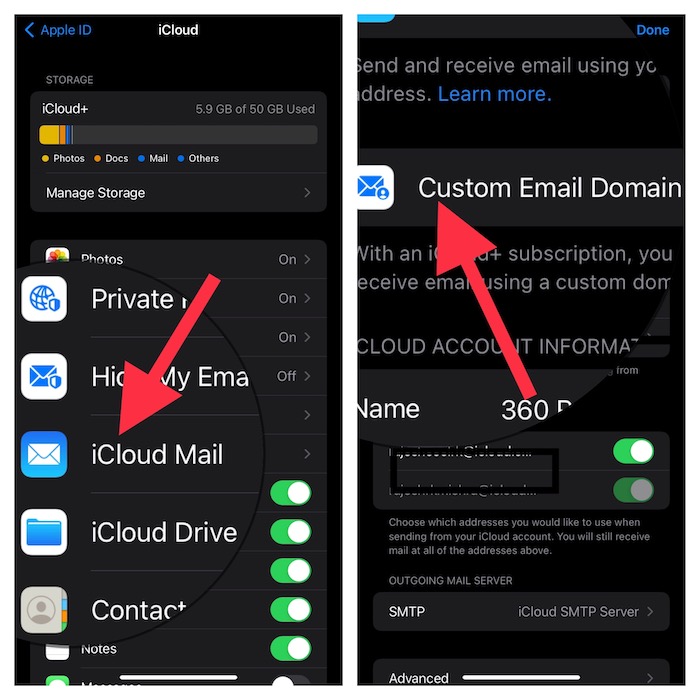
Step 2. Now, tap iCloud Mail and then tap Custom Email Domain.
Step 3. Under the “Add a Custom Email Domain” section, hit “Add Domain”.
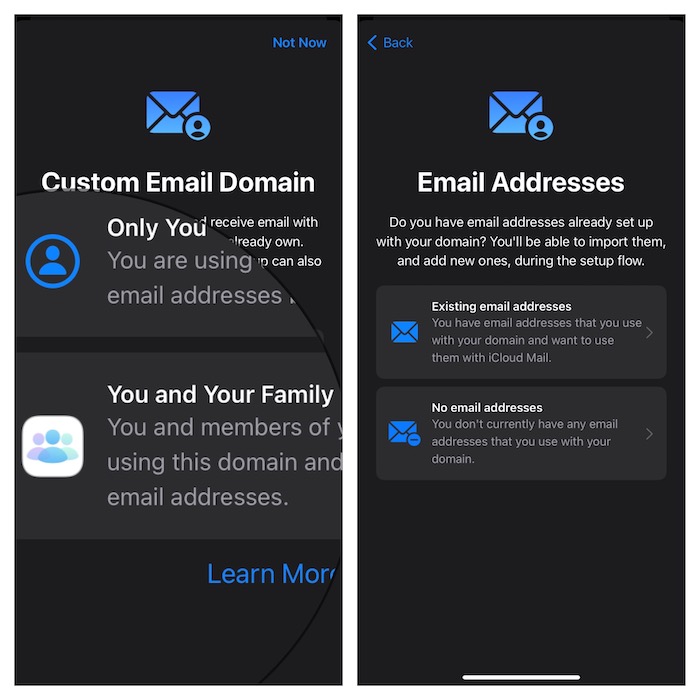
Step 4. Now, you need to choose who will use the domain you wish to add. You can either choose “Only You” or “You and Your Family”.
Step 5. If you currently have existing email addresses set up with the domain, choose “Existing email addresses” or select “No email Addresses.”
Step 6. Next, you need to enter the domain name you wish to use with iCloud Mail and then tap Continue at the prompt to sign in to iCloud.com and set up your domain.
Step 7. Under the name of your domain, hit the “Next” step.
Step 8. If you have any email addresses which you currently use with the domain, hit the “+” plus button next to your name and then enter your address. After that, tap Add an email address.
9. Finally, Apple will send you an email to this address. Make sure to look for the email and then follow the instructions to verify it.
That’s done! You will now receive an email to your iCloud Mail with all the required information to update the records on your domain registrar’s website. Once you have changed the records on your registrar, Apple will invite you to iCloud.com to confirm that your custom domain is ready.
Going forward, you can manage your custom email domains from the iCloud.com website.
Stay Tuned in For More…
Do you have any questions or feedback to share with us? Share it in the comments section below.