iOS 18 has come up with a super handy “Object Remover” tool called “Clean Up”. While iOS 18’s built-in object remover is great and works like a charm thanks to the power of “Apple Intelligence”, it is, unfortunately, limited to just A17 Pro or higher chip. That means if you don’t have the supported iPhone model (i.e. iPhone 15 Pro & 15 Pro Max), you can’t use it. However, there is no need to lose your heart as there is a pretty neat way you can get the iOS 18 object remover on iPhone 15, 15 Plus, iPhone 14 Series, iPhone 13 Series, iPhone 12 Series, iPhone 11 Series, and even older models like iPhone SE 1 and iPhone 6s & 6s Plus.
Get iOS 18 Object Remover on iPhone 15, 15 Plus, 14 Series, 13 Series & 12 Series & iPad
It’s worth noting that in this guide we are going to use an app called “Remove Objects” from Spring Tech. The app is available for free and supports iOS 14 or later. Moreover, you can also get it on your Mac and Apple Vision Pro.
The best part about this third-party object remover is that it works reliably in erasing any object. Just like iOS 18’s object remover, it also requires you to circle the object that you want to get rid of. Another important thing that I would like to highlight is that the app is available for free. Though you will need to upgrade to the premium version of you want to unlock all the goodies.
Step 1. First off, download the “Remove Objects” app on your iPhone or iPad.
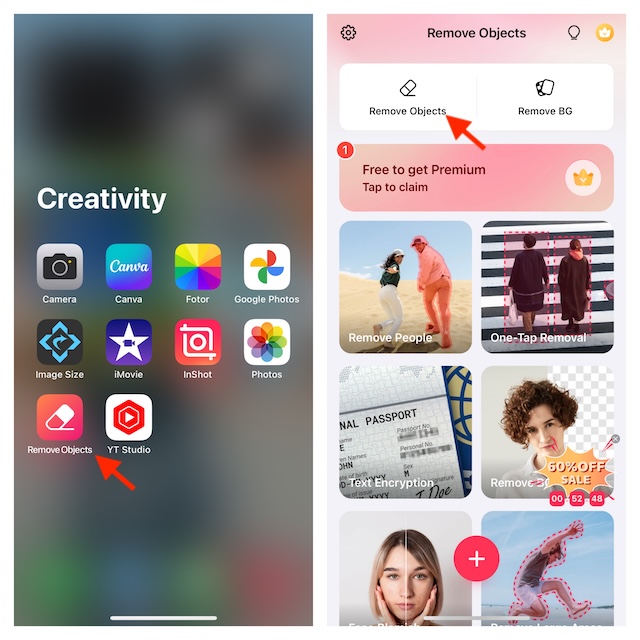
Step 2. After that, open the app on your device.
Step 3. Now, tap on the “Remove Objects” option at the top.
Step 4. Then, choose the desired photo from your photo library.
Step 5. Now, you can choose the preferred aspect ratio for your photo. Otherwise, ensure that the “Custom” option is selected and tap on “Next” to proceed.
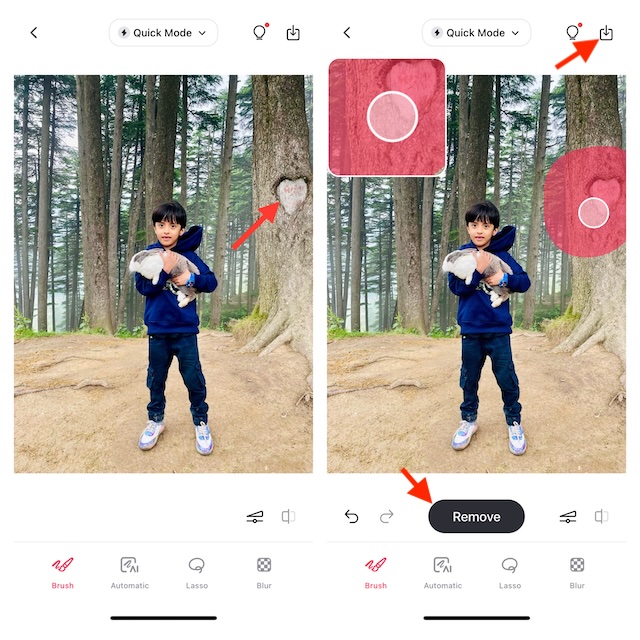
Step 6. Next up, make sure that the “Brush” tab is selected at the bottom.
Step 7. Tap and select the object that you would like to get rid of.
Step 8. Next up, drag your finger on the object that you wish to get rid of. Make sure to drag your finger on the object multiple times until it is completely hidden. As you drag your finger on the unwanted objects, you should see a live preview that is designed to provide a better idea.
Step 9. Once you have hidden the unnecessary objects, hit the Remove button at the bottom.
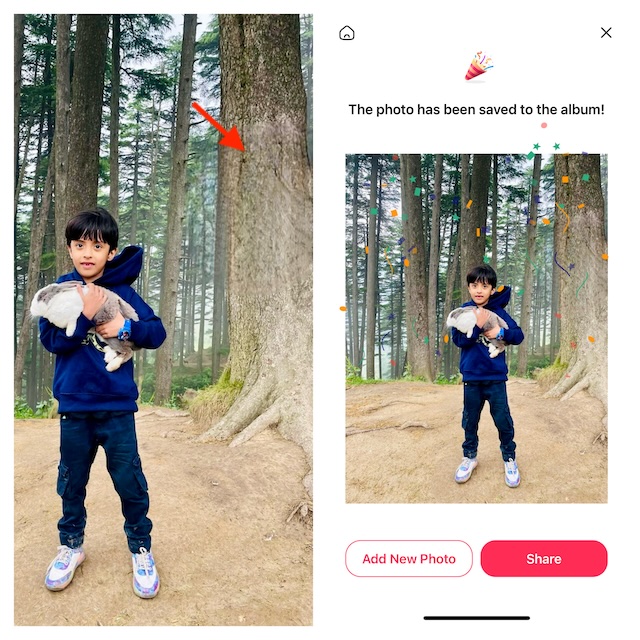
Step 10. Finally, tap on the Download icon (the downward arrow) at the top right corner of the user interface to finish. Your image will be saved to your photo library.
- Alternatively, you can also choose to share your image on social networking platforms, tap on the Share button at the bottom, and then share the image via the desired platform. To edit more images, repeat these same quick steps.
Signing Off…
So, that’s how you can wipe out unwanted objects from photos on your iOS or iPadOS device. Now that you know how this hack works, make the most of it to keep unnecessary things away from your images. And that too without having to shell out any bucks or upgrade to the flagship iPhone models. Hopefully, you will no longer miss the much-talked-about object remover that has graced iOS 18.
Read more: Best iOS 18 Hidden Features (Video): Time to Dig Deeper!