File extensions make it easier for your device to find out which applications have created a file and which applications can open the file. Moreover, extensions also assist a device in selecting suitable icons for files. For instance, “.jpg” tells your Mac that the Preview app can open the image. While it’s undoubtedly a handy feature, not everyone may find the need to view file extensions. Follow along to learn how to show or hide file extensions on iPhone, iPad, and Mac.
Show or Hide File Extensions on iPhone, iPad, and Mac
Slowly but steadily, the Apple Files app for iOS has become a complete file manager. Yeah, in more ways than one, it’s become the Finder for your iPhone and iPad. With iOS 16, the stock file manager app can also work as an efficient background remover and allow you to show/hide file extensions.
As for revealing and hiding the file extensions on Mac, the process is as straightforward as it can ever get.
Show or Hide Extensions for All Files on iPhone and iPad
- First off, open the Files app on your iPhone or iPad.
- After that, navigate to a folder.
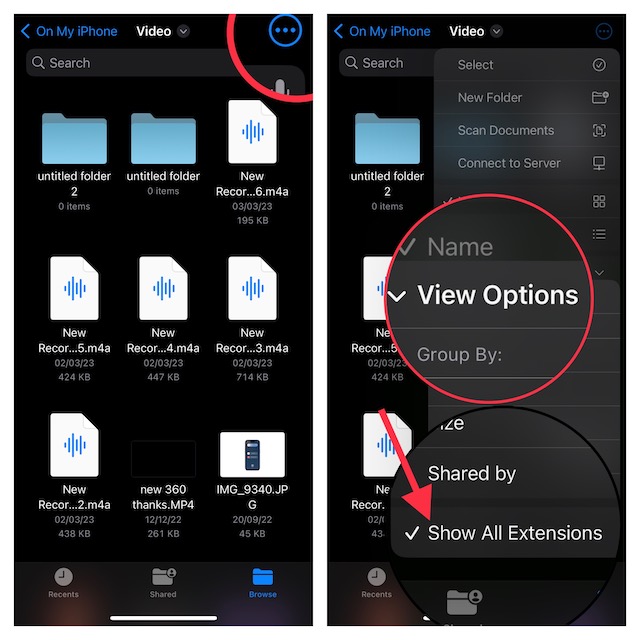
- On iPhone, hit the triple-dot icon aka the encircled ellipsis button in the top-right corner of the screen. On iPad, tap on the icon that looks like four small squares.
- In the drop-down menu, choose View Options.
- Now, select/deselect the Show All Extensions.
That’s all there is to it. The change will come into effect straight away and all the files in the current folder will start showing their extensions. Later, if you want to hide the extensions, head into the same View Options menu and deselect Show All Extension.
Show or Hide Extension for a Specific File on Mac
- First off, head over to a file and select it.
- After that, click on the File menu -> choose Get Info from the dropdown. Or, select the file -> Control/right+click on the file and select Get Info in the contextual menu.

- Click the arrow next to “Name & Extension” to expand the section.
- To show or hide the filename extension, just check or uncheck the box next to the Hide extension.

Show or Hide Extensions for All Files on Mac
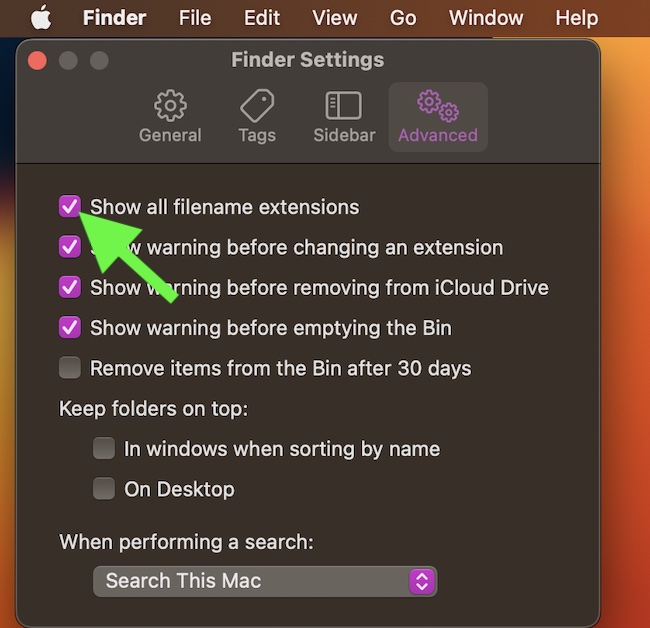
- To begin with, open a Finder window on your Mac.
- After that, click on the Finder menu at the top left corner of the screen and choose Settings in the drop-down menu.

- Next, select the Advanced tab.
- Then, check or uncheck the mark next to Show all filename extensions.
Wrapping up…
So, these are the easy ways to hide or show file extensions in iOS, iPadOS, and macOS. Have you got any doubts related to this guide? If the answer is yes, use the comments section below to share your feedback or ask any questions.
Read more: How to Put Home Button on Screen on iPhone 14 & 14 Pro